Connecting Workstations to Code and Data
Aims and Objectives
Most NMFS staff who will be using the Google Workstations platform will be working on analytical workflows involving remote data and code. During this session, we’ll be covering the following topics to get you up and running with Google Workstations:
Setting up your workstation to work with GitHub
Cloning, pushing and pulling work.
Intro to cloud storage, why we use cloud storage with cloud compute.
Setting up your workstation to use a Google Cloud Bucket.
Practice writing and reading data from a bucket
Prerequisites: What do I need before this workshop to follow along on my own?
- This session is meant for those with a basic understanding of Google Workstations. Check out our Introduction to Google Workstations lesson if you are new to Google Workstations or need a refresher.
- We’ll be working with GitHub, so make sure you have an active GitHub account and that you are logged in.
Connecting GitHub to your Workstation
Using Git and GitHub is the easiest way to connect your code to your workstation. All workstation configurations include Git as a standard pre-installed software. Not familiar with using Git and GitHub or need a refresher? Check out the NMFS Open Science GitHub Clinic: NOAA Fisheries GitHub Clinic.
Create a Personal Access Token (PAT) in GitHub
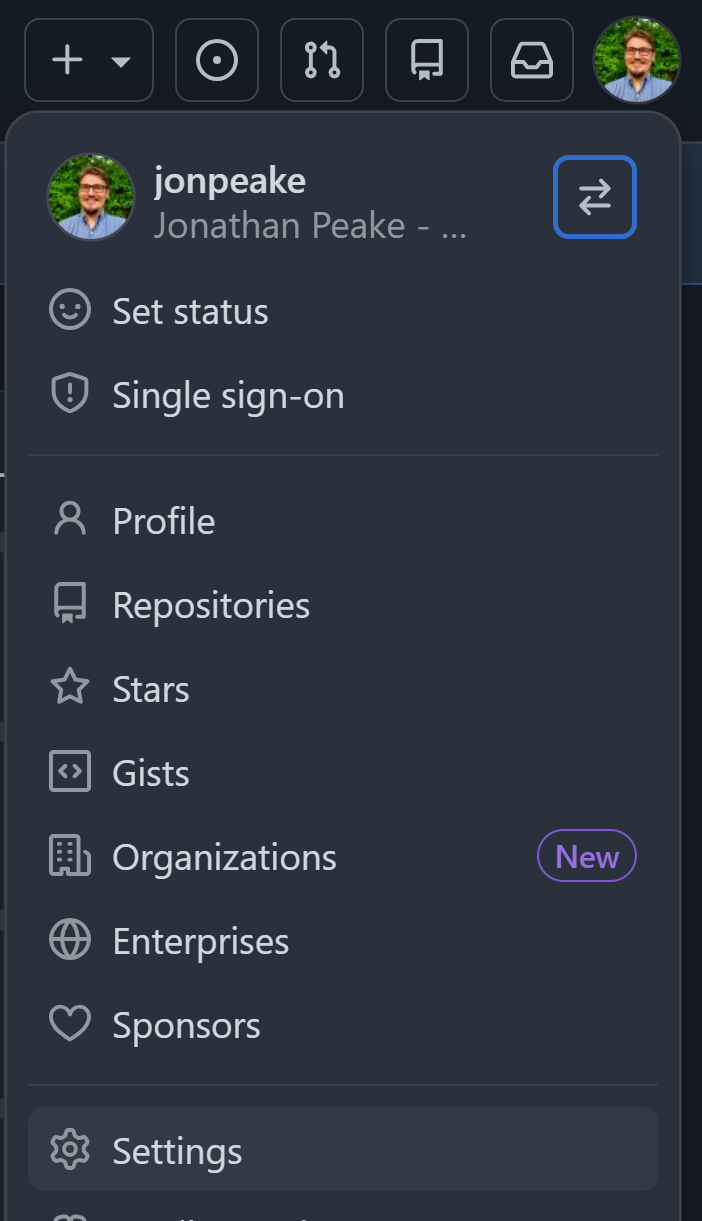
- Open a browser tab and navigate to GitHub. After logging in, select your profile picture in the upper right corner, and click on the Settings cog.
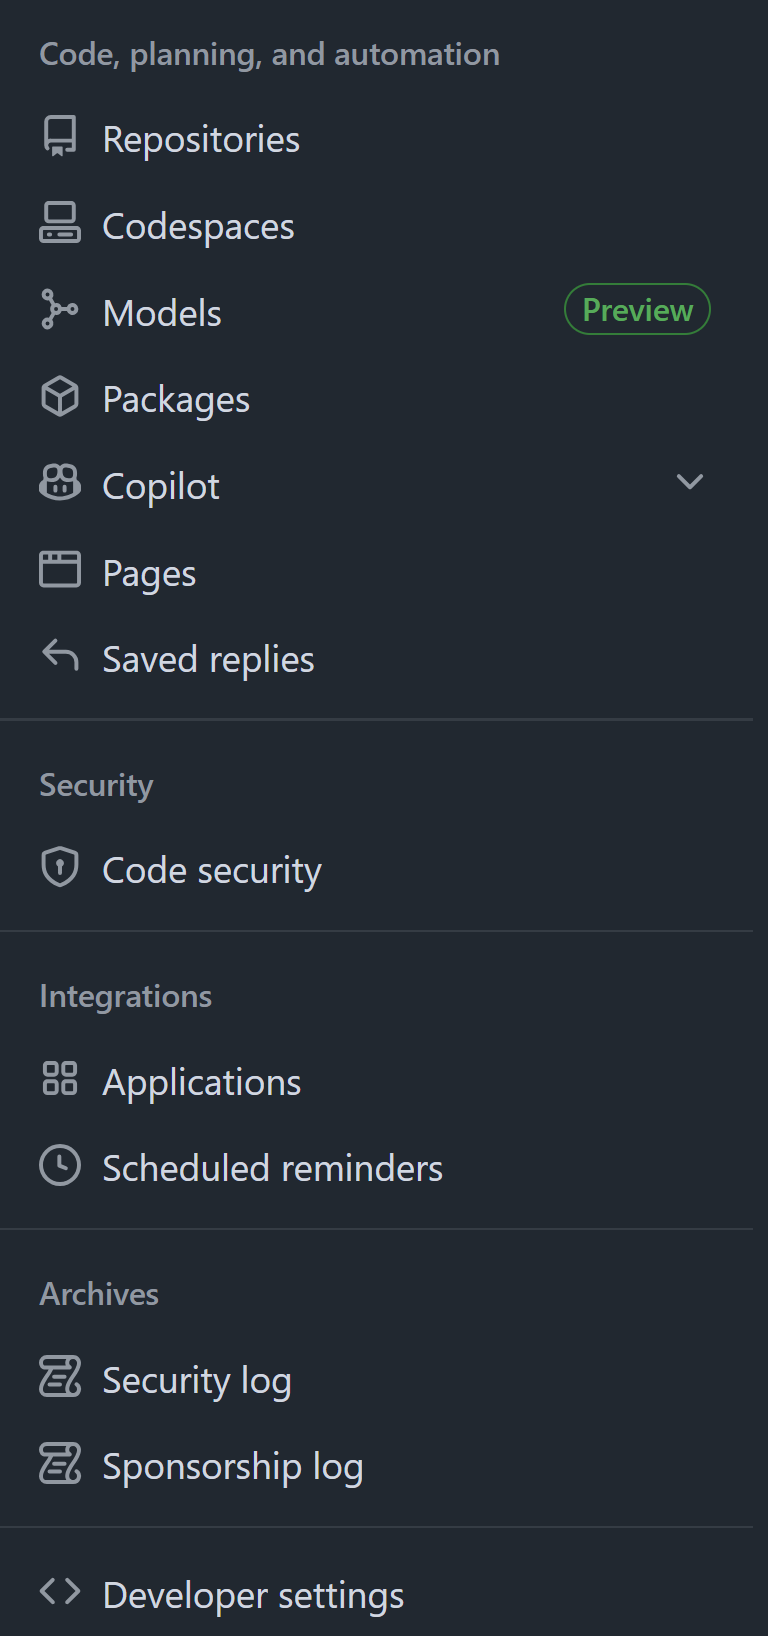
- In the menu on the left, select Developer settings at the bottom of the menu.
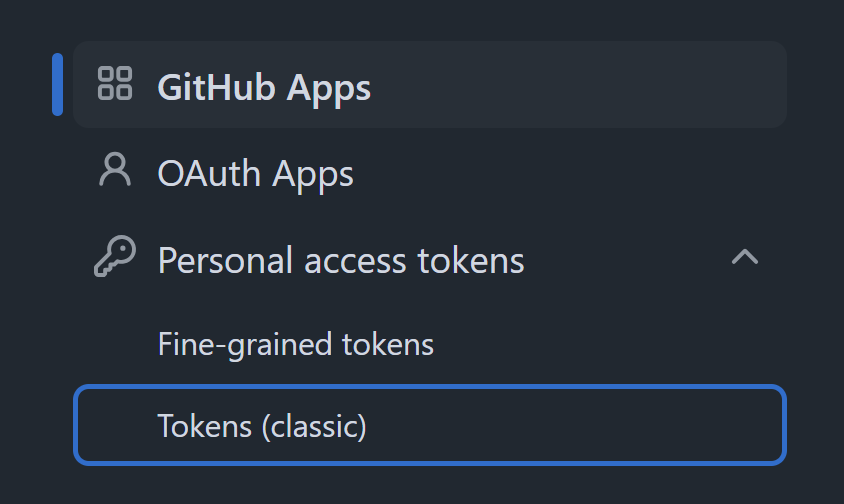
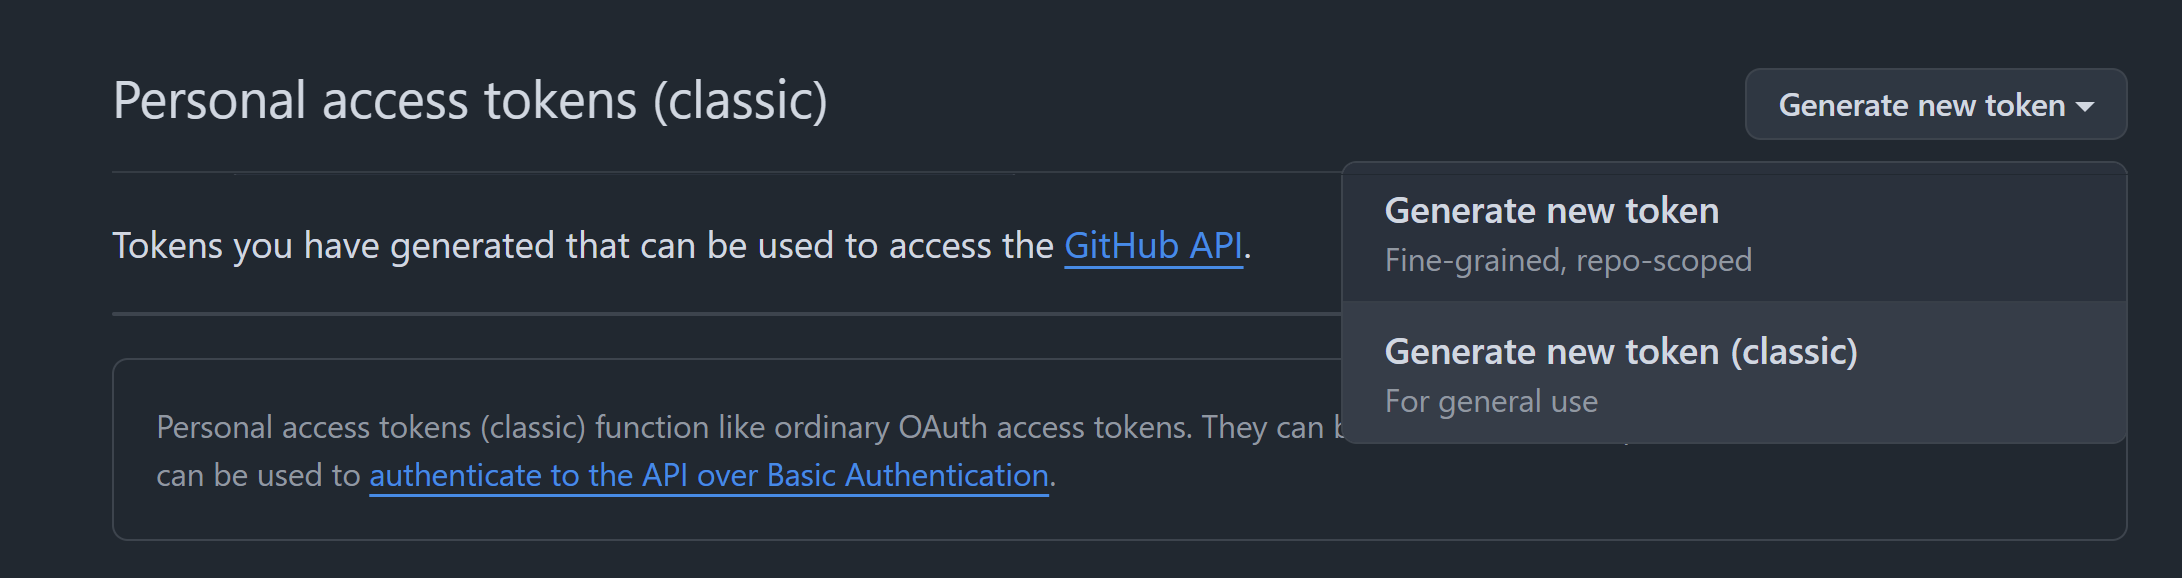
- Select the dropdown next to Personal Access Tokens and select **Tokens (classic)**
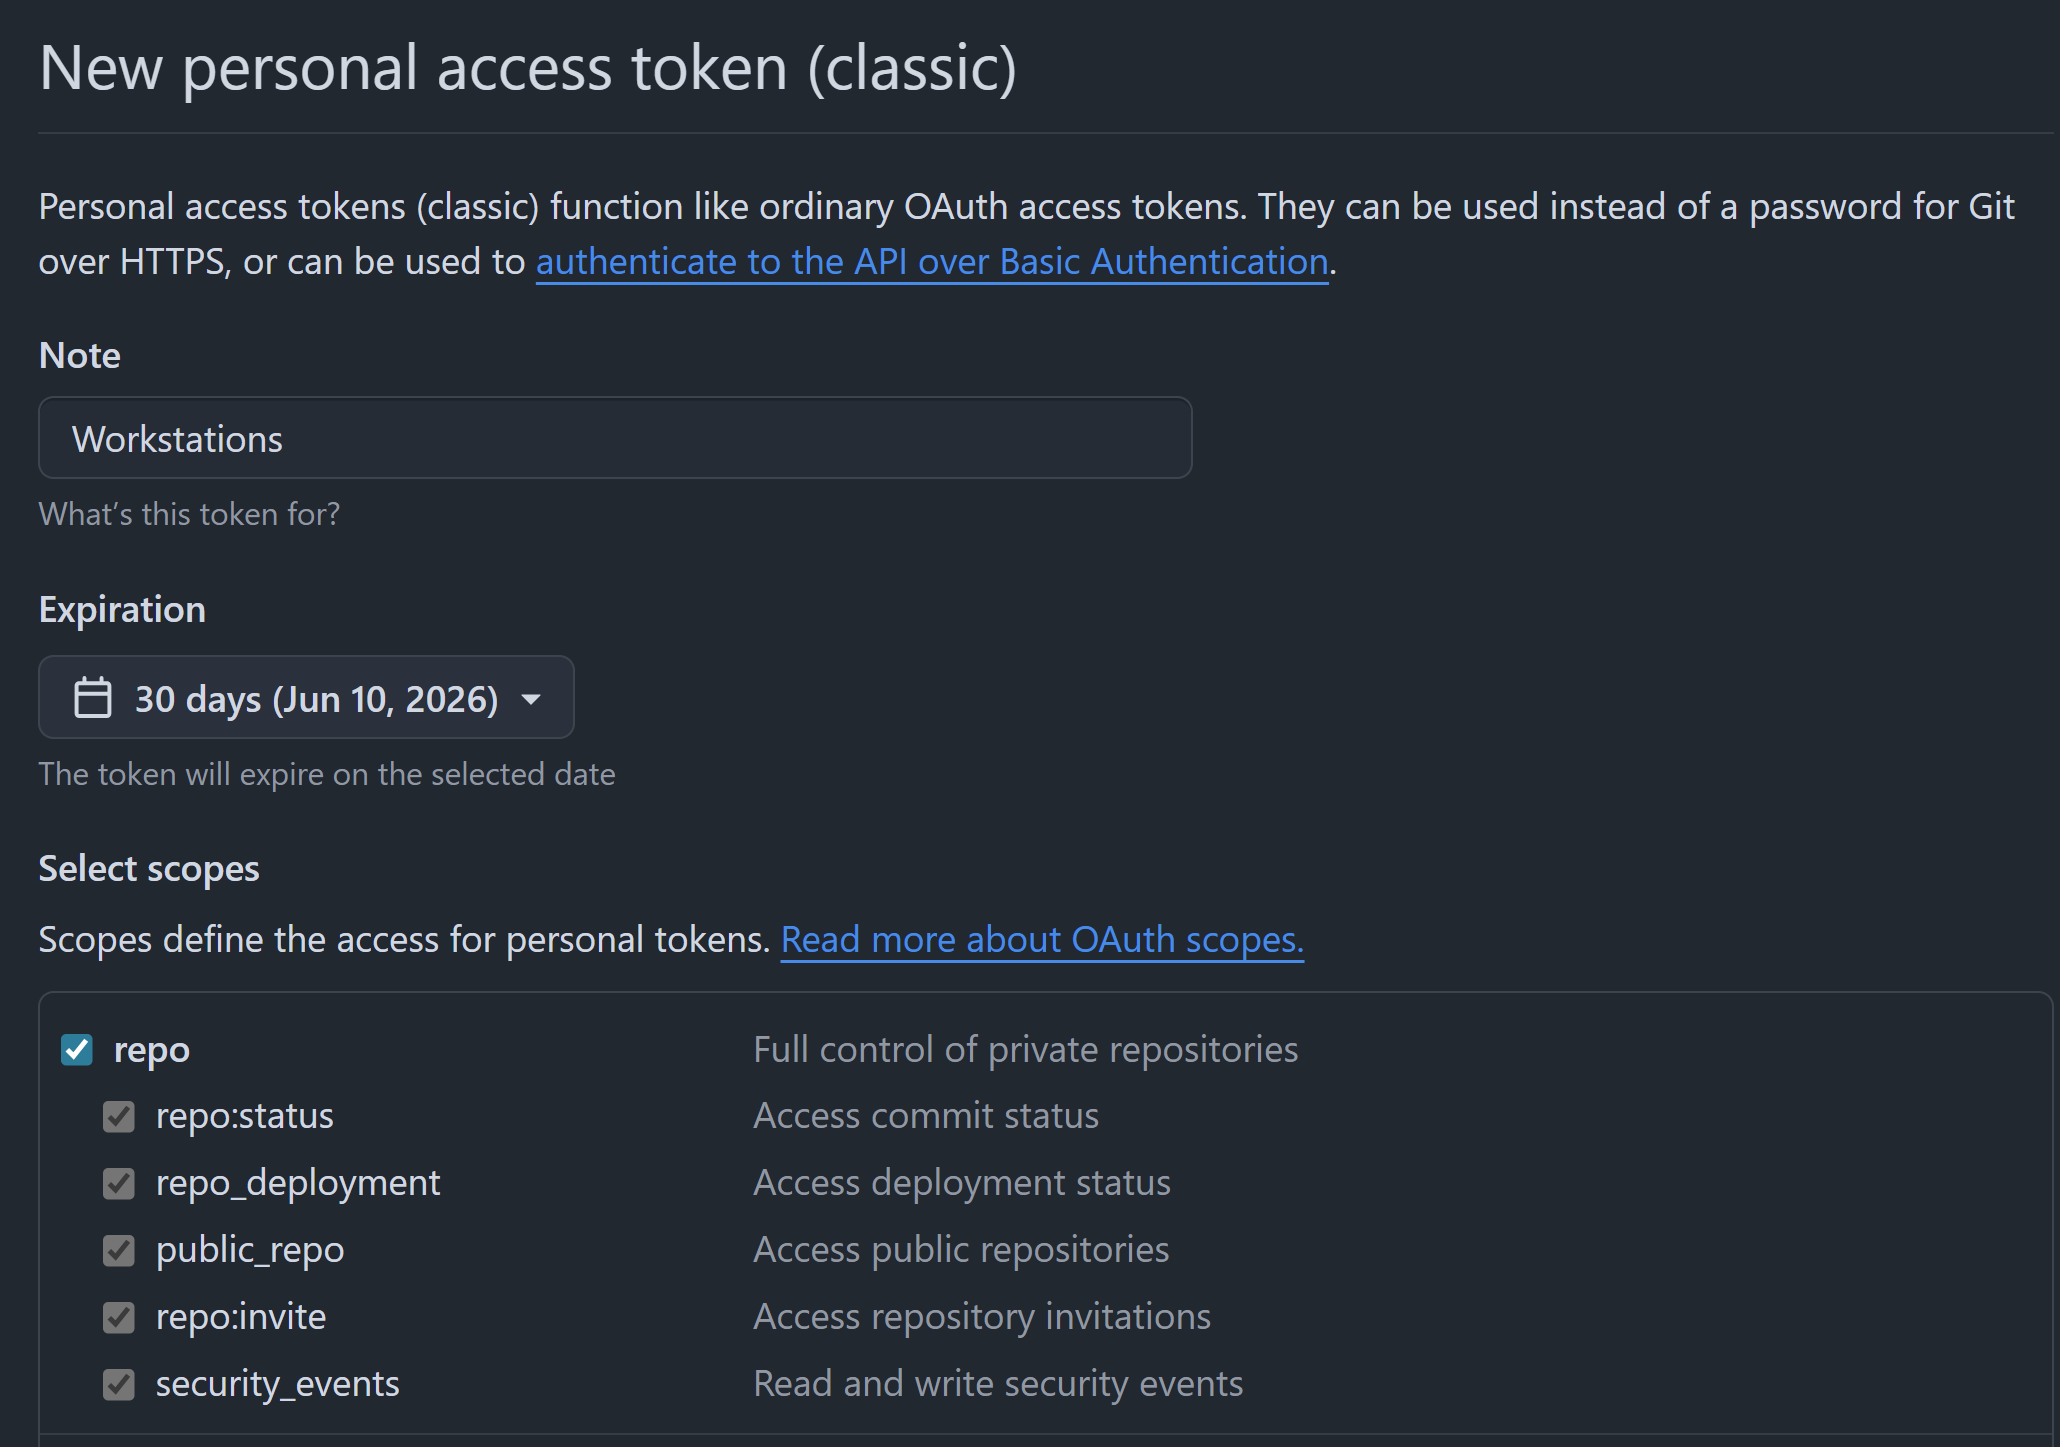
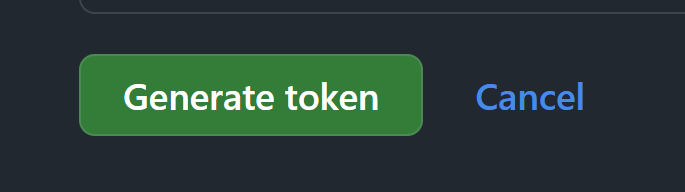
- Generate a new classic token. Give it a name, select the checkbox next to repo to give GitHub access to your repositories, and click Generate token.
- Copy your token to your keyboard, and save it somewhere handy (e.g., a text file on your local machine). Make sure you do this before navigating away from the page! Otherwise you won’t be able to access the token string, and you will need to regenerate the token.
Note: the token in this tutorial was created specifically for this tutorial and no longer exists; you will need to create your own to access your GitHub account.
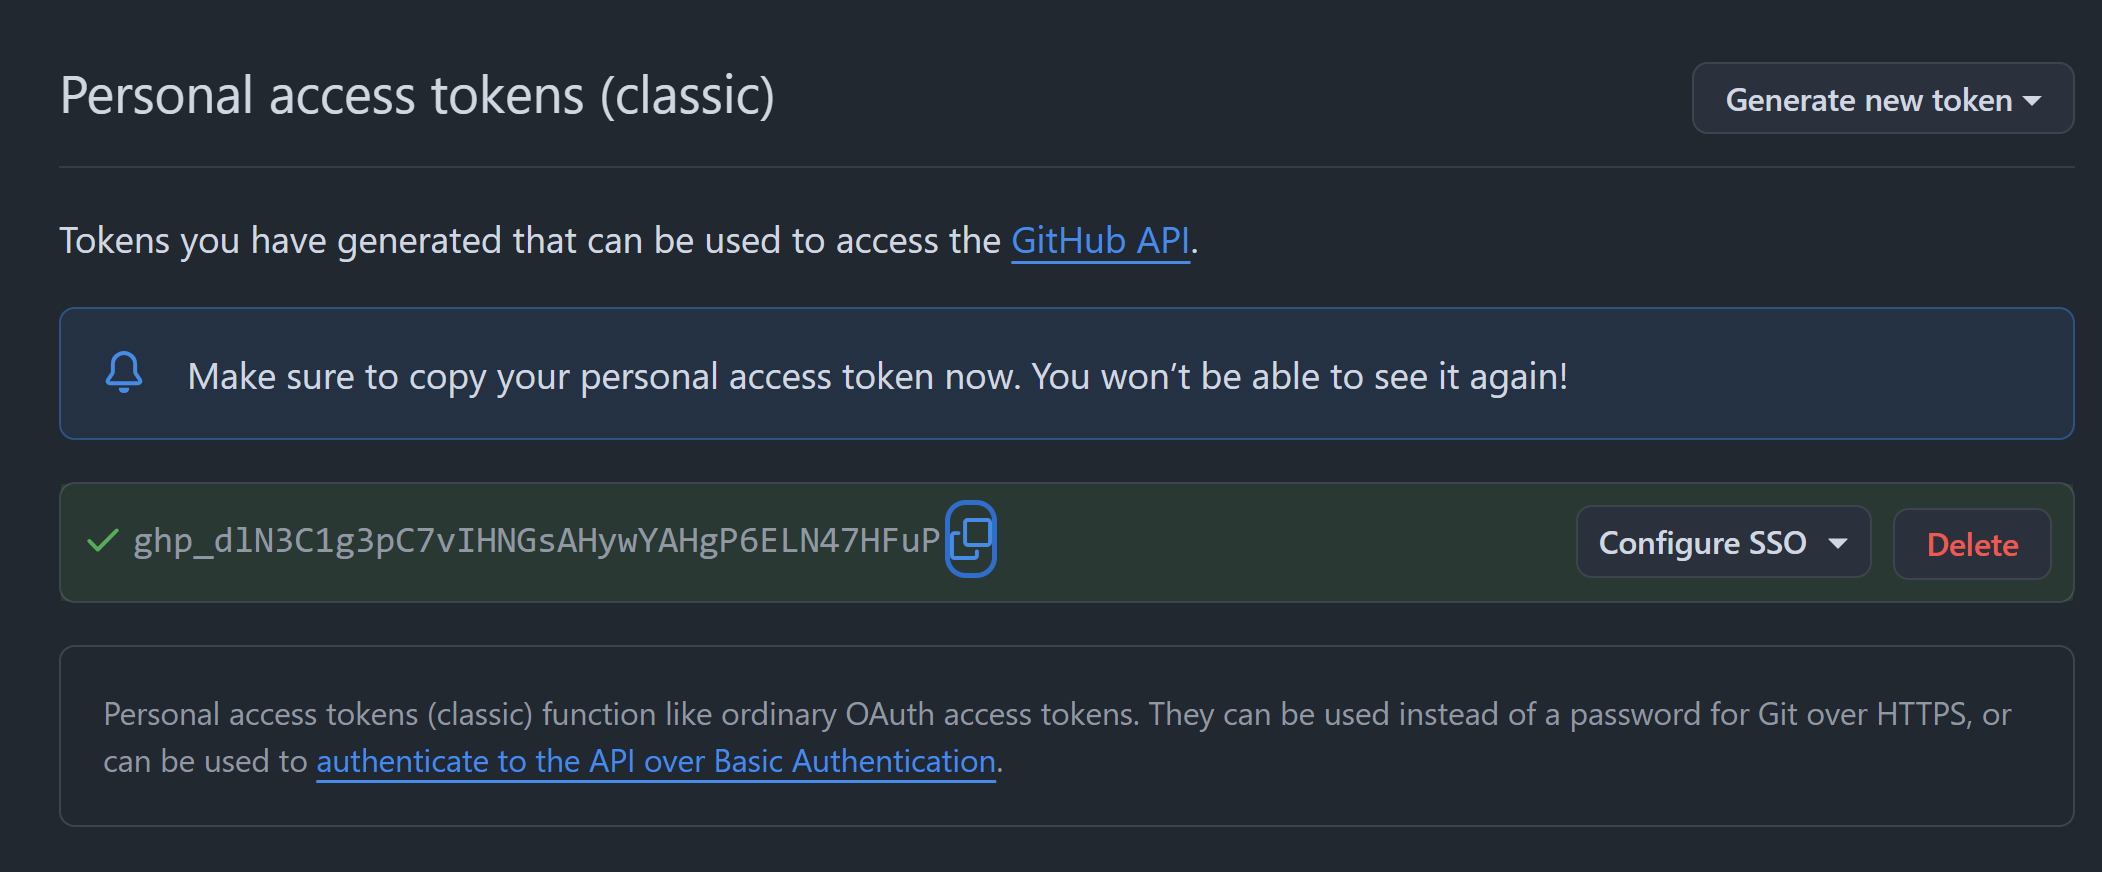
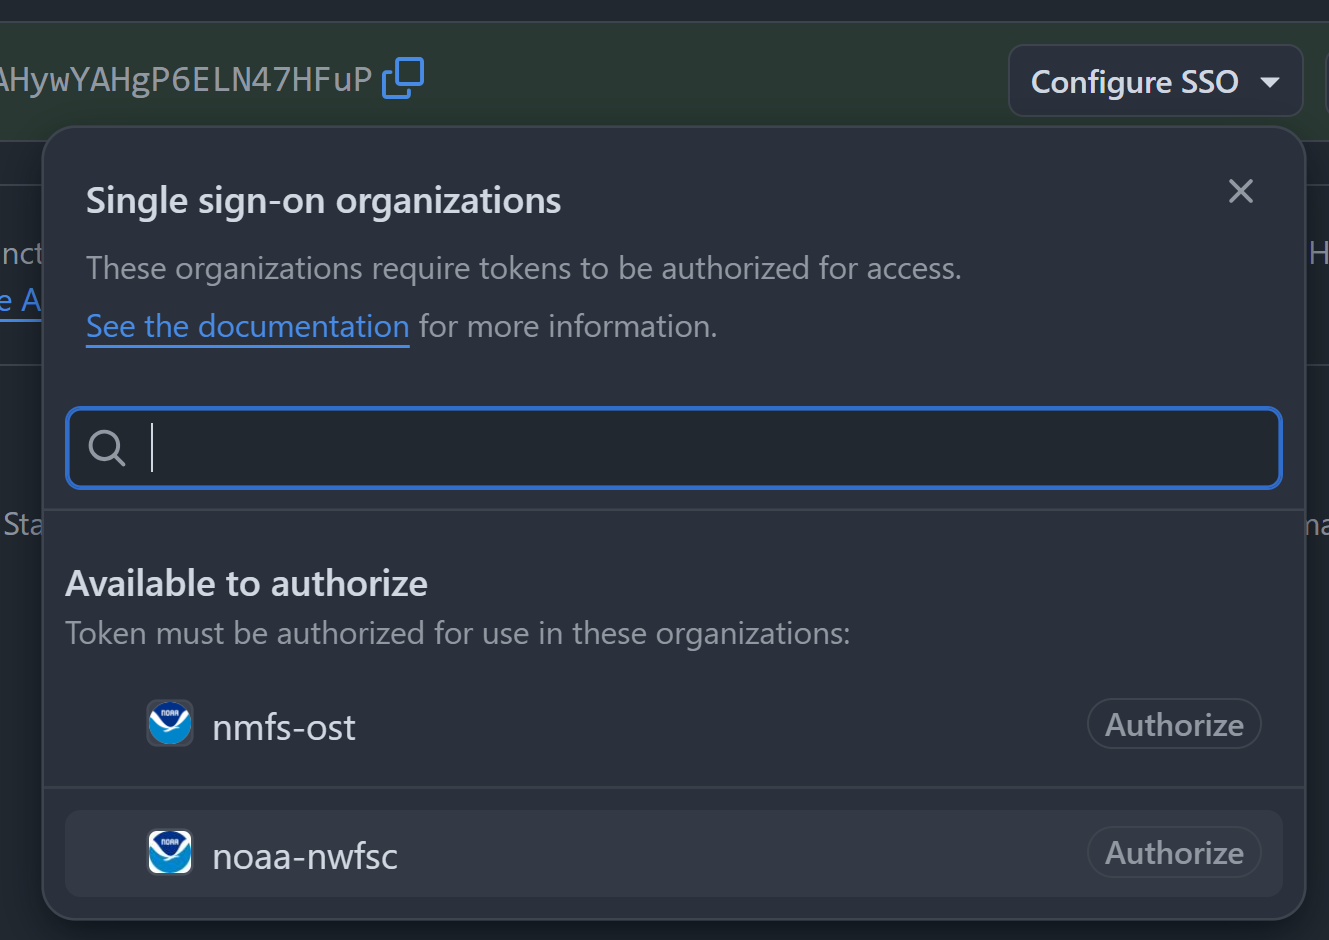
- If you have repositories hosted in a NMFS GHEC organization, you will need to authorize access to that organization using the Configure SSO dropdown. Select the organization you would like to authorize, and proceed to authorize with your CAC (if you haven’t yet logged in to the Enterprise in this GitHub session).
In RStudio Workstation
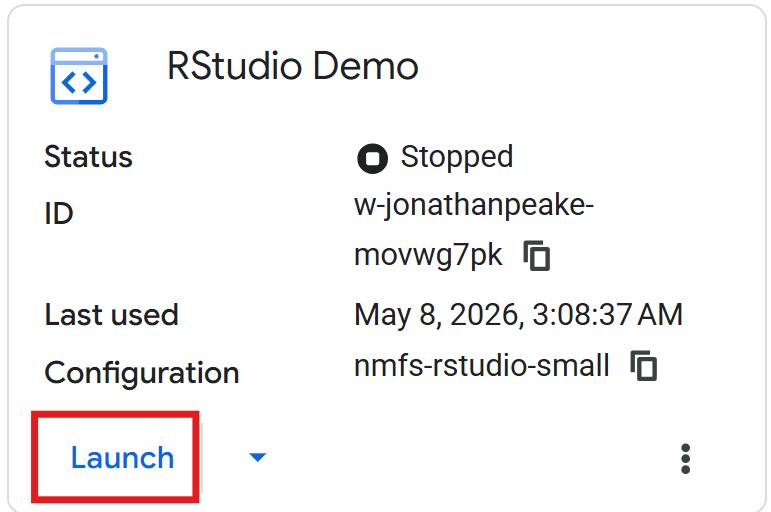
- Create or launch an RStudio workstation in your Google Cloud Console
- In your workstation RStudio console, run the following script to set up Git and connect your GitHub credentials to your workstation. Make sure to replace the USER_NAME, E_MAIL, and TOKEN with your own GitHub login information before you run the script.
Copy this code into an R Script on your workstation, replace the login information, and save the script in your home directory. Run the script from RStudio to automatically set up your Git credentials. You can download the script to your local machine for use in future Workstations
# R code to connect github to a Google Cloud Workstation
# Author: Alexandra Norelli

# Go to Github and generate a Personal Access Token (PAT) with the permissions
# you need:
# https://github.com/settings/tokens
# Github tutorial here:
# https://docs.github.com/en/authentication/keeping-your-account-and-data-secure/managing-your-personal-access-tokens
# Github Governaance Team Video tutorial here:
# https://drive.google.com/file/d/1tbbw_xXARK689Zj5tm4lVo18aBaXhdKX/view?t=4

# ctrl+f and replace USER_NAME with your username
# ctrl+f and replace E_MAIL with your email address
# ctrl+f and replace TOKEN with your PAT Token

system('git config --global user.name "USER_NAME"')
system('git config --global user.email "E_MAIL"')
system("git config --list")  #check that the info is correct

cred_line <- "https://USER_NAME:TOKEN@github.com"
writeLines(cred_line, "~/.git-credentials")
system('git config --global credential.helper store')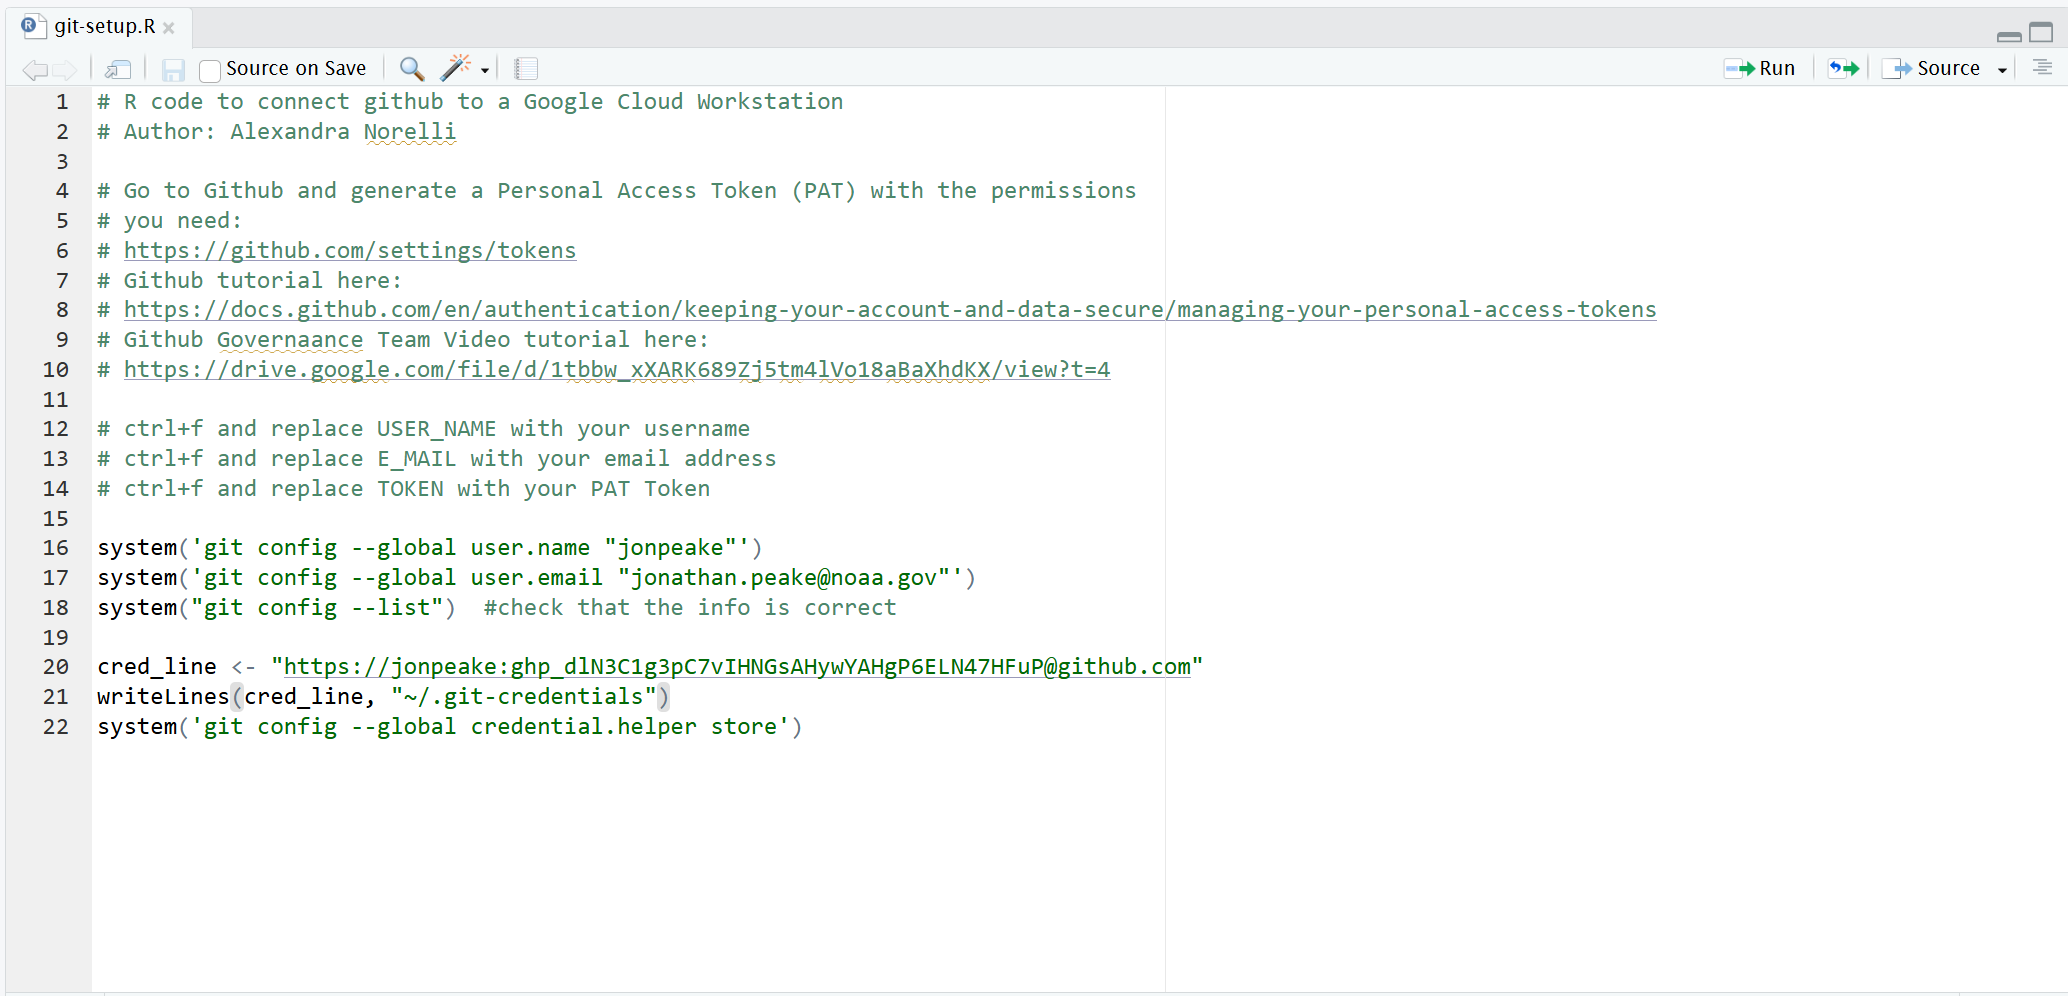
- Once your credentials are set, you’re ready to clone a GitHub repository. RStudio does this through their Projects interface. In your workstation RStudio session, click the Project dropdown in the upper right corner of your window and select **New project.**
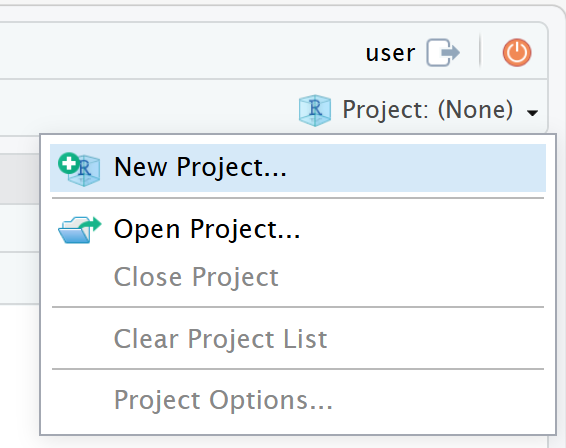
- Select the Version Control option, then Git.
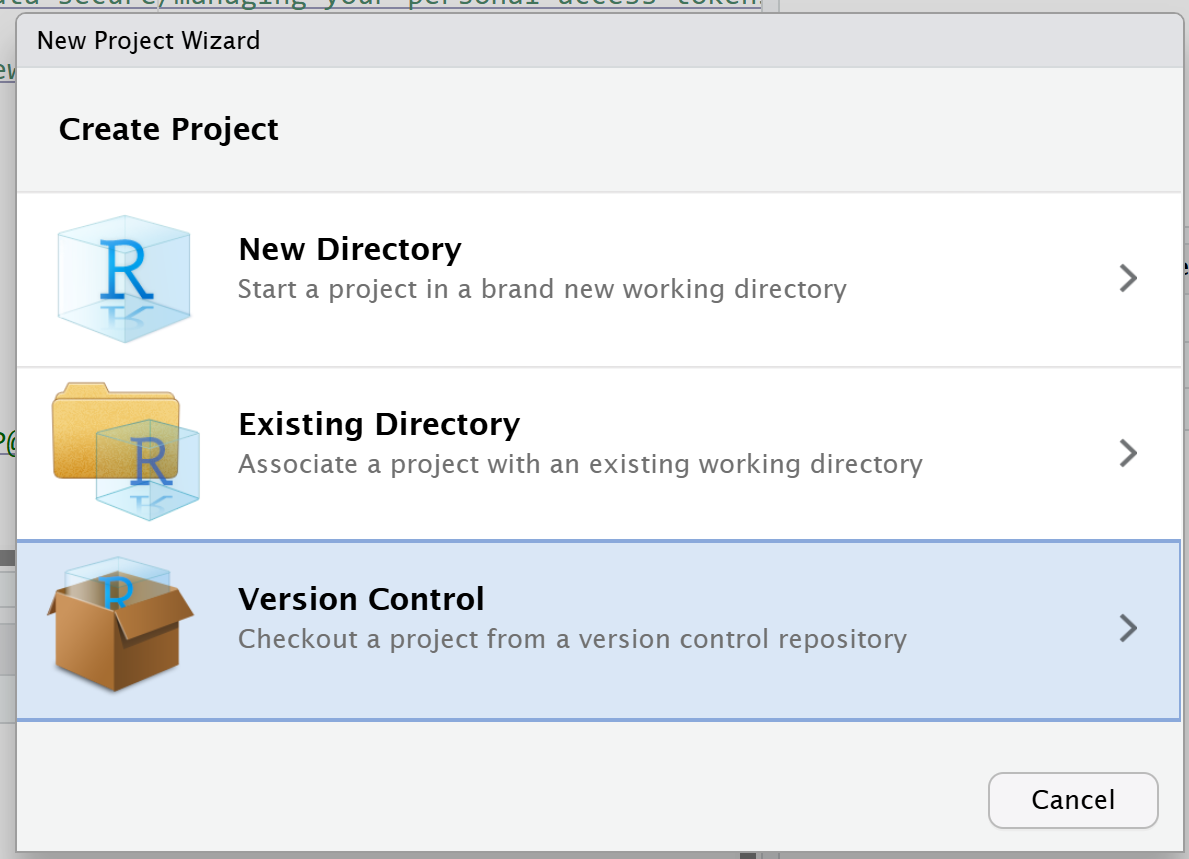
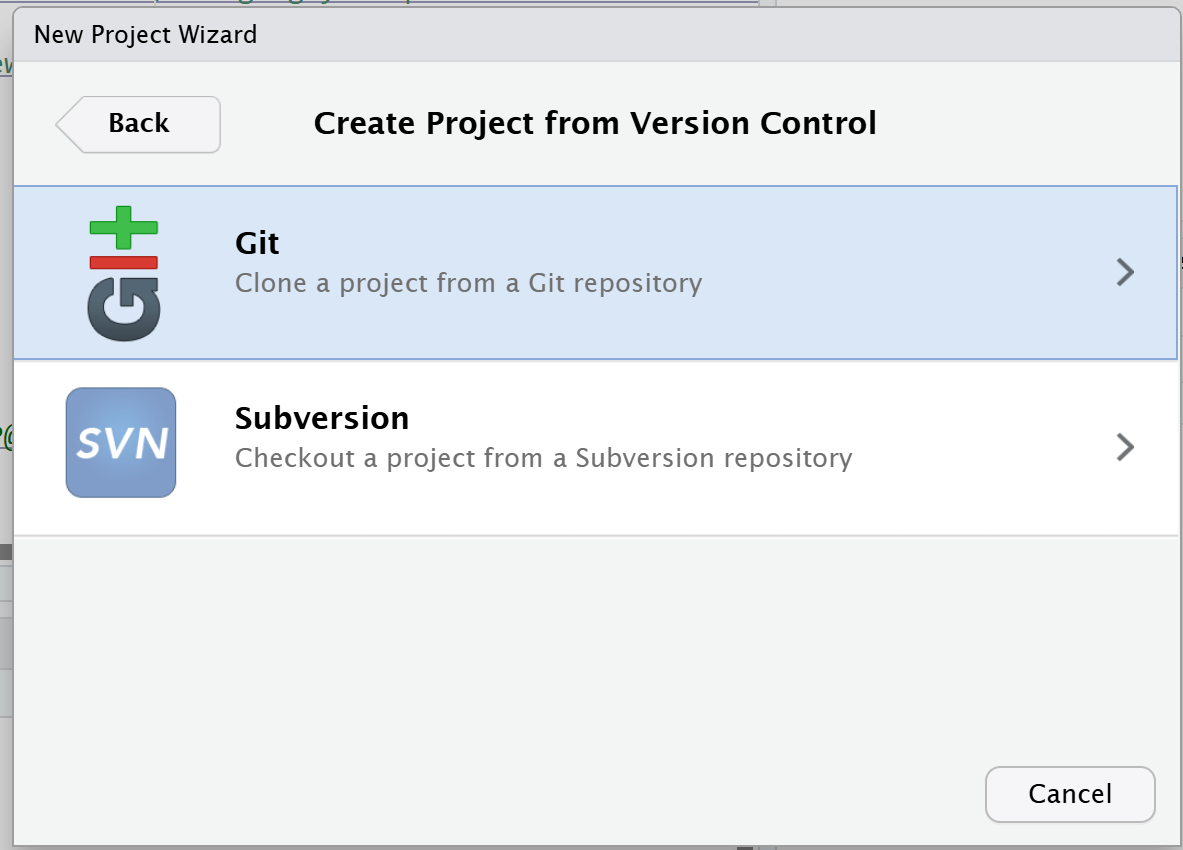
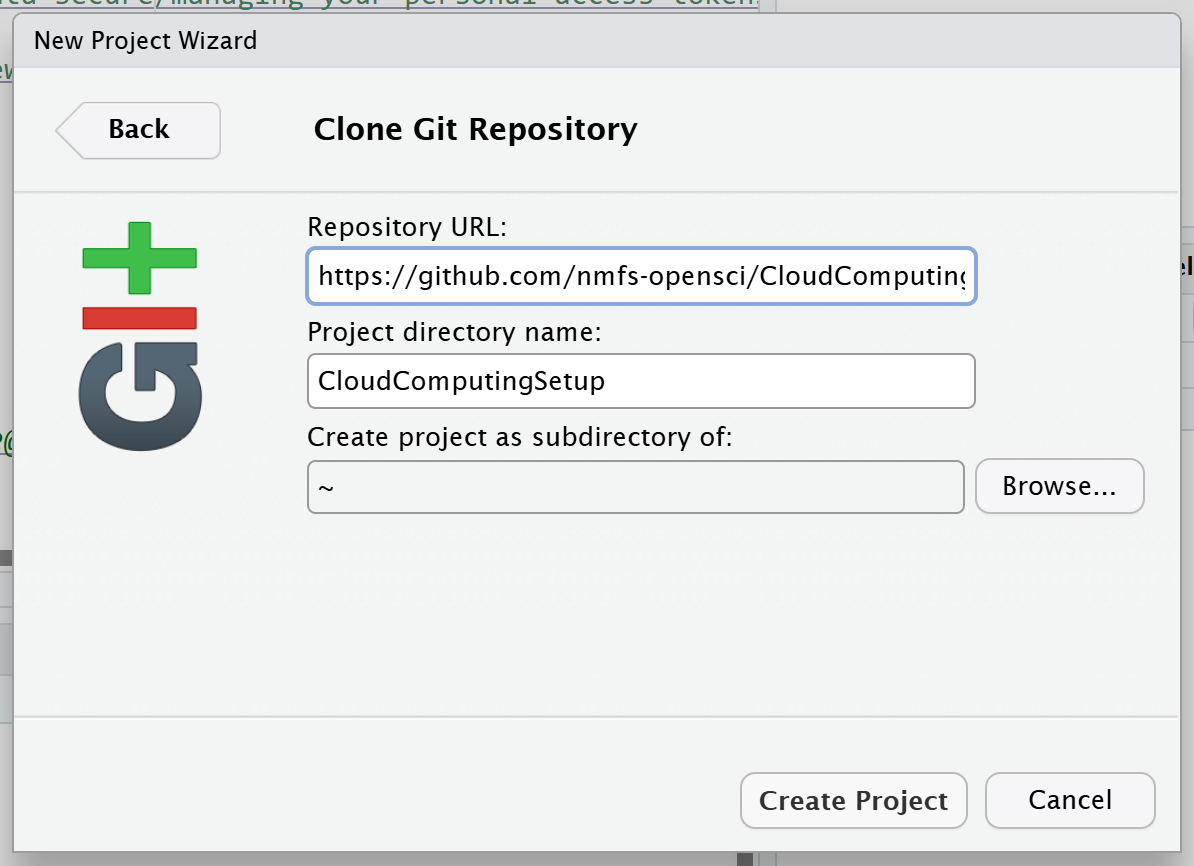
- Enter the URL of the GitHub repository you would like to clone. The directory name will autofill with the name of the repository. You can leave the the project subdirectory as the Home directory (
~) or change it to a different folder in your Home directory. Select Create Project when you’re ready.
- You will see Git running in the background to clone your repository into your workstation. Once it’s finished, the RStudio session will refresh and open the GitHub repository as an R Project (with the repository as the new working directory).
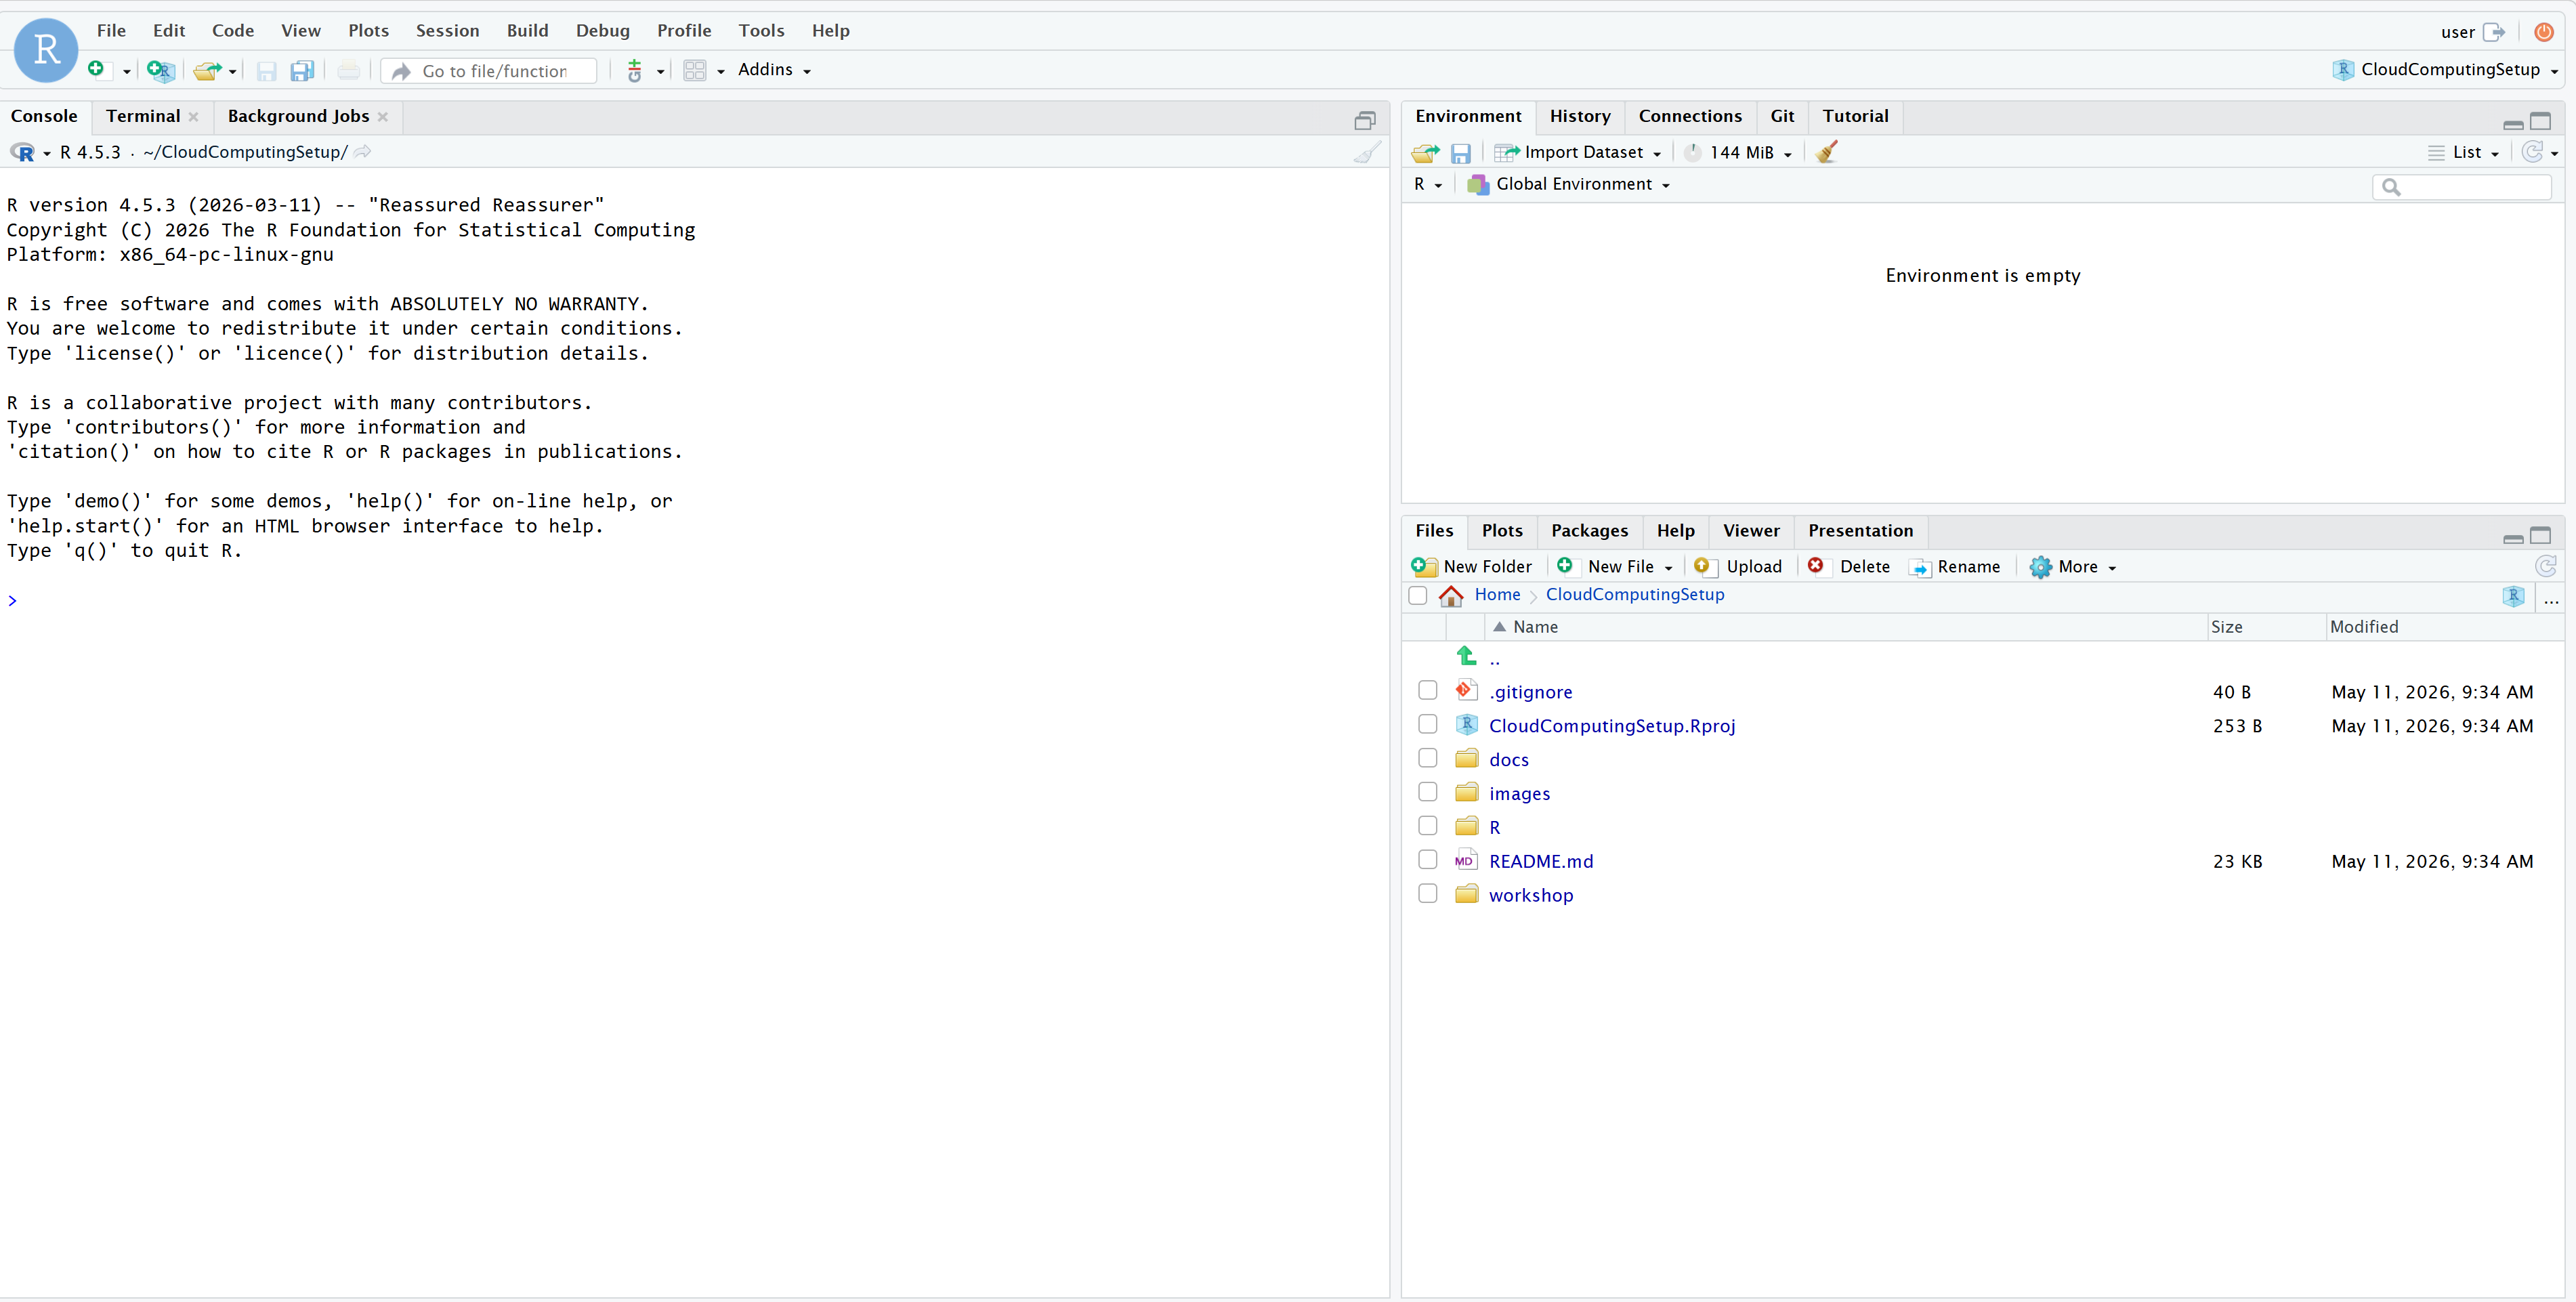
- Note that we have a new
Gittab in our RStudio pane. From this tab we can access all of the usual Git functions: pulling (syncing) from the remote repository on GitHub, committing new files and modifications to the current repository, pushing (syncing) changes made in the workstation back up to GitHub, and creating branches for collaborative development.
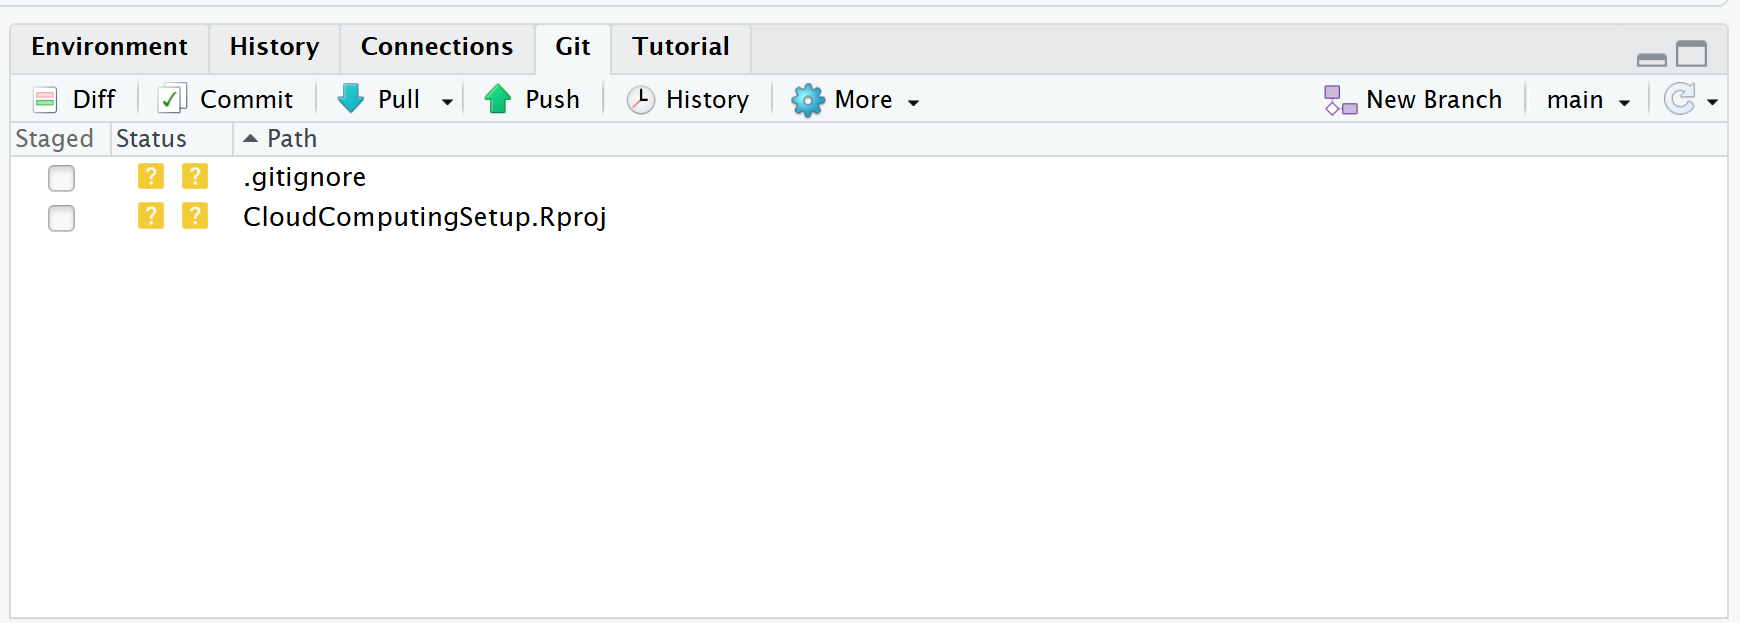
- When you create a new file or make changes to an existing file, those changes will show up in the Git pane to commit. Click the checkbox next to the file in the Git pane to stage the changes, then click the Commit button to open the Commit interface.
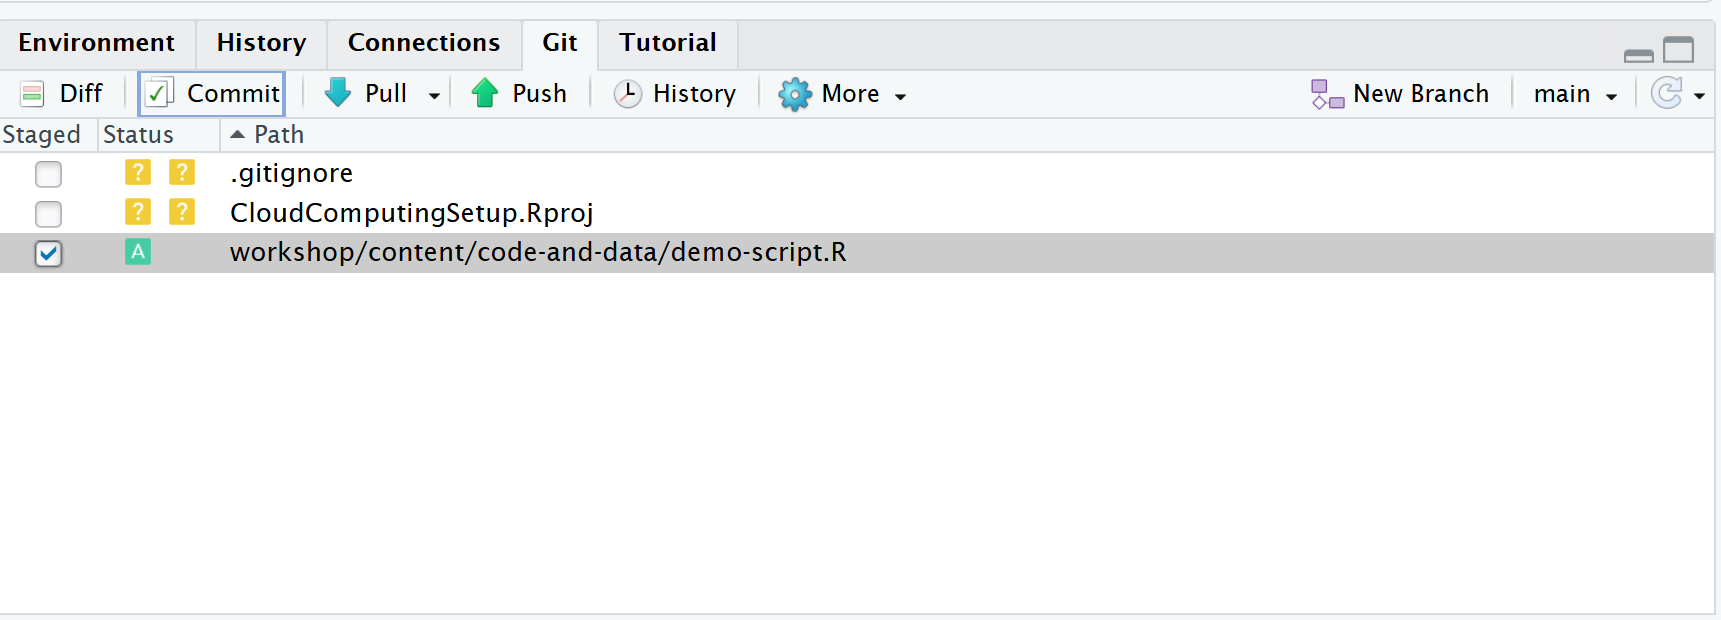
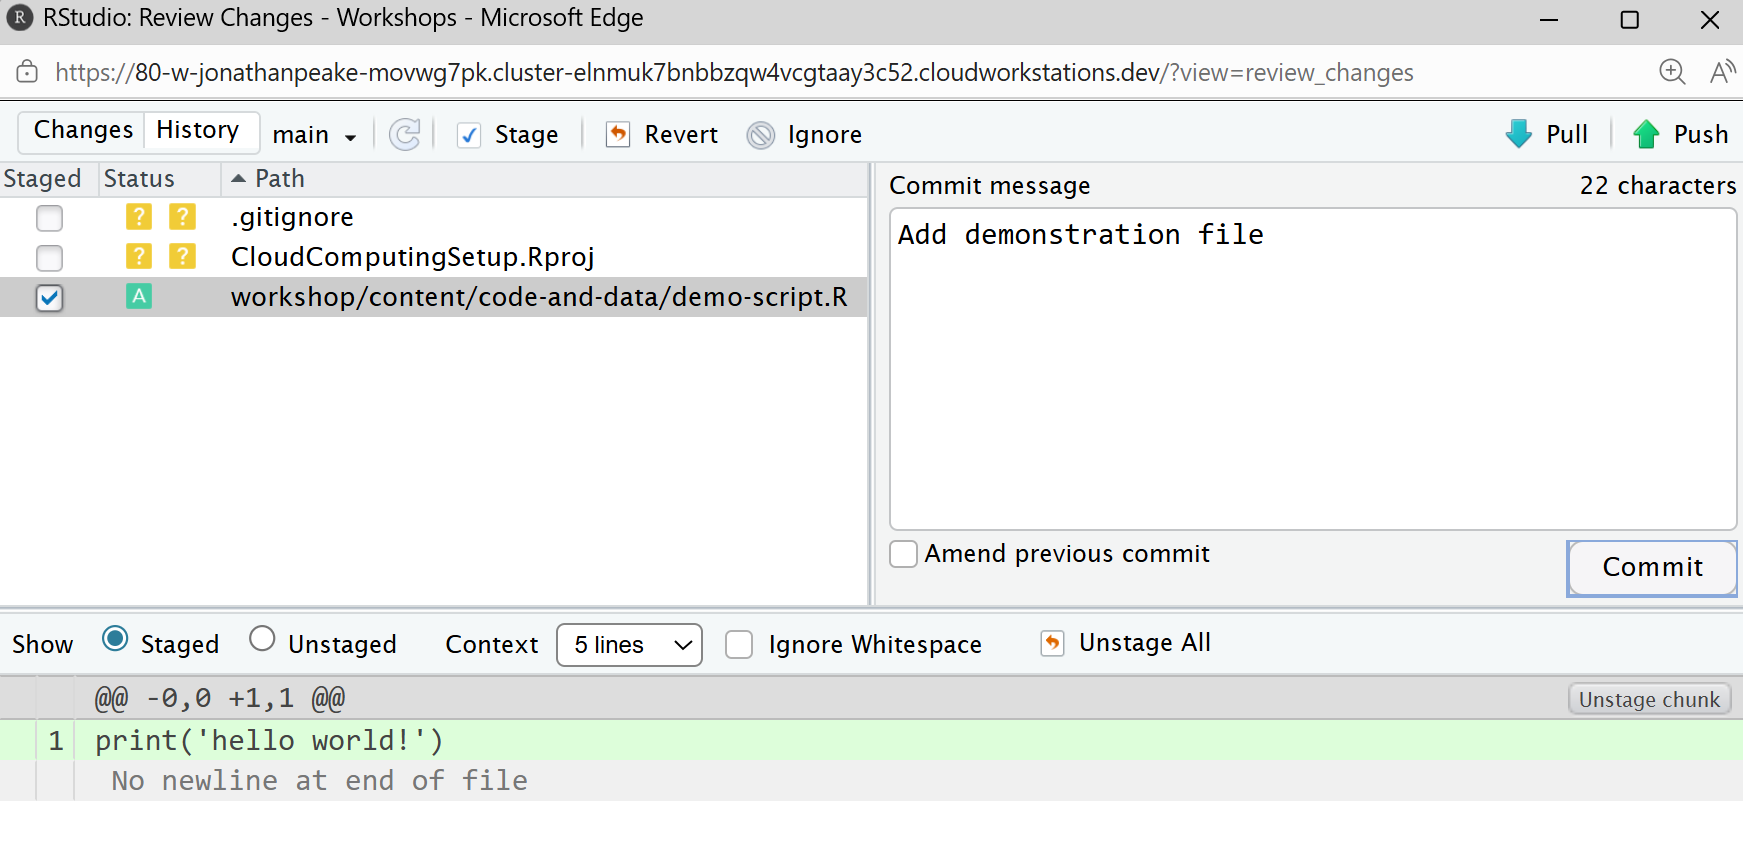
- Add a commit message, then click the Commit button to commit the changes to your repository.
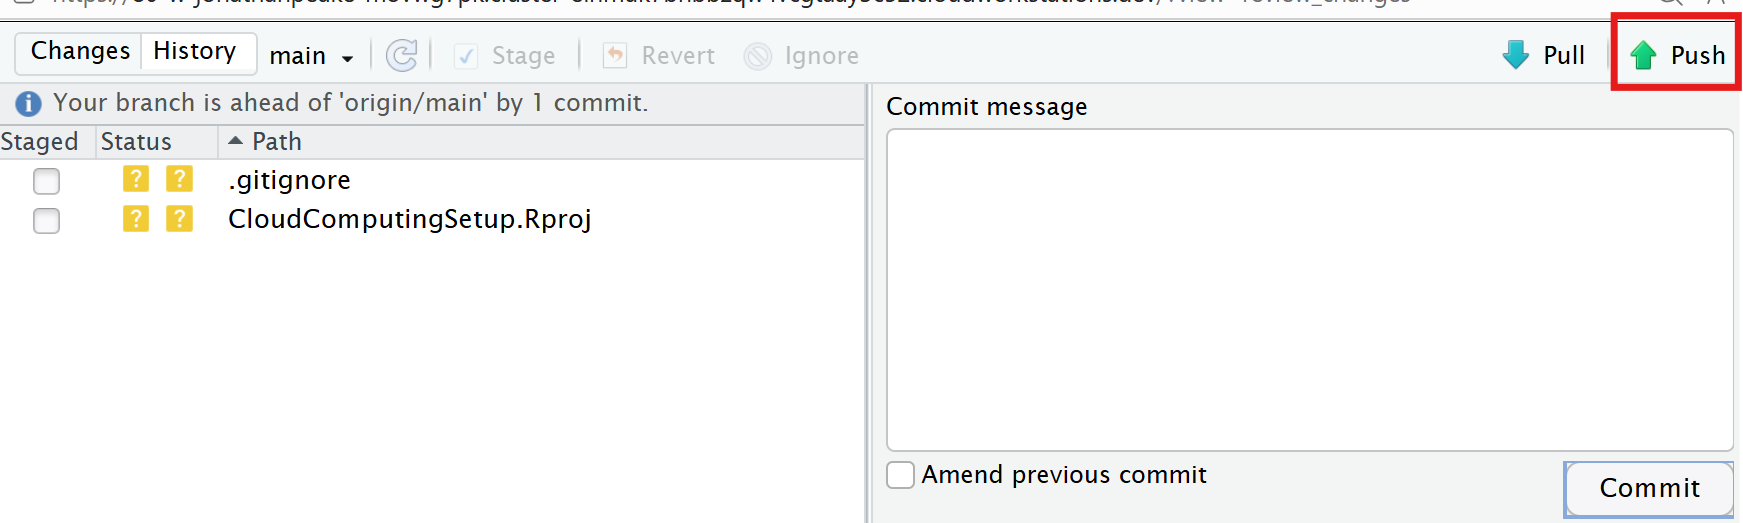
- Push your commit up to GitHub using the Push button.
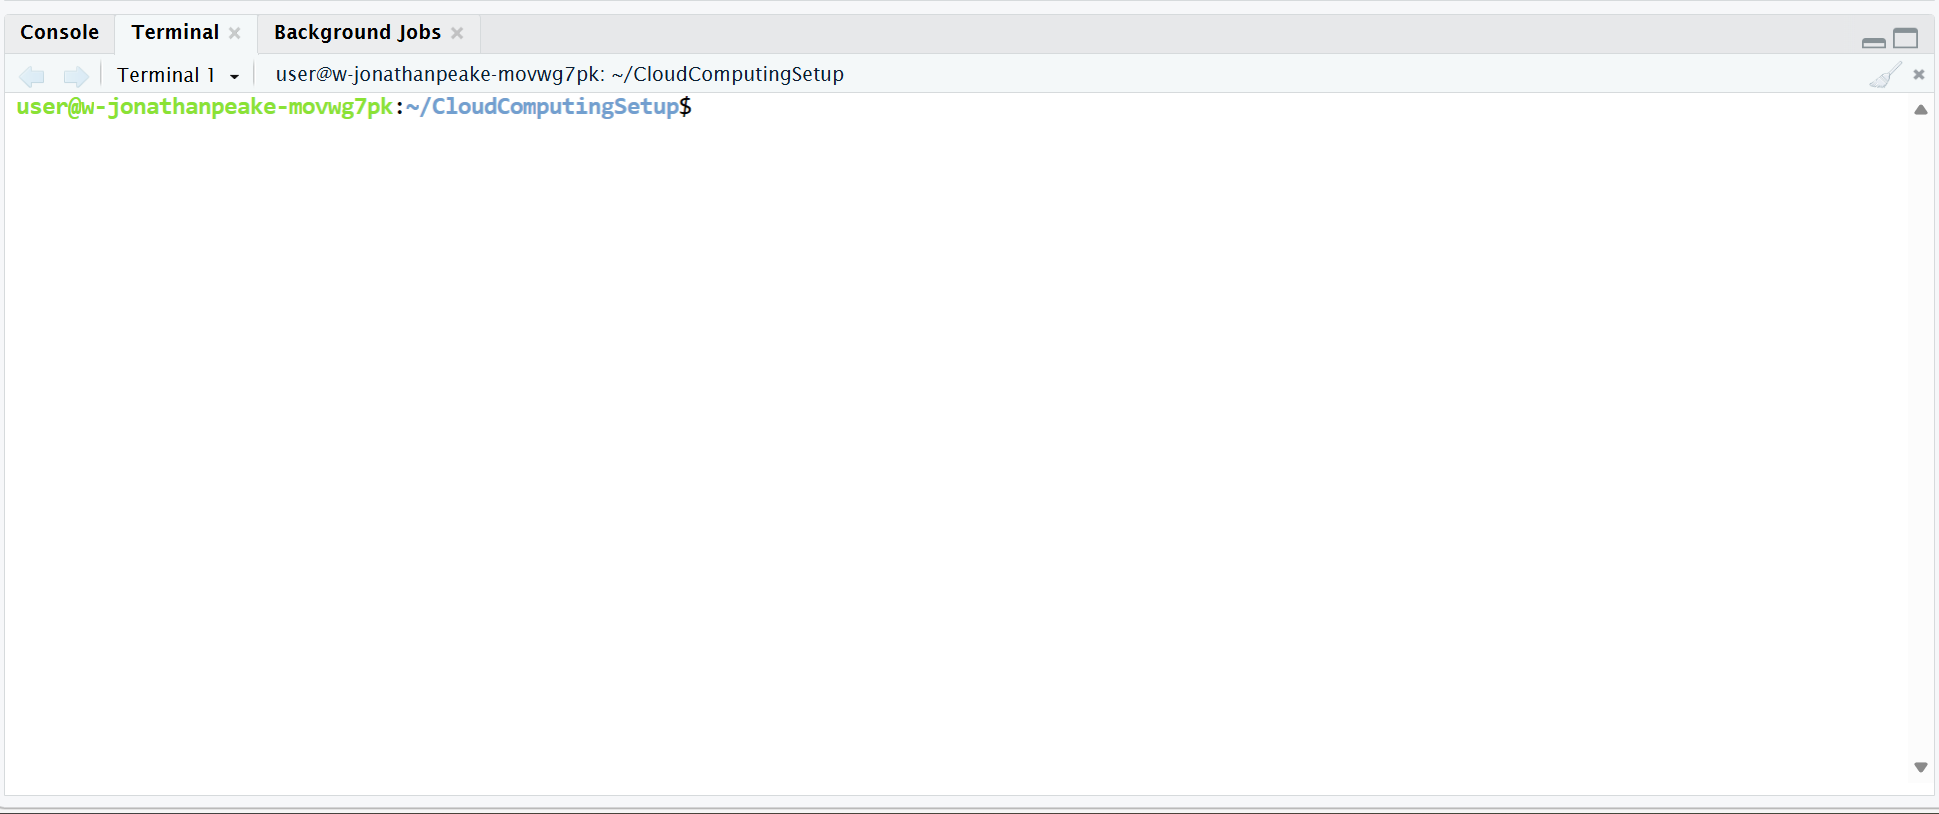
- If you’re comfortable with using Git on the command line, all of the Git tools are available through the terminal. You can access the terminal for the underlying Linux operating system using the Terminal tab in your RStudio interface:
In Jupyter Workstation
The JupyterLab workstation configuration allows connection to Git through the terminal; however, the
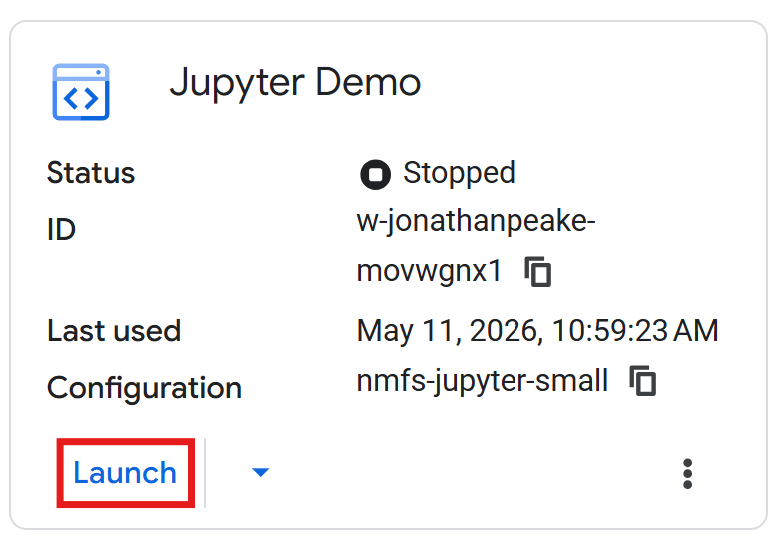
- Create or launch a Jupyter workstation in your Google Cloud Console
- In your workstation Jupyterlab, copy the following code into a Notebook code cell to set up Git and connect your GitHub credentials to your workstation. Make sure to replace the USER_NAME, E_MAIL, and TOKEN with your own GitHub login information before you run the cell. Note that this code won’t work as a standalone python script due to the system calls.
# Python code to connect github to a Google Cloud Workstation
# Author: Jonathan Peake

# Go to Github and generate a Personal Access Token (PAT) with the permissions
# you need:
# https://github.com/settings/tokens
# Github tutorial here:
# https://docs.github.com/en/authentication/keeping-your-account-and-data-secure/managing-your-personal-access-tokens
# Github Governaance Team Video tutorial here:
# https://drive.google.com/file/d/1tbbw_xXARK689Zj5tm4lVo18aBaXhdKX/view?t=4

# ctrl+f and replace USER_NAME with your username
# ctrl+f and replace E_MAIL with your email address
# ctrl+f and replace TOKEN with your PAT Token

!git config --global user.name "USER_NAME"
!git config --global user.email "E_MAIL"
!git config --list

cred_line = "https://USER_NAME:TOKEN@github.com"

with open(".git-credentials", "w", encoding="utf-8") as f:
    f.write(cred_line)

with open(".git-credentials", "r", encoding="utf-8") as f:
    print(f.read())

!git config --global credential.helper store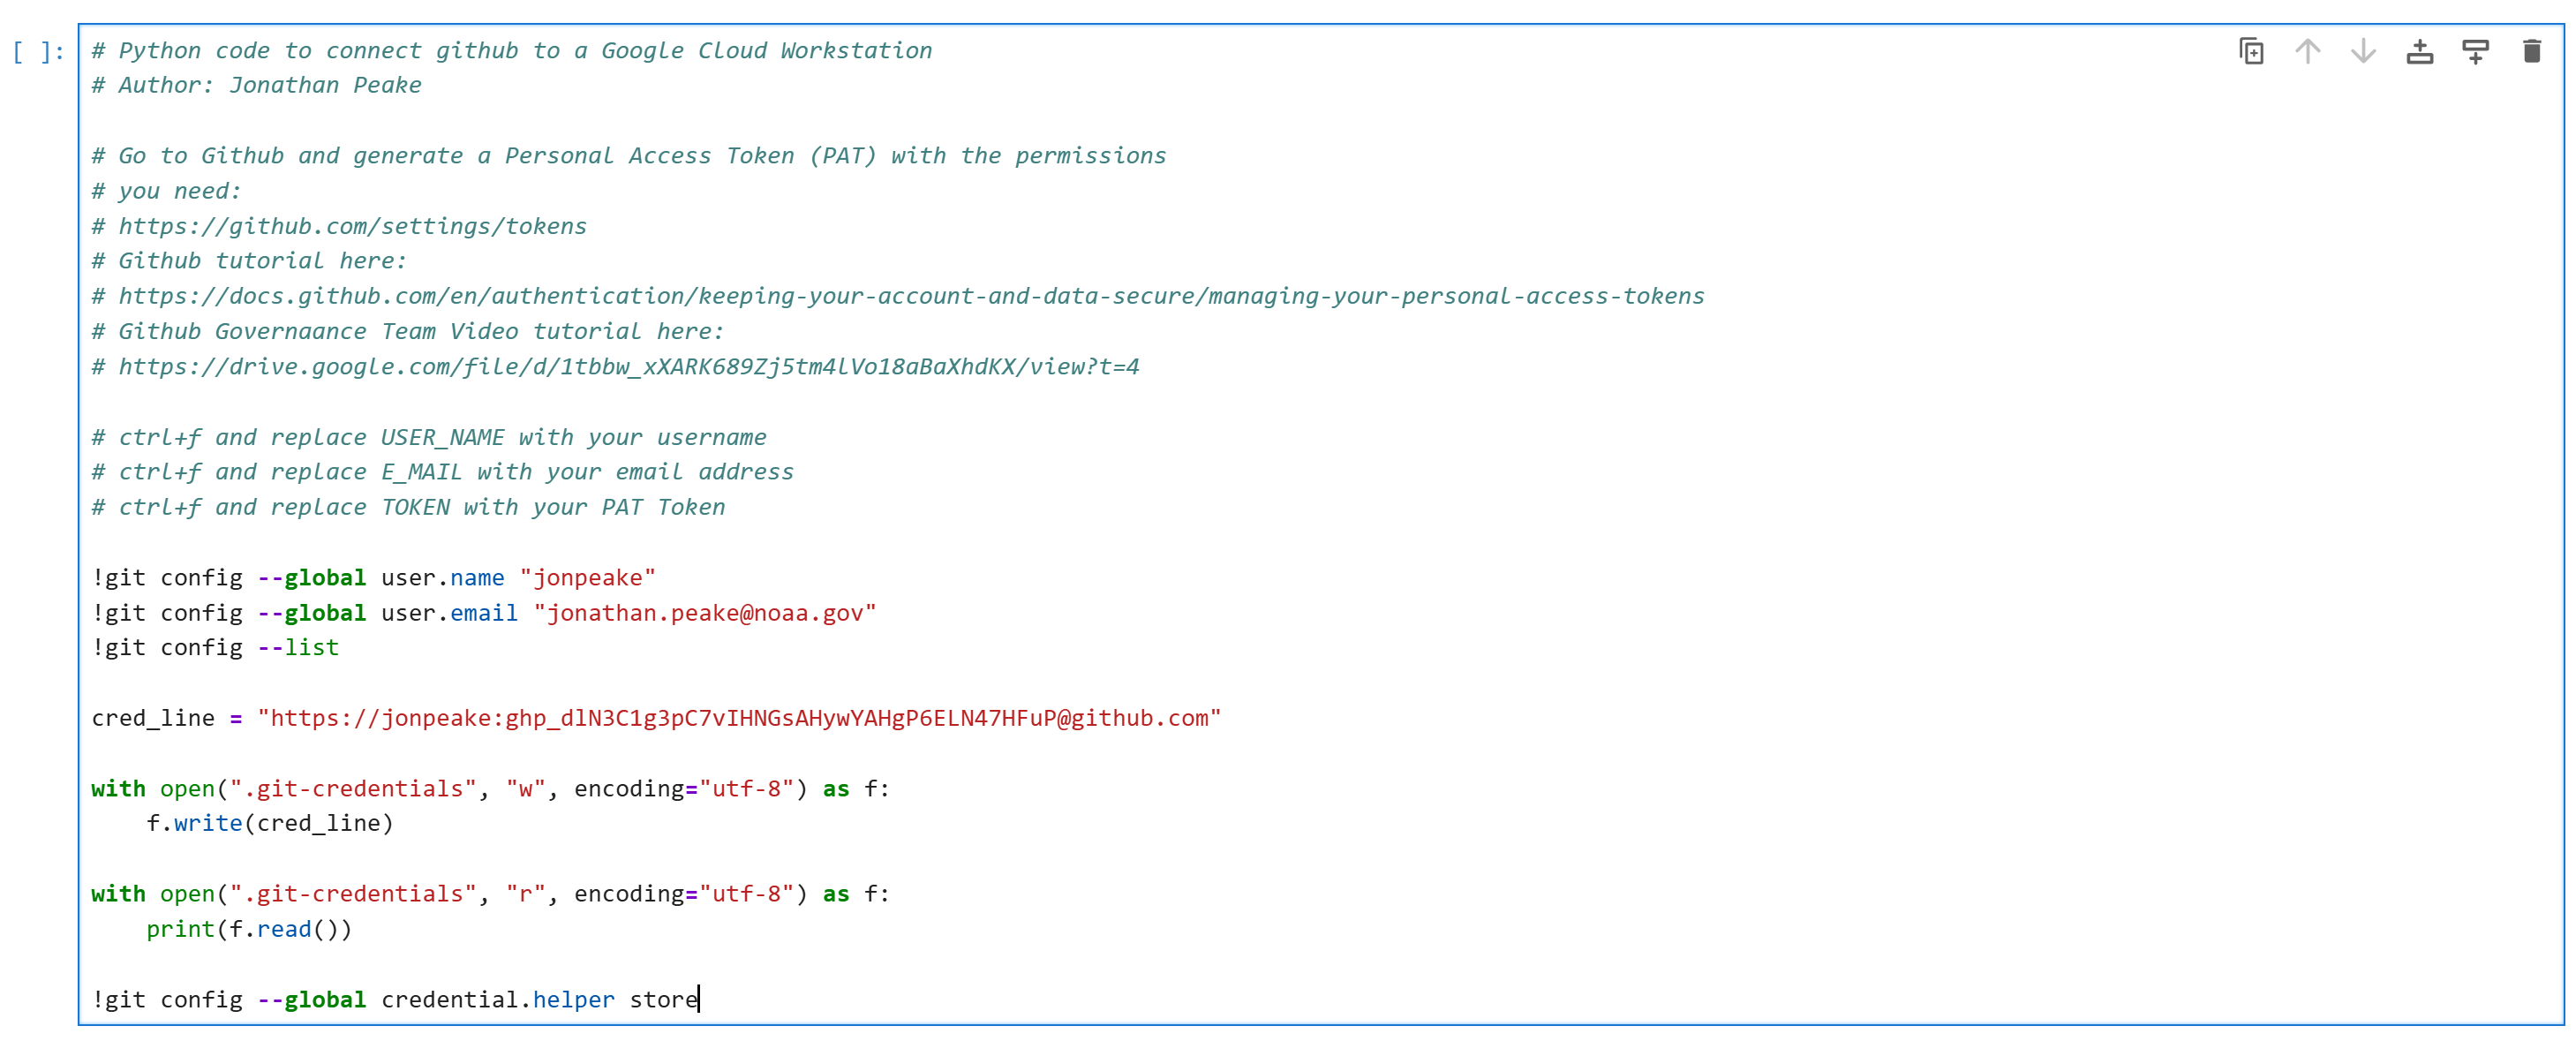
- Once your credentials are set, you’re ready to clone a GitHub repository. In JupyterLab, this will happen through the terminal. There is a Git extension for JupyterLab, but this does not appear to work in the Google Workstations implementation of JupyterLab at this time.
Cloud Data in Workstations: Google Buckets
Buckets are the most efficient way to access data in a cloud workstation. Instead of uploading and downloading data to the workstation’s drive, buckets can be used as mountable drives from which you can stream large datasets. Here’s how to set up a Google Data Bucket on a workstation.
- If you don’t have a personal bucket, work through your local IT to obtain one in the us-east4 region. You’ll need IT to grant permission to read and write to the bucket.
NOAA Fisheries’ Google Workstations are housed in the us-east4 region on Google’s servers. To minimize costs, buckets should reside in the same region as your workstation. If the bucket is not in the same region as the workstation, data egress charges will apply.
- Buckets need to be mounted each time a workstation is started. The bucket will persist until the workstation is turned off. To mount a bucket, copy the following code into a file called “mount_bucket_folder.sh” in the home directory of your workstation (this will work for any of the workstation configurations). Make sure to change the
BUCKET_NAMEvariable with your bucket’s name (this will be assigned when you are given access). The current example uses an example bucket from NMFS OpenSci that is readable by NOAA staff so you can see what this looks like, even if you don’t have your own bucket.
# Terminal code for mounting Google Cloud Buckets to Google Cloud Workstations
# Author: Alexandra Norelli with Gemini assistance for R to BASH translations.
# Run the .sh file with the code commented below and follow the instructions to
# authenticate your google account.

# Run this script as a .sh file by copying and pasting this code in your bash
# terminal:
#bash mount_bucket_folder.sh

# Define your bucket and the mount point.
# replace "nmfs-opensci" with your bucket name
# add the path to folder within the bucket for FOLDER_NAME
# make sure to put a / at the end of the folder path
# The `$HOME` symbol is a shortcut for your home directory, so this will
# create the folder at /home/your_username/my_gcs_bucket.
BUCKET_NAME="nmfs-opensci"
FOLDER_NAME="/"
MOUNT_POINT="$HOME/my_gcs_bucket"

# --- Authentication ---
# This command authenticates your user account with Google Cloud.
# You'll be prompted to open a browser to complete the login process.
echo "Running gcloud authentication. Please follow the instructions to log in in your browser."
gcloud auth application-default login --no-launch-browser

# --- Installation and Setup (Run only once) ---
# Create the mount point if it doesn't exist.
# Since this directory is in your home folder, you don't need `sudo` to create it.
if [ ! -d "$MOUNT_POINT" ]; then
    mkdir -p "$MOUNT_POINT"
fi

# Add the Google Cloud GPG key to your system's trusted keys.
# This is a critical step to verify the authenticity of the packages.
curl -fsSL https://packages.cloud.google.com/apt/doc/apt-key.gpg | sudo gpg --dearmor -o /etc/apt/trusted.gpg.d/gcsfuse.gpg

# Add the GCS FUSE repository to your system's sources list.
echo "deb [signed-by=/etc/apt/trusted.gpg.d/gcsfuse.gpg] https://packages.cloud.google.com/apt gcsfuse-`lsb_release -c -s` main" | sudo tee /etc/apt/sources.list.d/gcsfuse.list > /dev/null

# Update the package list to include the new repository.
echo "Updating package list..."
sudo apt-get update

# Install gcsfuse.
echo "Installing gcsfuse..."
sudo apt-get install -y gcsfuse

# --- Mounting the Bucket ---  you might only need to run this if restarting a workstation
# Use the gcsfuse tool to mount the bucket to the specified mount point.
# The mount point is in your home directory, so `sudo` is no longer needed.
echo "Mounting the bucket..."
gcsfuse --implicit-dirs --only-dir "$FOLDER_NAME" "$BUCKET_NAME" "$MOUNT_POINT"

echo "Mounting complete. You can now access the bucket contents at $MOUNT_POINT"

# Optional: List the contents to verify the mount was successful.
ls -l "$MOUNT_POINT"- Run the file by typing the command
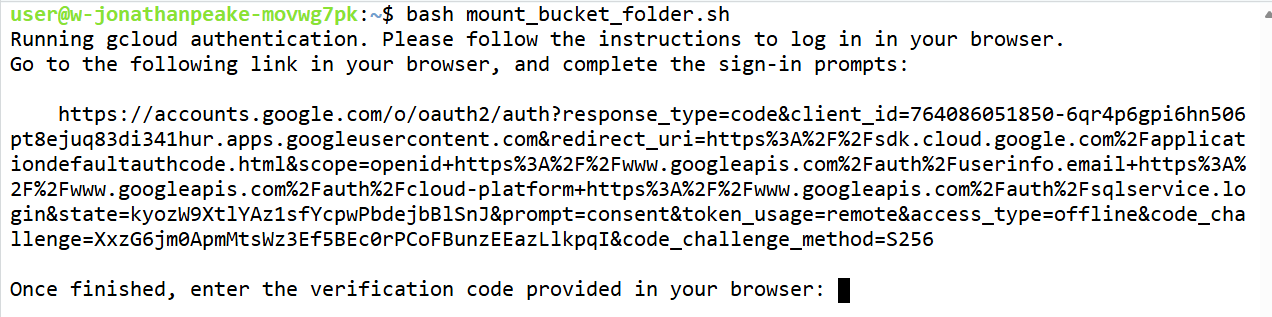
bash mount_bucket_folder.shin your terminal (not your R or Python console) and hittingEnter.
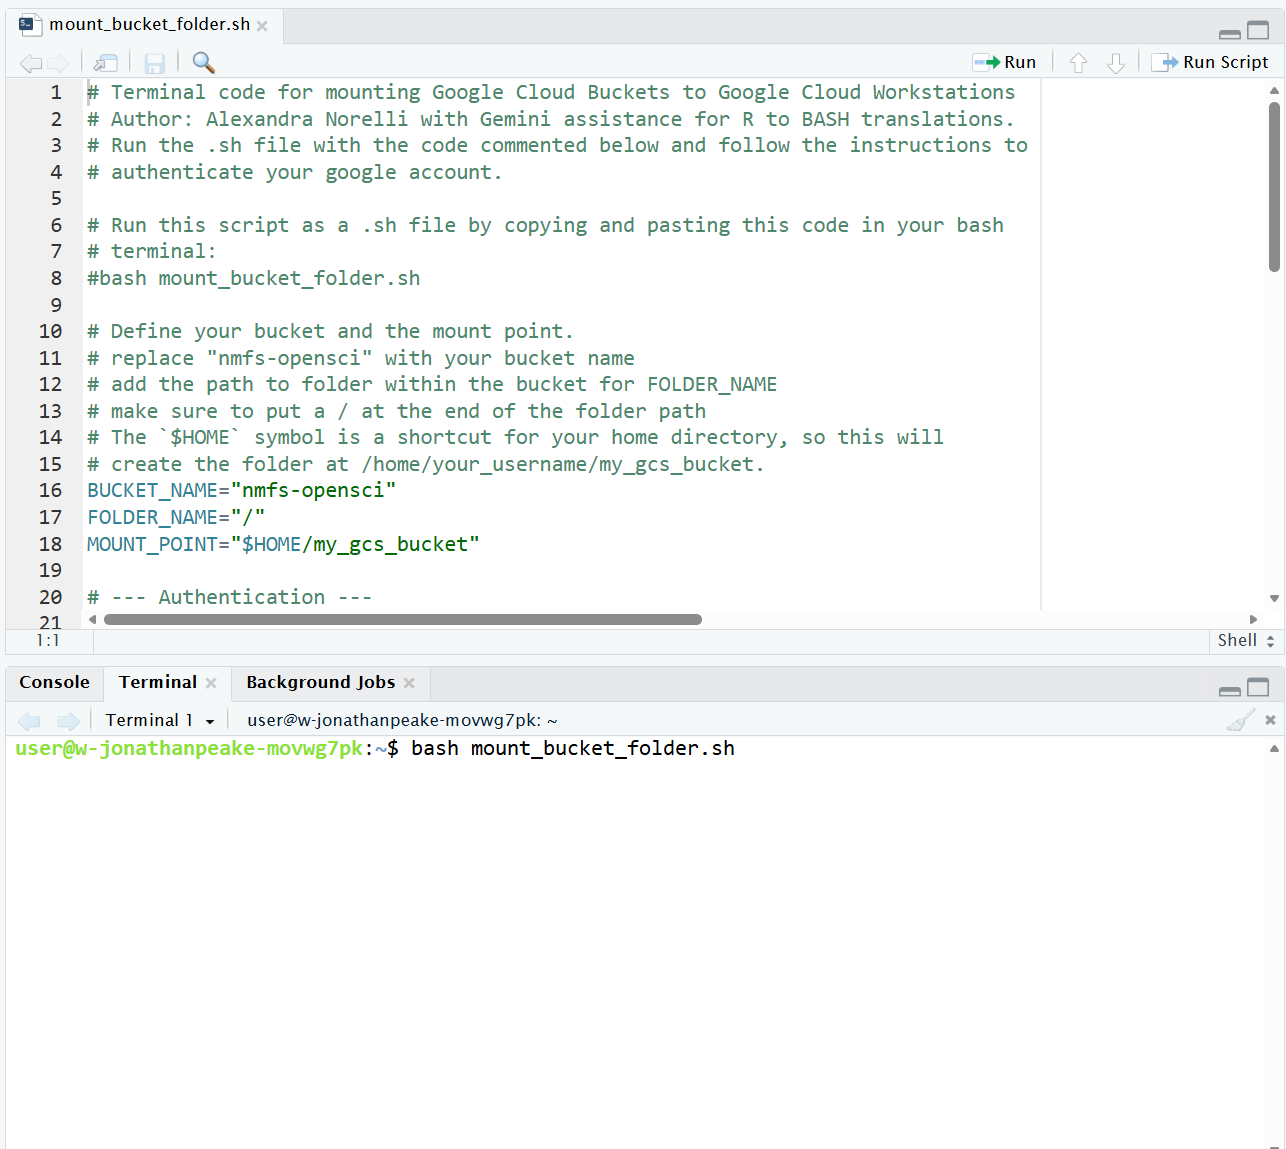
- When you hit enter, the bash script will run until it prompts you to authenticate with Google. Open the link and log in with your NOAA Google account.
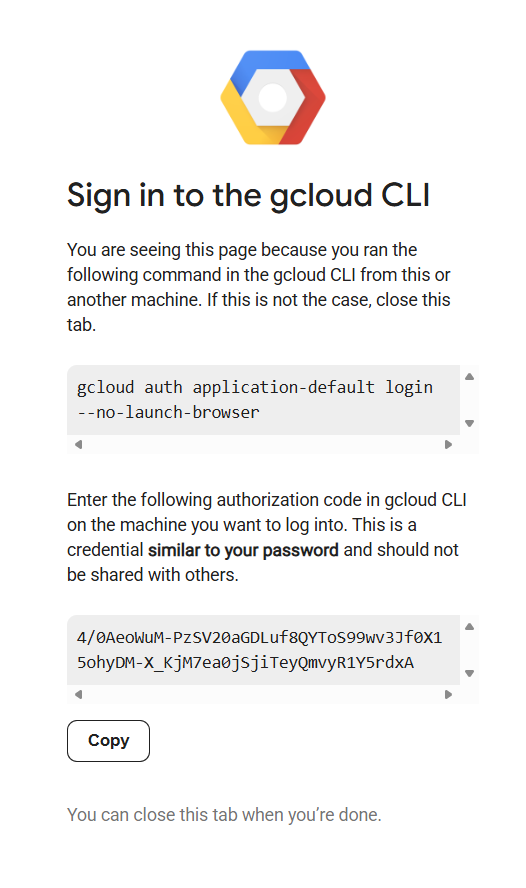
- When you finish logging in, you’ll get an authorization code that you will need to copy and paste into your terminal session. Note that this code only works for this one login instance. Paste your code into the terminal (Hint: to paste into the terminal, you can use the shortcut
Ctrl-Shift-V) and hitEnter.
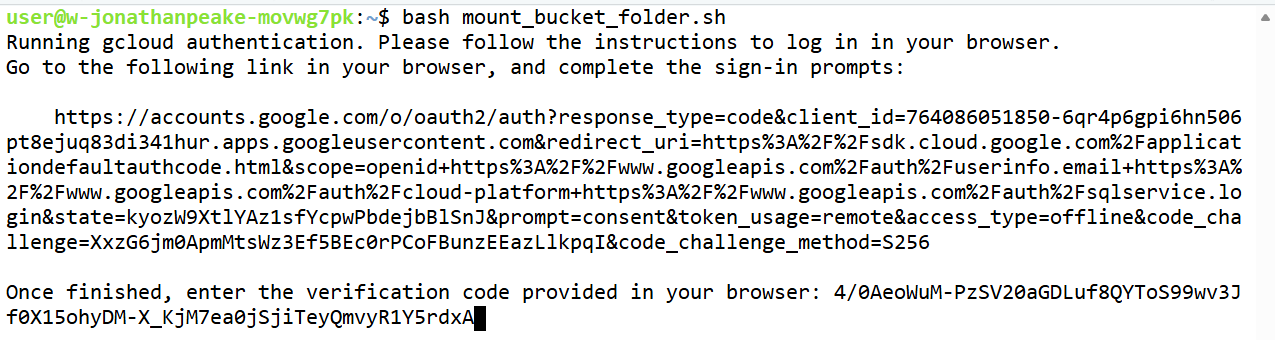
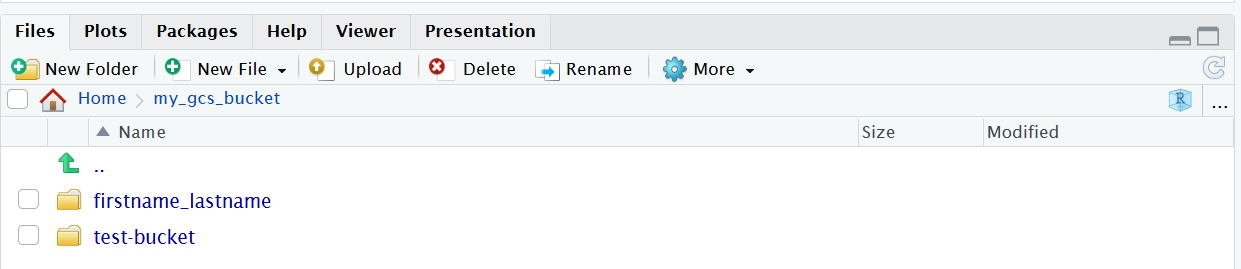
- Once the script has finished running, you should see the bucket and its contents appear in your Home directory. You can now interact with the folder as if it were a drive (for this tutorial, please don’t upload any files or datasets to the nmfs-opensci bucket).