Forking Repositories in GitHub (and beyond)
Aims and Objectives
Forking is one of the main collaborative tools available that make GitHub such a powerful platform for open source development. Forks allow developers across all of GitHub to iterate on ideas and changes before they are proposed back to the parent repository. This skills session will use directed, interactive lessons to provide NOAA Fisheries staff with a foundation in using forks for open source development in GitHub.
Prerequisites: What do I need before this workshop to follow along on my own?
- This stand-alone skills session is meant for those with a basic understanding of Git and GitHub. Check out our Introduction to Git and GitHub lessons if you are new to Git and GitHub or need a refresher.
- We will also be using a bit of Markdown, so you may want to refresh yourself on Markdown language with our Introduction to Markdown lesson.
What is a Fork?
Tutorial: Forking a repository
For this tutorial, we’re going to be forking a demo repository (https://github.com/nmfs-opensci/GitHub-Clinic-demos), editing our forked copies, and creating a pull request to contribute back to the main repository. Follow along on your own account.
Step 1: Fork the repository
- Open the demo repository in GitHub.
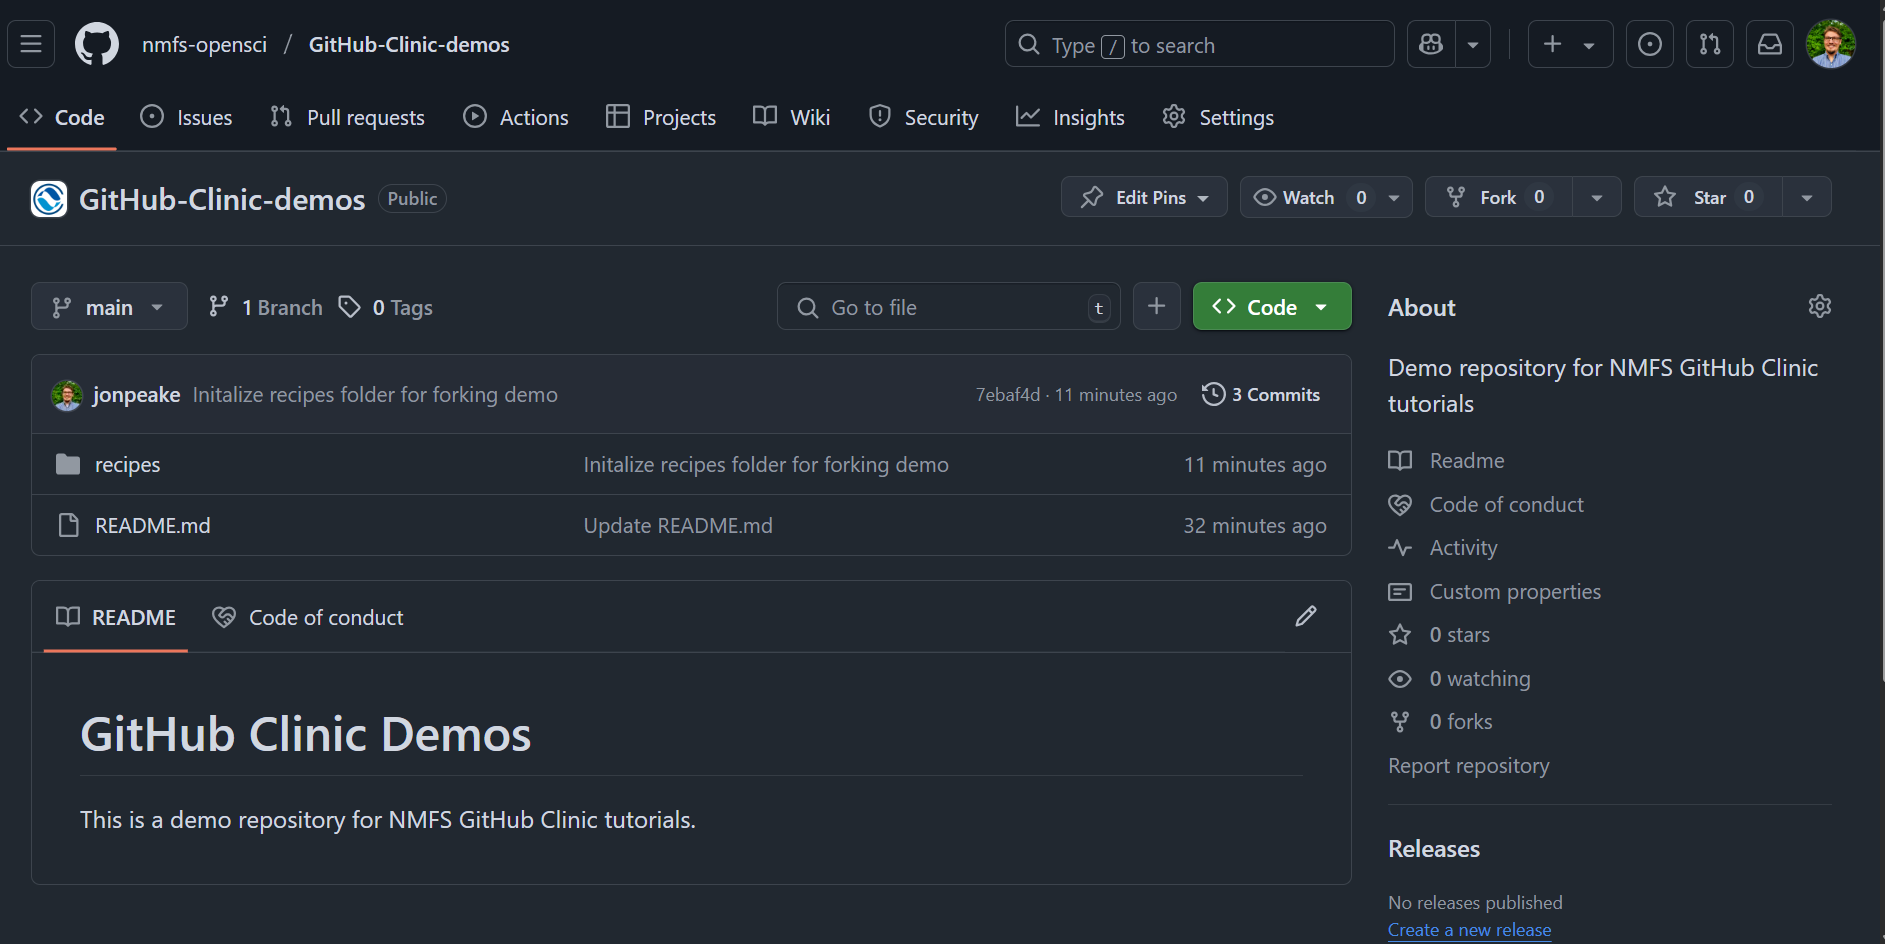
- At the top of the repository, click the Fork button

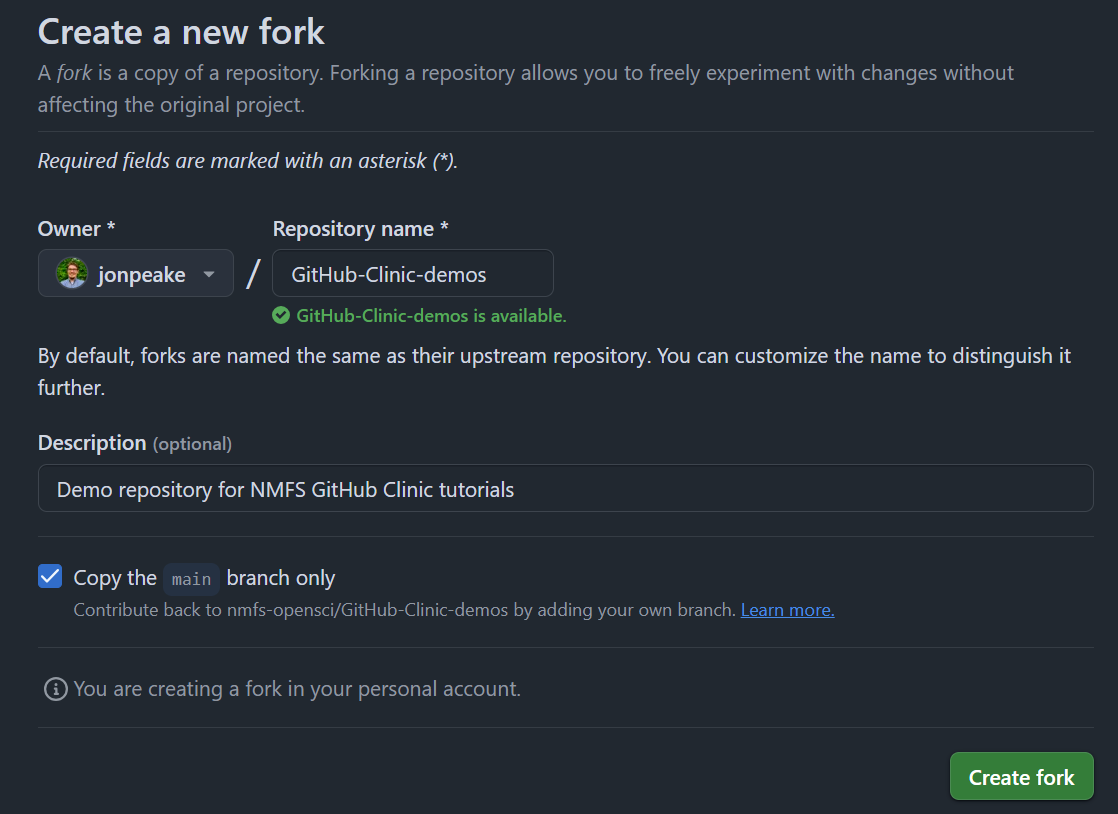
- Keep everything default (your account should be listed under Owner, and the Repository name should be pre-filled for you). Click the green Create Fork button.
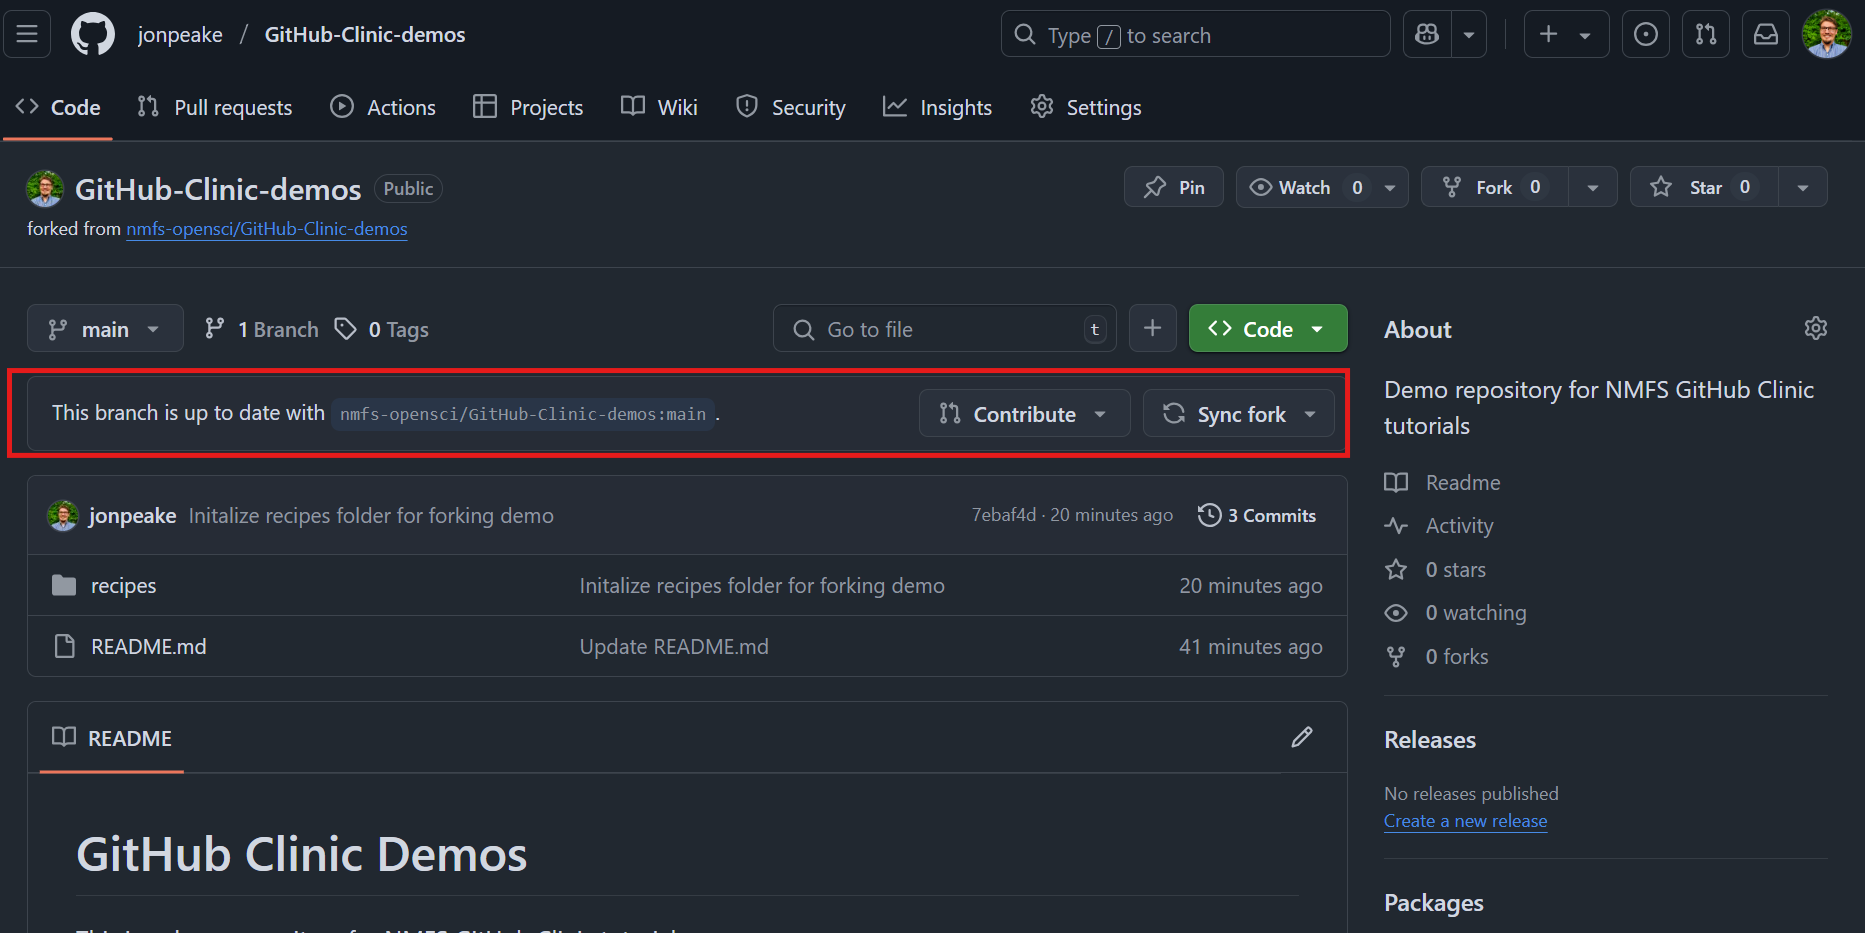
- You now have a copy of the original repository in your account. Note that the fork is still connected to the parent repository, so when a change is made to the parent, you can sync it to your fork
Step 2: Add content to your forked repository
We’re going to add a recipe to our forked repository. You can add whatever recipe you’d like, with as many details as you’d like; for this demonstration, we’ll keep it simple (we’ve provided a more detailed chocolate chip recipe as an example to start out).
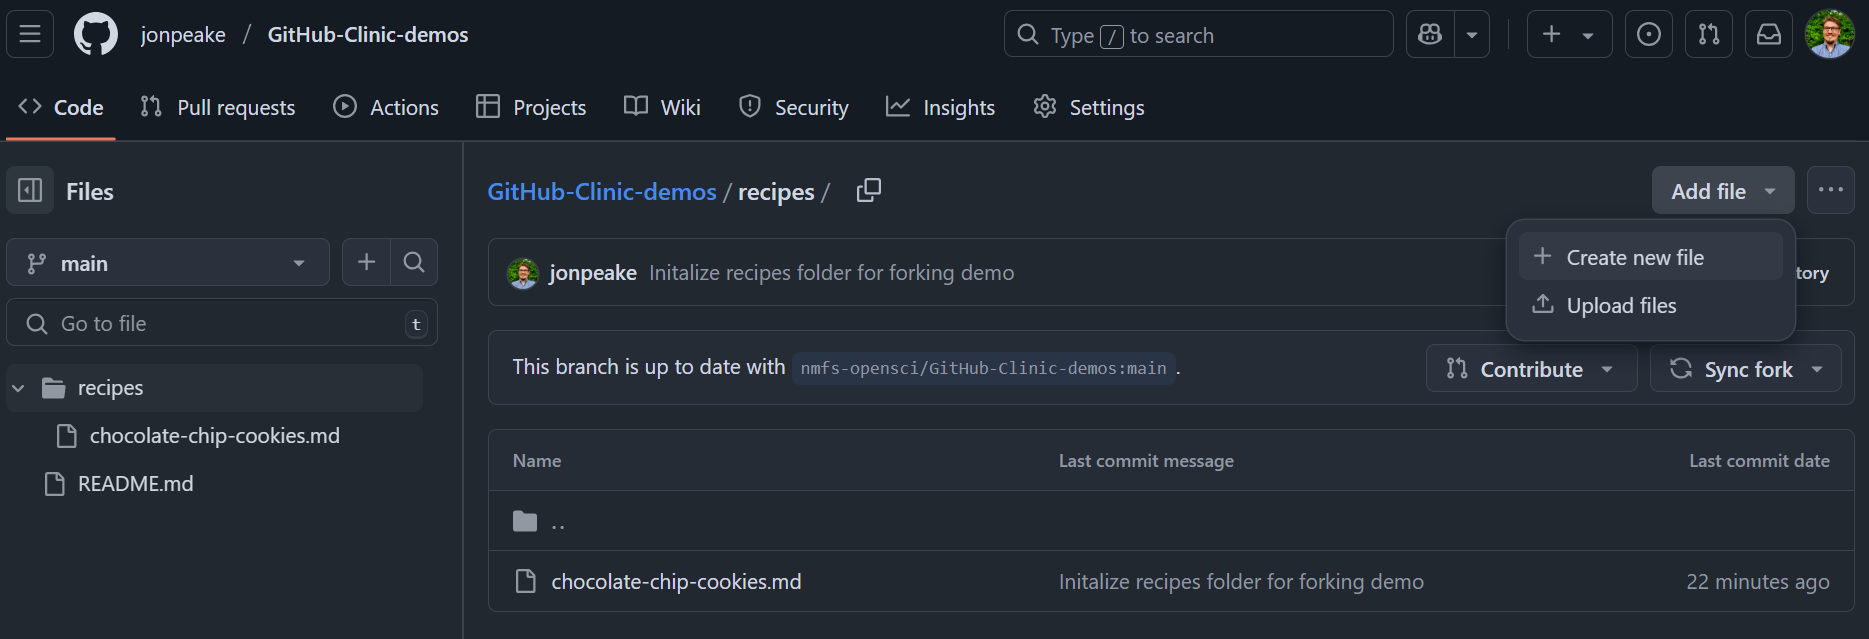
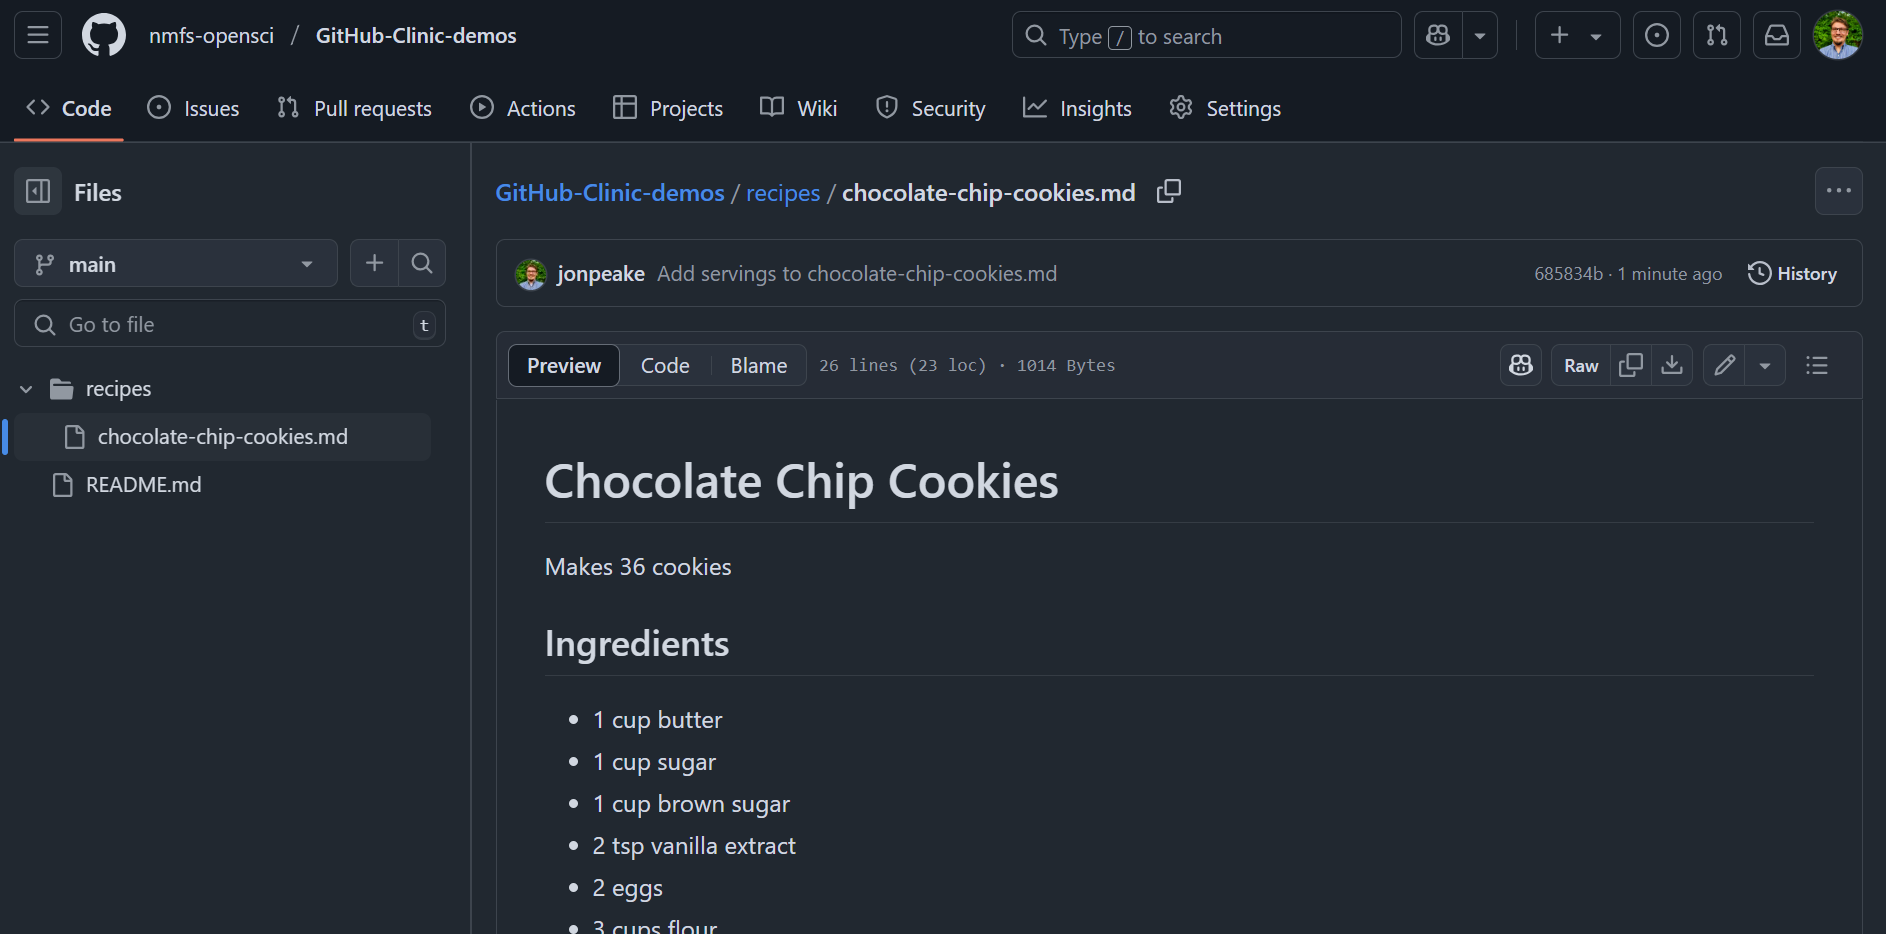
- Click on the
recipesfolder in the file tree of your forked repository, click the Add file dropdown, and click “Create new file”
- Name your recipe file, and make sure it ends in
.md. We’re making a markdown file here, so we need the.mdfile extension.

- Enter your recipe into the file contents. Remember that we can use markdown formatting here; let’s take advantage of that by adding a title and a couple headings for
## Ingredientsand## Instructions.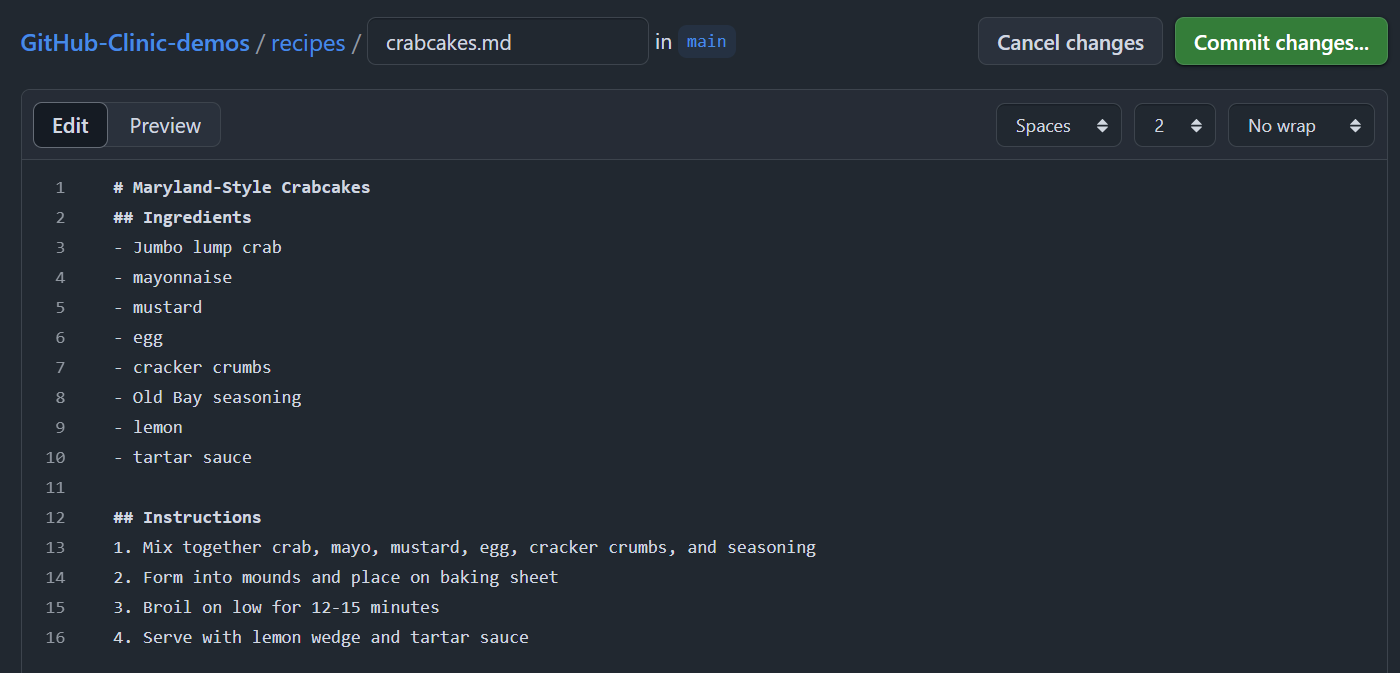
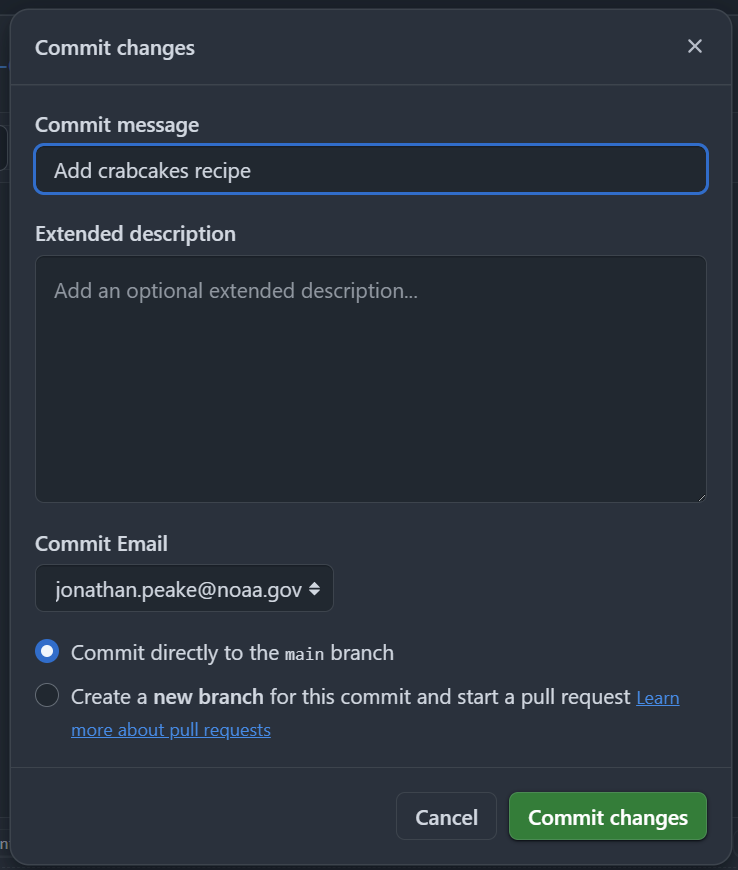
- Commit your changes to the main branch of your repository.
Step 3: Contribute your recipe to the parent repository
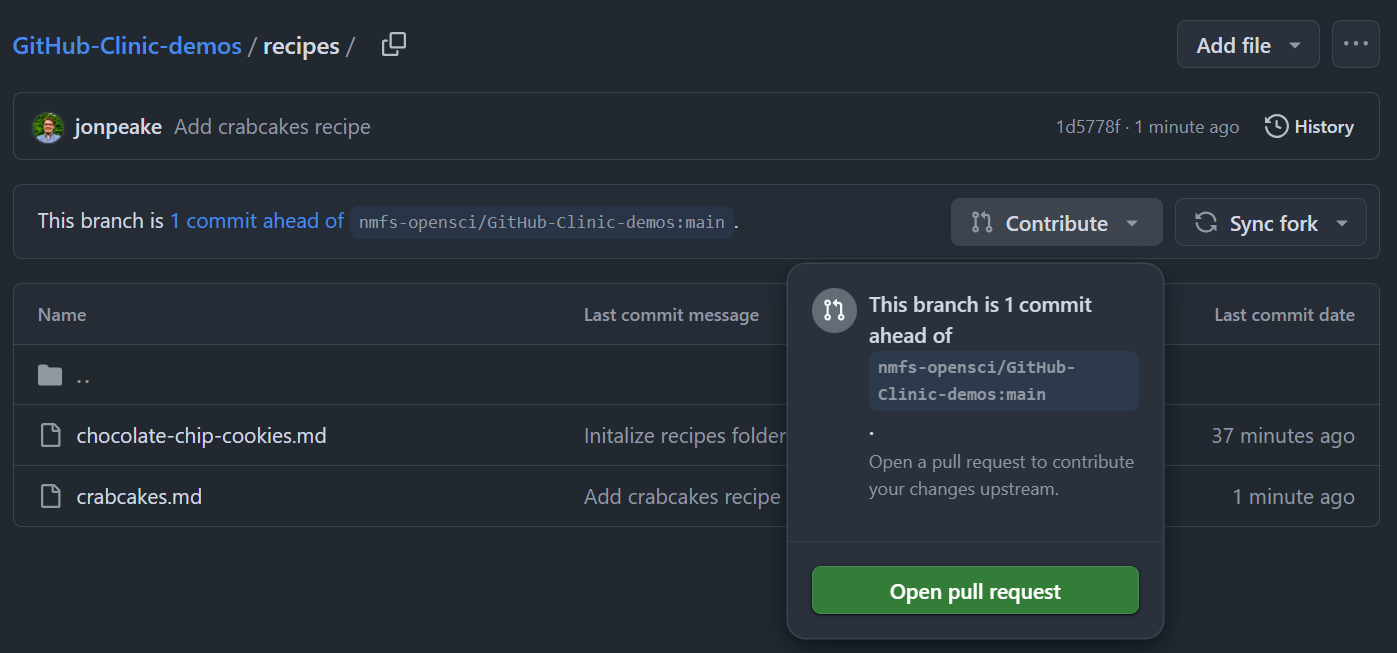
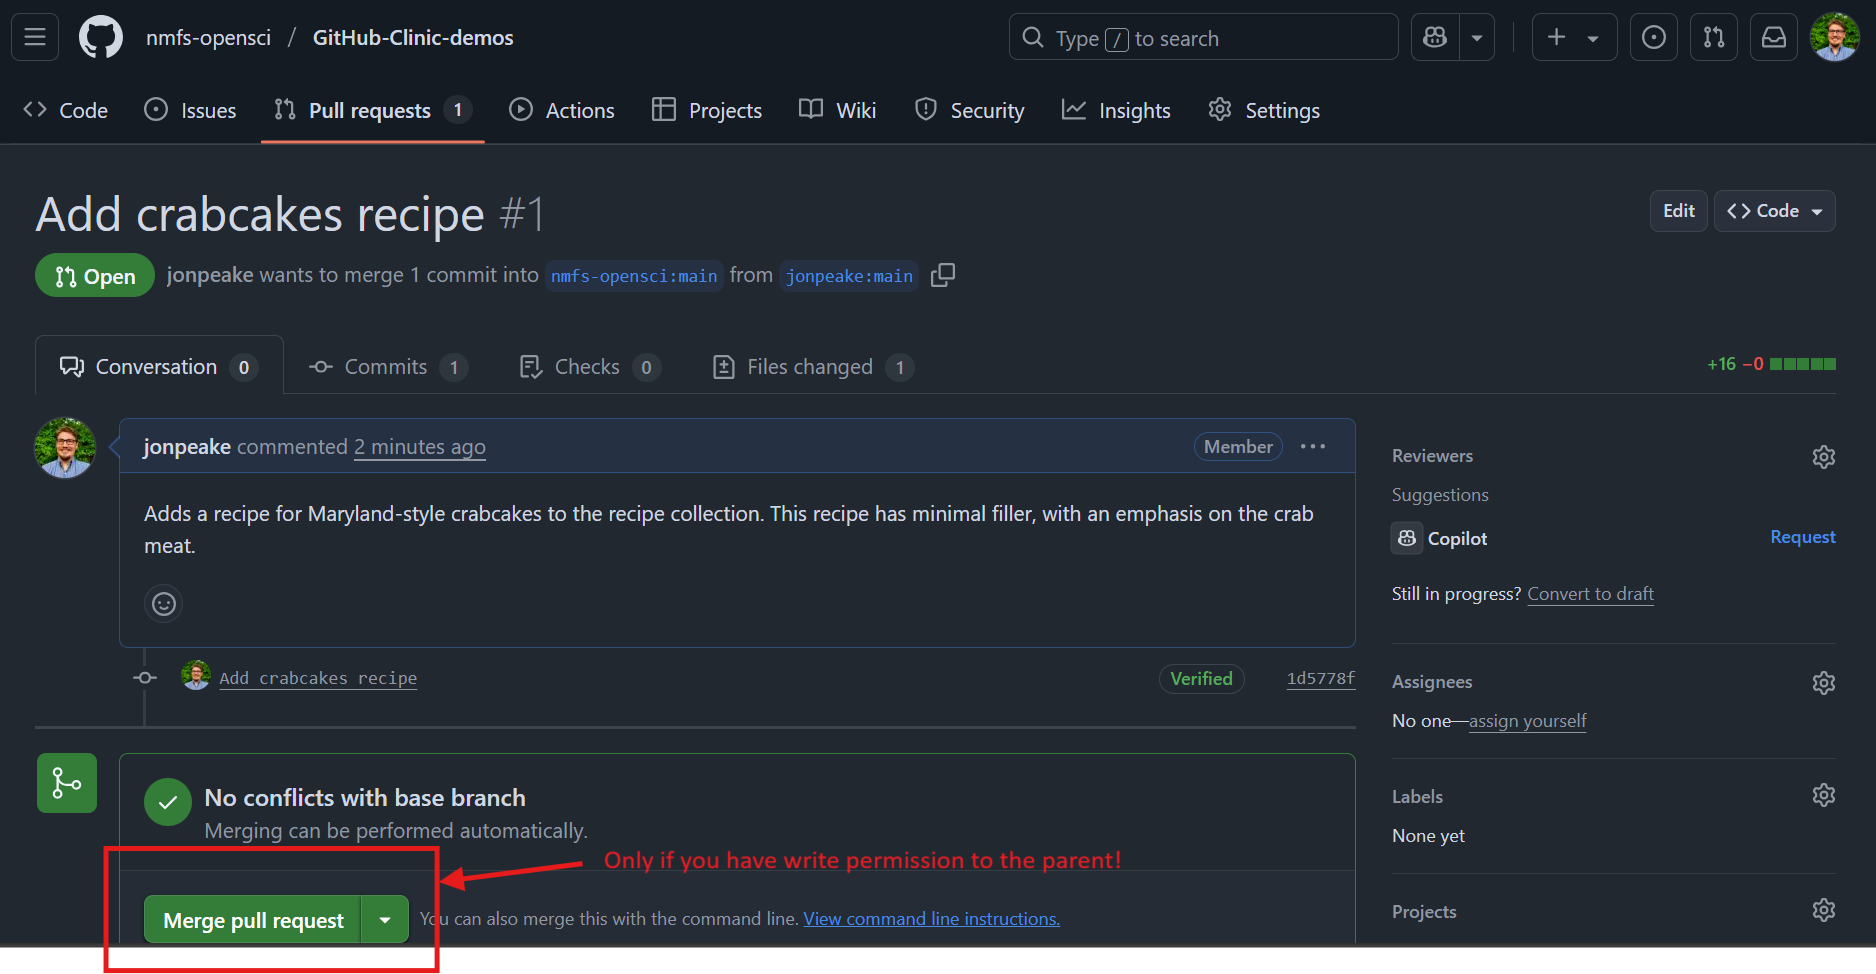
- Open the Contribute drop-down on the repository, and click the green Open pull request button to contribute this recipe back to the parent repository.
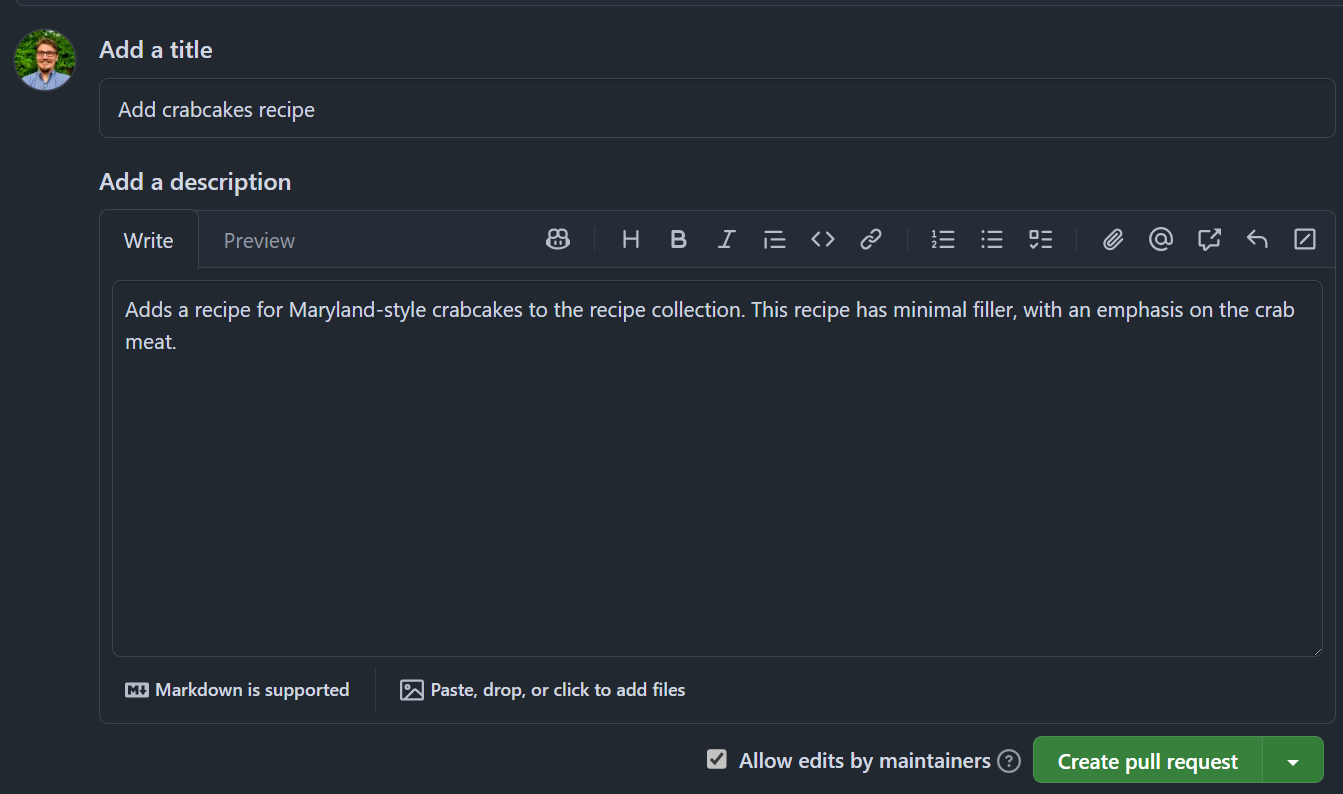
- Your Pull Request (PR) will auto-populate the title with your commit message. You can edit this if you want, or add an extended description. Generally the more descriptive the better, especially if you’re fixing a bug or adding a feature to another repository. For now, we can be brief. Add a description, and click Create pull request
- Once you create the PR, you’ll be brought to the PR on the parent repository. Note that if you do not have write permission on the parent repository, you will not have the option to merge the pull request. But if you do, you can review the pull request and merge it in if everything looks good!
Step 4: Sync changes from parent to your fork
If a change was made to the parent repository, you can sync that change to your forked repository. For this demo, I added the number of cookies that are made to the chocolate chip cookie recipe (on the main nfms-opensci repository). Let’s see how we can integrate that change to our fork.
- Navigate to your forked repository.
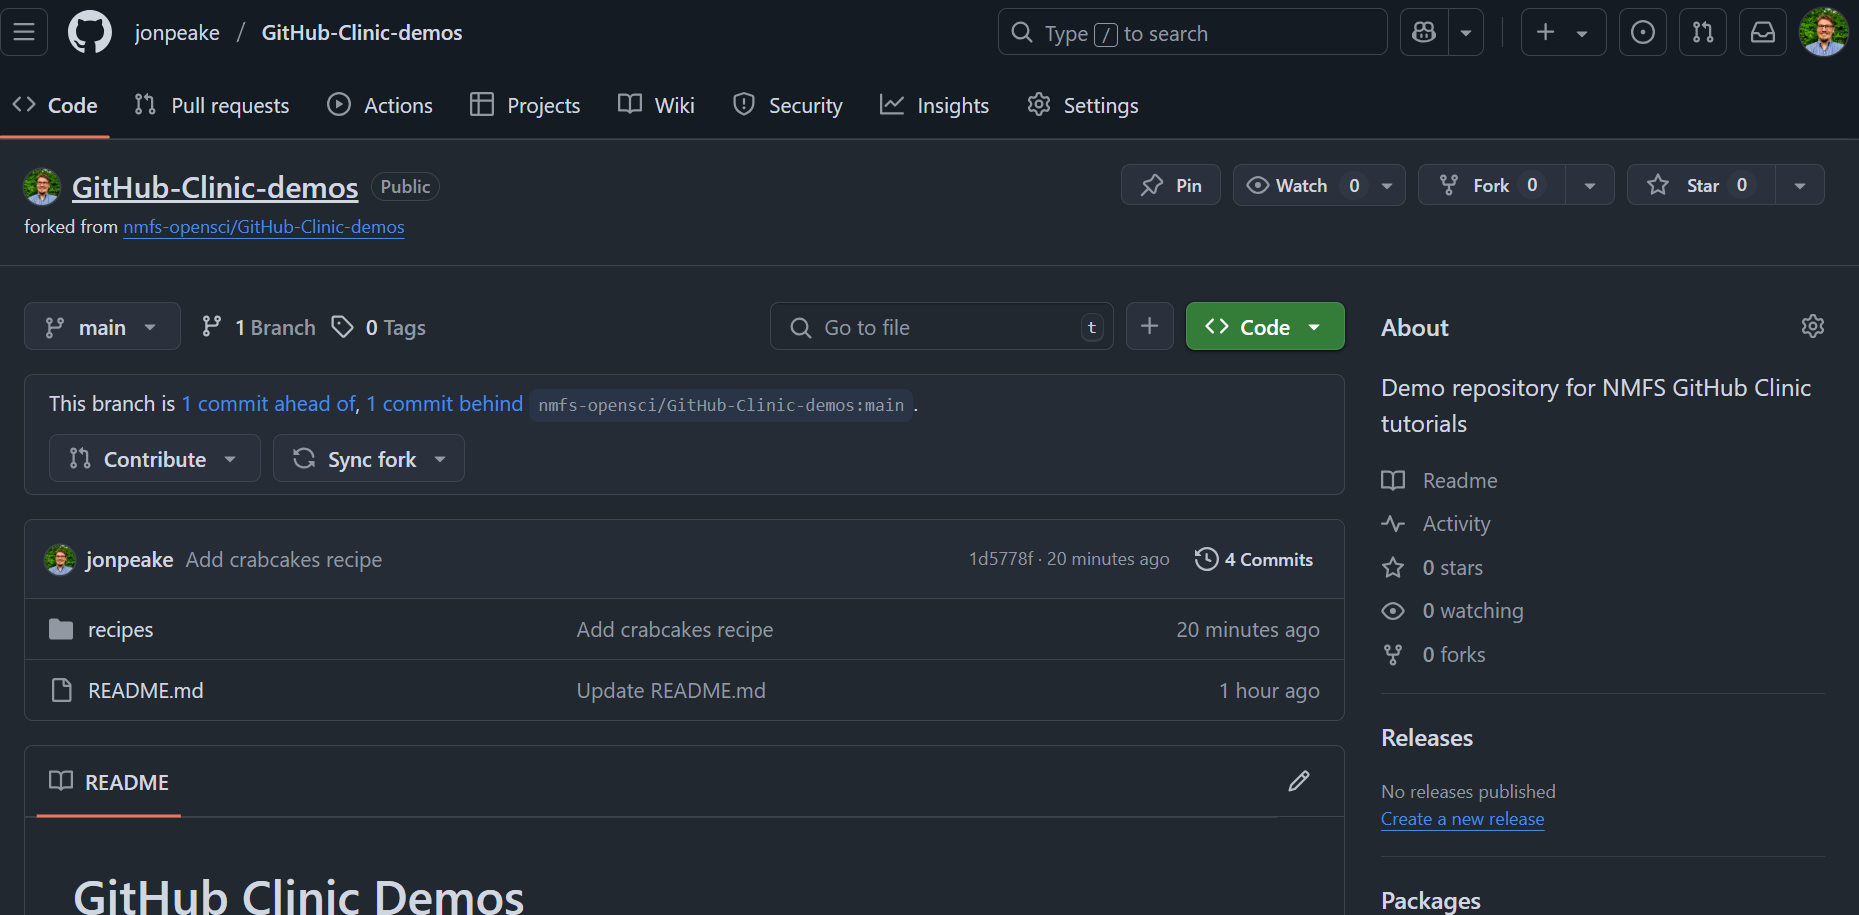
- Notice that the repository notifies you of the number of commits ahead of the parent and behind the parent your fork is. In that same message box, click the Sync fork dropdown, and click Update branch. Note that if you have commits that have not been merged into the parent, you can either discard your commit before the merge (so your fork matches the parent) or keep it and merge the changes from the parent into your fork.
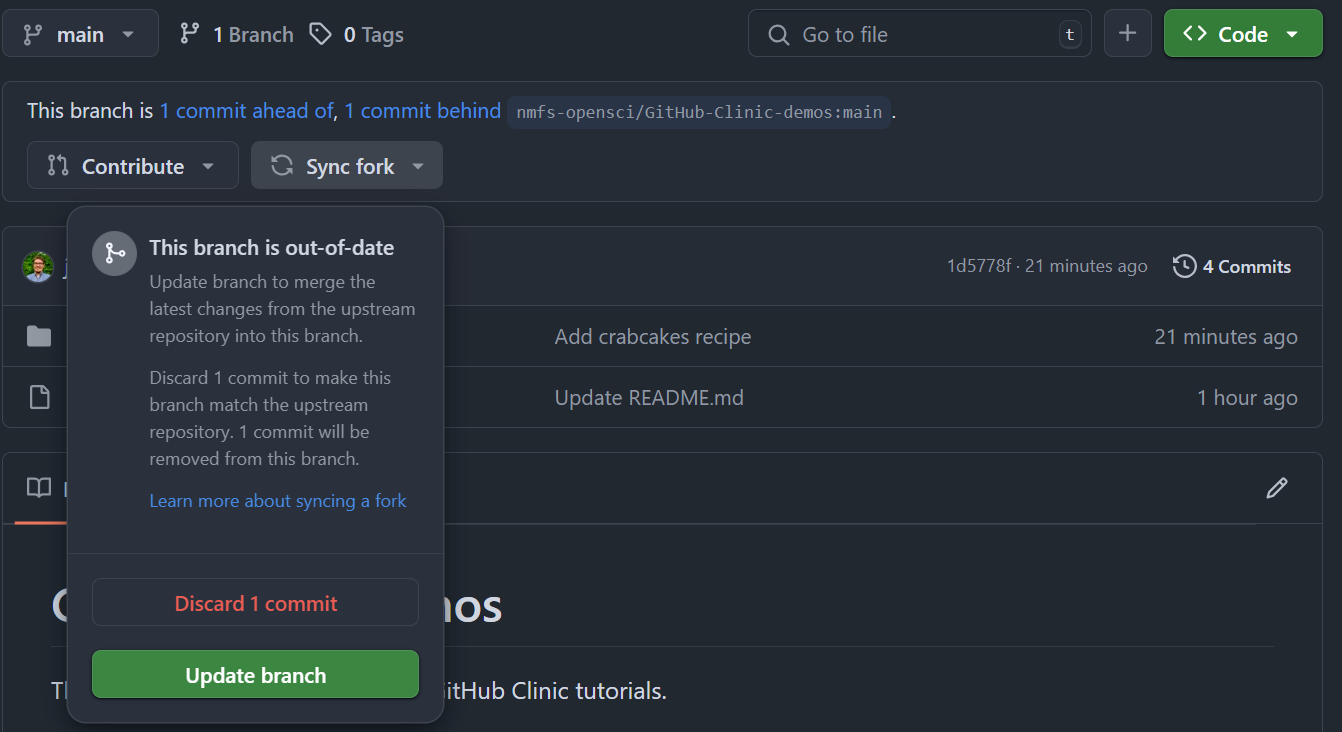
- To verify that your merge worked, click the Sync fork dropdown again. If everything worked, you should have a message that your branch is not behind the upstream (parent) repository
