GitHub Actions
Aims and Objectives
GitHub Actions is a continuous integration and continuous delivery platform that allows you to automate your build, test, and deployment pipeline directly from your GitHub repositories. You can create workflows that run your code, build and test your packages, reports, and websites, or deploy your built products. This skills session will use directed, interactive lessons to provide NOAA Fisheries staff with a foundation in using GitHub Actions for automated workflows on GitHub.
Prerequisites: What do I need before this workshop to follow along on my own?
This stand-alone skills session is meant for those with an intermediate understanding of Git and GitHub. Check out our Introduction to Git and GitHub, Branches and Pull Requests, and Workflows in Git and GitHub lessons if you need a refresher.
What are GitHub Actions?
Tutorial: Getting familiar with GitHub Actions
GitHub Skills - Hello GitHub Actions
We’ll be using the Hello GitHub Actions Skills tutorial to get familiar with GitHub Actions. Follow along with the tutorial using your personal GitHub account.
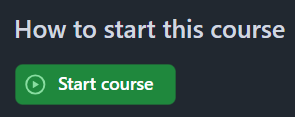
Step 1: Start the course
Open the GitHub Skills link, and make sure you are logged into GitHub. Use the “Start course” button to make a new repository on your account:
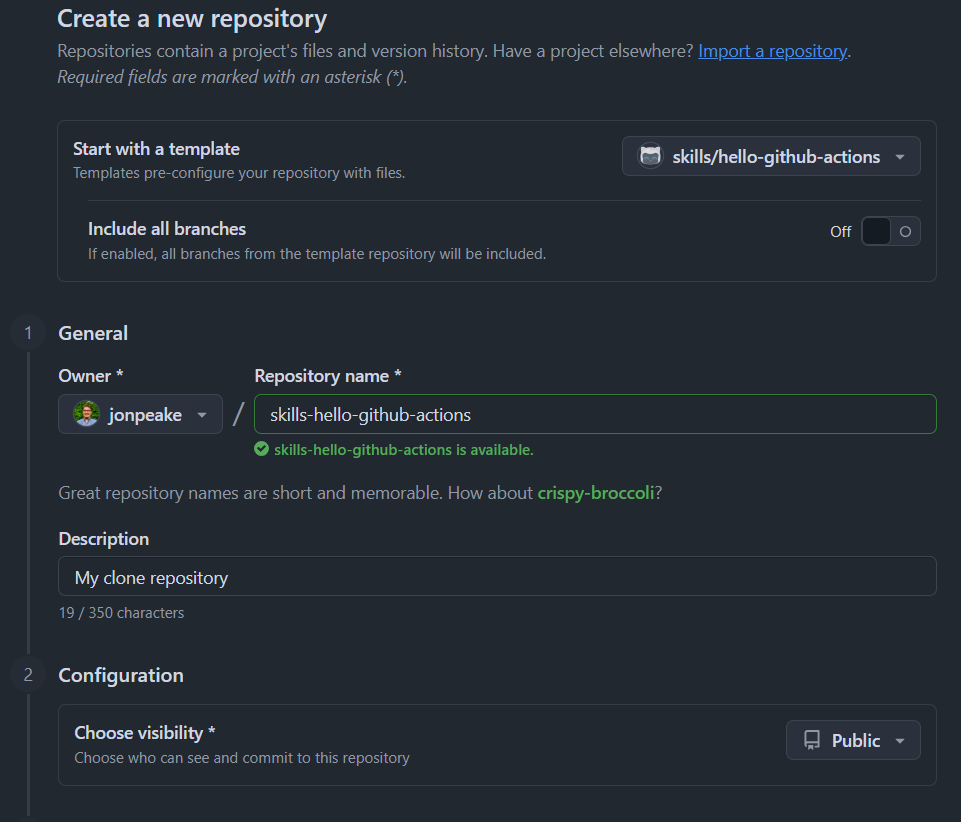
When you open up the “Start course” link, you will be presented with the “Create a new repository” interface. Keep all of the defaults, and click the green “Create repository” button:
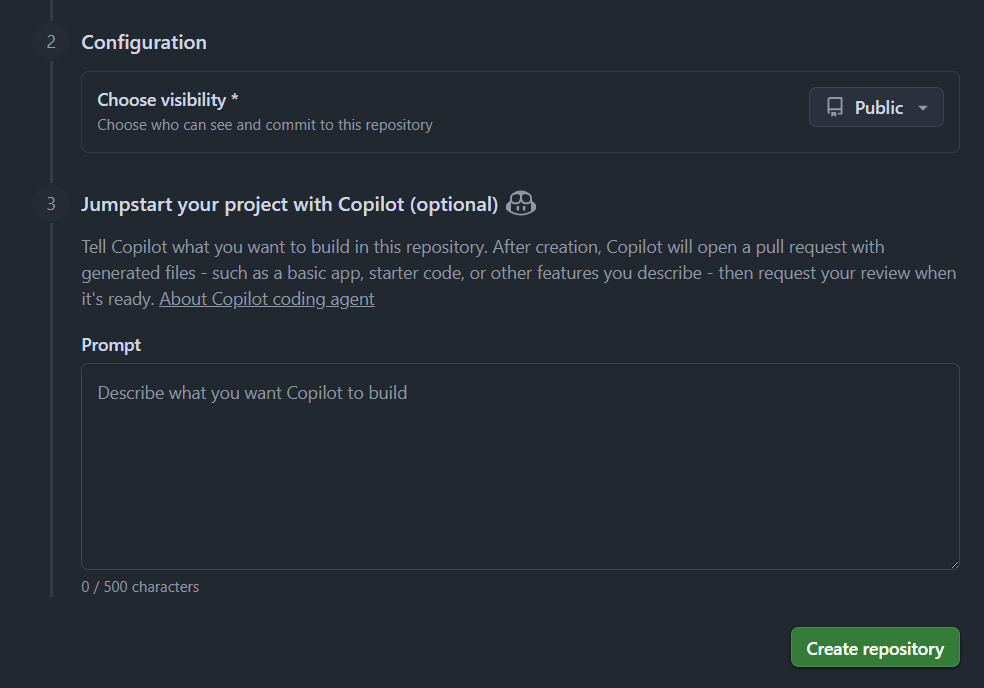
These actions use “minutes”, which are limited in a private repository, but unlimited in a public one. We suggest keeping your GitHub Skills tutorial repositories public to avoid any minutes limitations.
GitHub Actions can take a little bit of time to run, so waiting this requisite time is important! Refresh the instructions after 20 seconds to make sure everything updates properly.
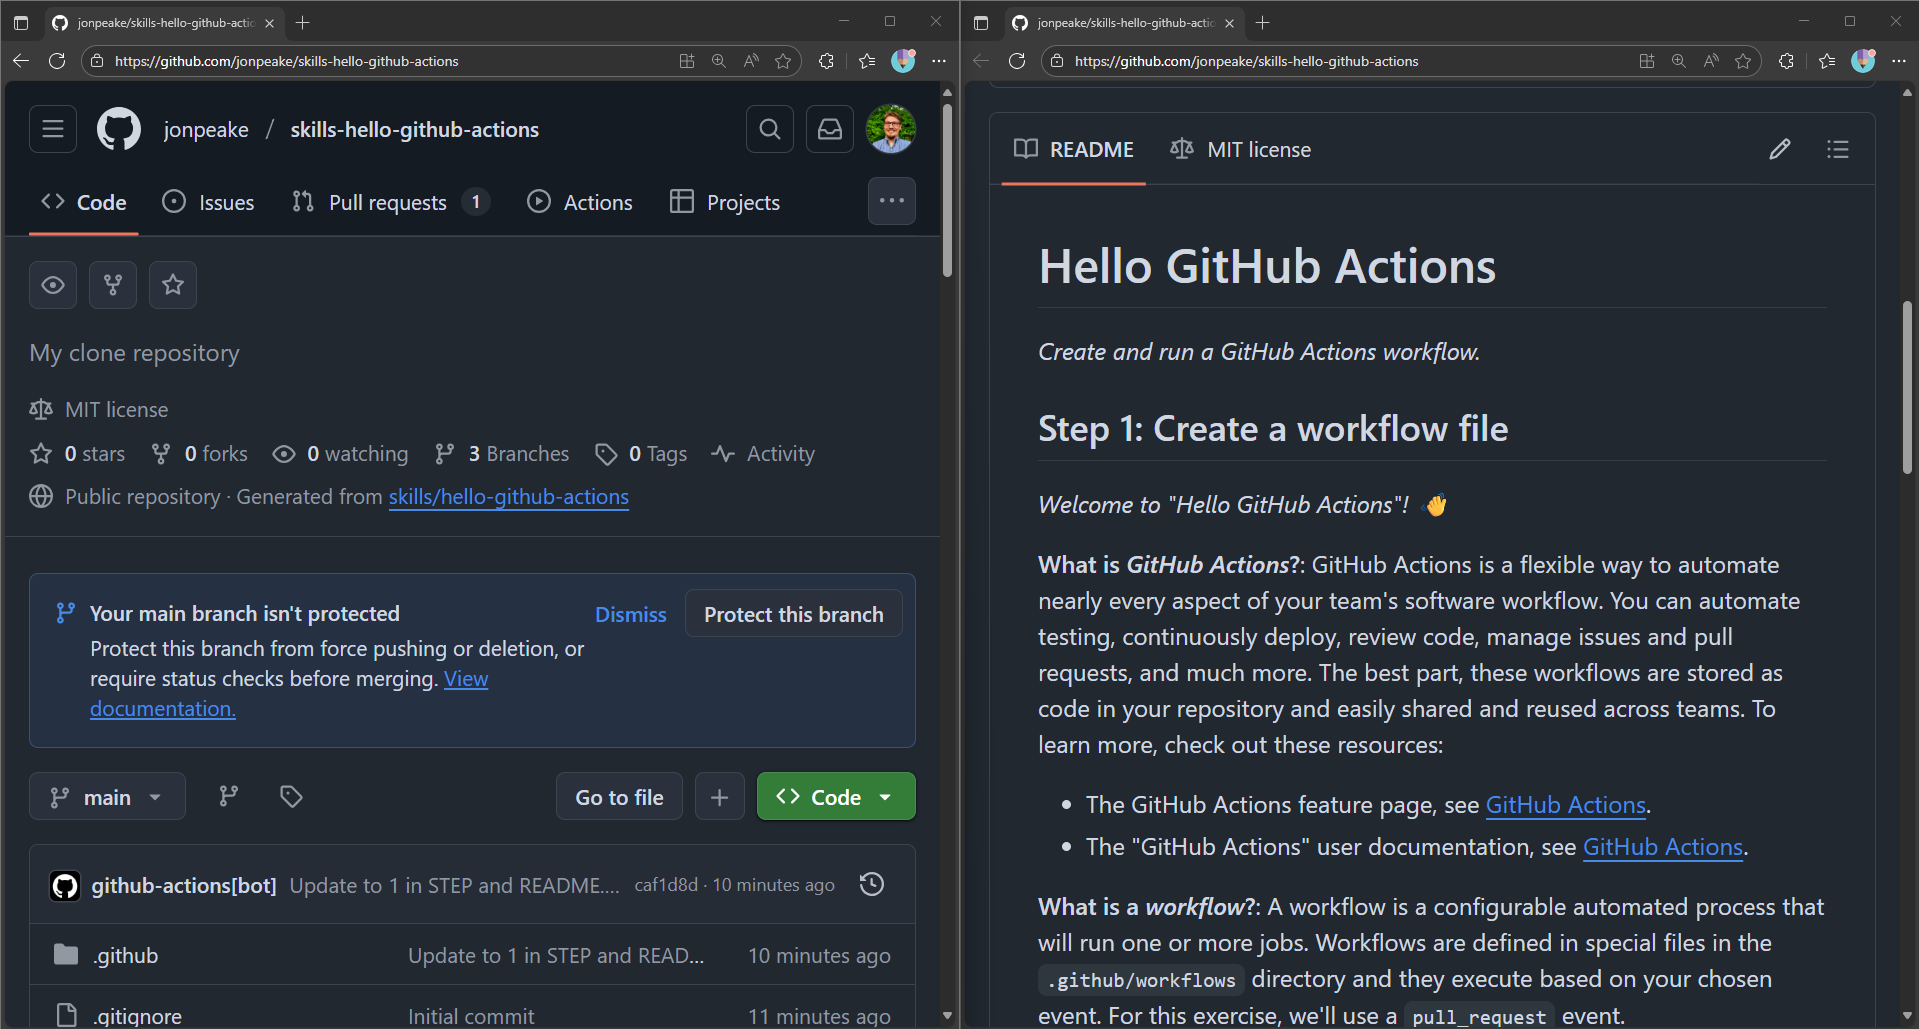
Step 2: Start the exercise
After waiting the suggested 20 seconds, refresh the repository, and click the “Go to Exercise” button in the README
I suggest moving the instructions tab into another window so you can work side-by-side with the instructions to limit switching back and forth between tabs.
Step 3: Follow the exercise
Create a workflow file
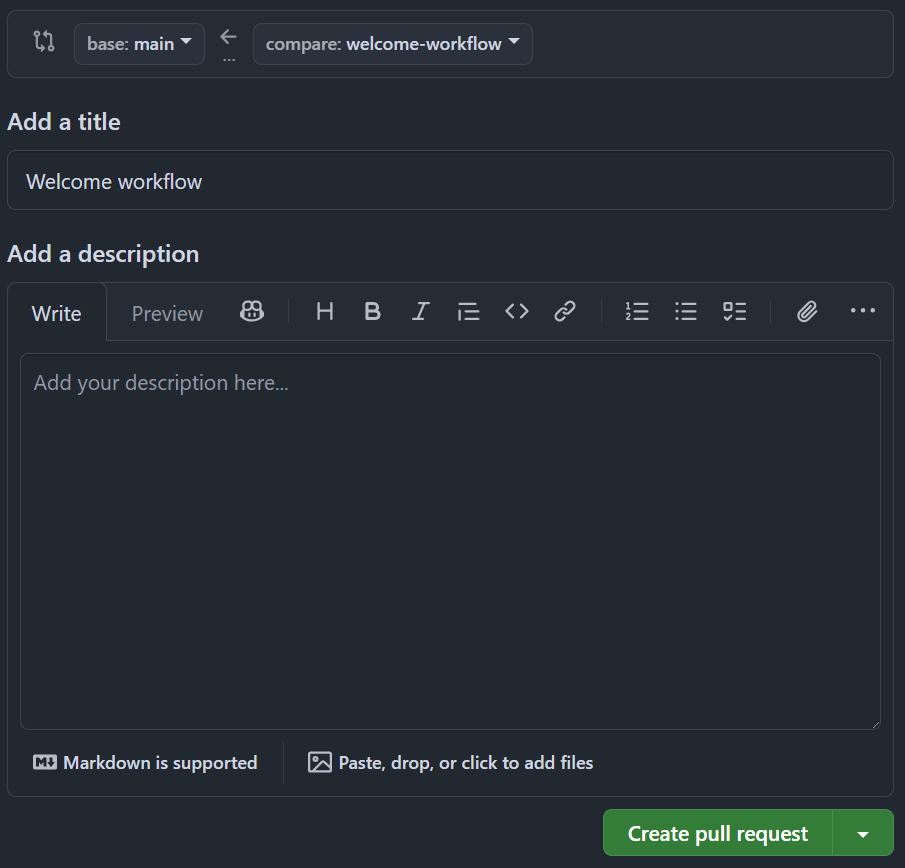
- We’re going to make a new pull request where we will be making our change during the exercises. Navigate to the Pull Requests tab, click New pull request, and change the
comparebranch towelcome-workflow. Click the green Create pull request button, and confirm the pull request by clicking Create pull request again.
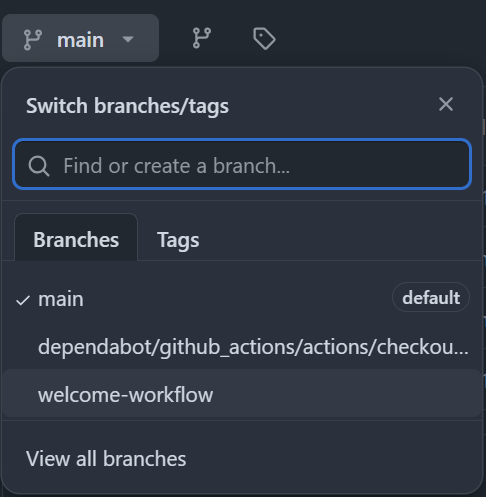
- Navigate to the Code tab, and switch to the
welcome-workflowbranch where it saysmain.
- In the Code tab, select the
.githubfolder, and navigate to theworkflowssubfolder. Use the Create new file button to add a new file to this folder.
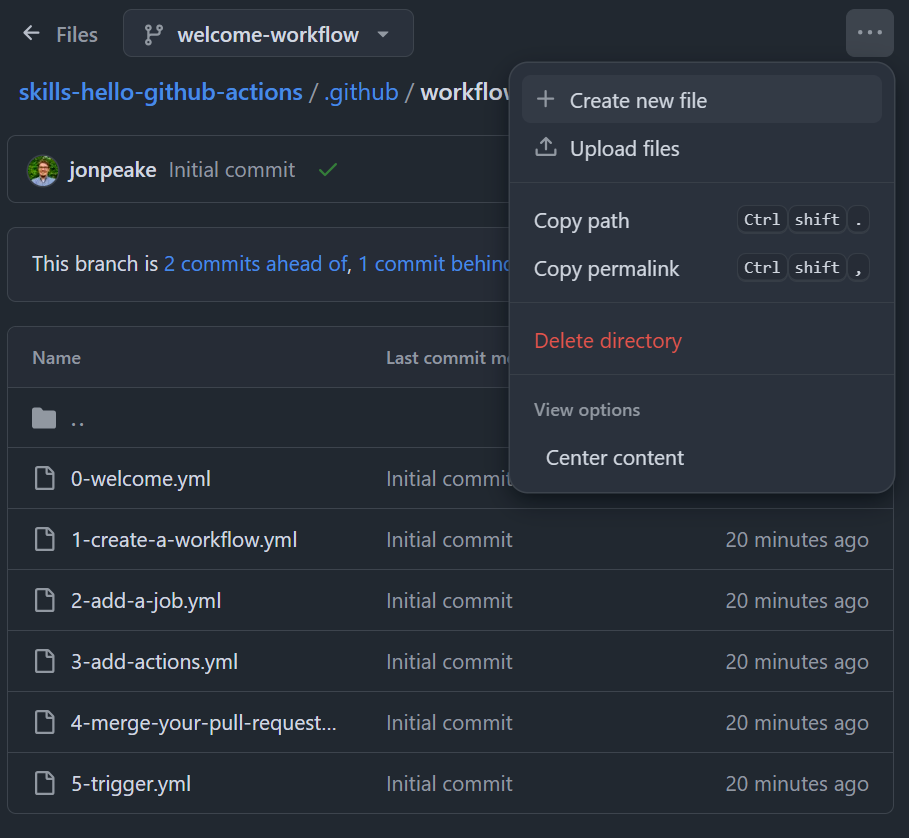
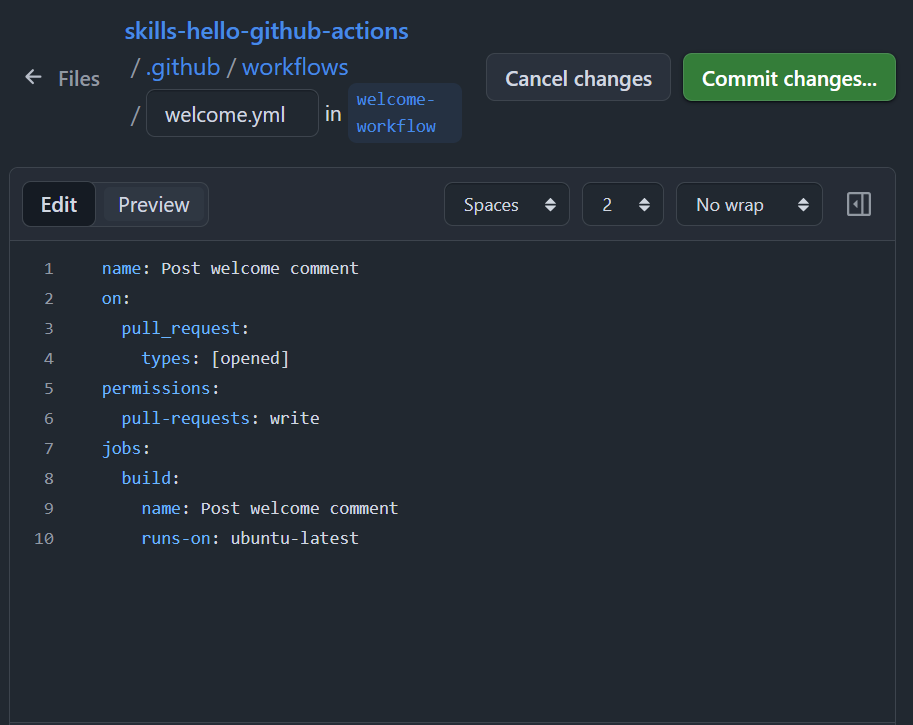
- Name your new file
welcome.yml, and copy in the YAML code from the tutorial code block into the file contents. Commit your changes to thewelcome-workflowbranch to save your changes.
- Wait about 20 seconds for the tutorial to update, then refresh the instructions page.
Add a job to your workflow file
Let’s specify a job to run on our GitHub Action workflow file.
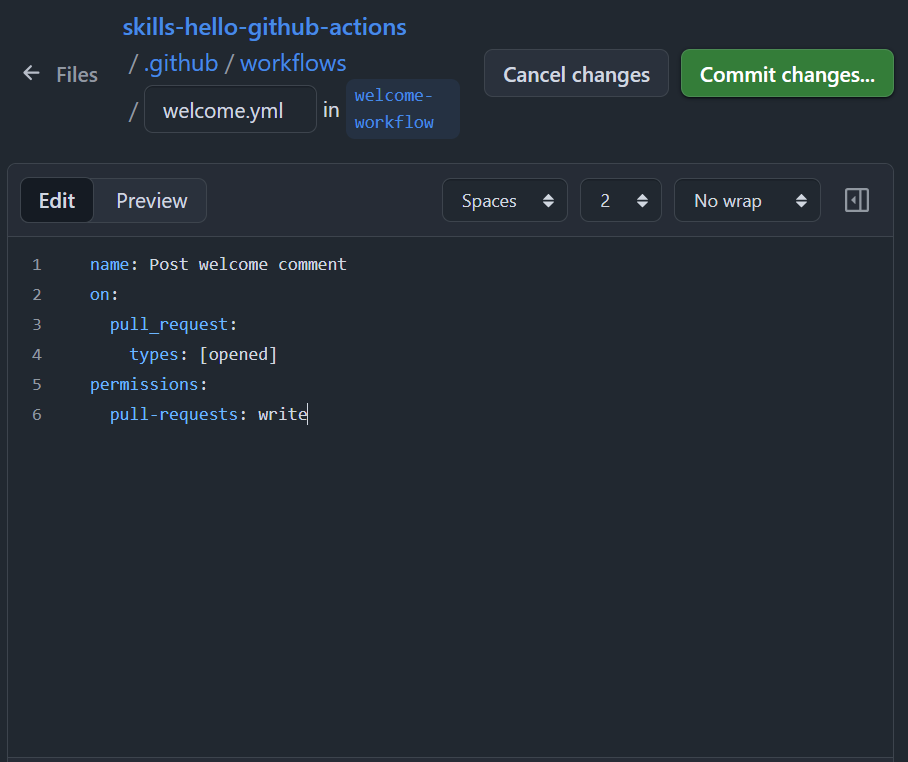
- Open the
welcome.ymlfile that we just created (note that this is different from the0-welcome.ymlfile that was provided with the repository at the start of the exercise). Click the Edit button, and copy in the contents from the exercise instructions.
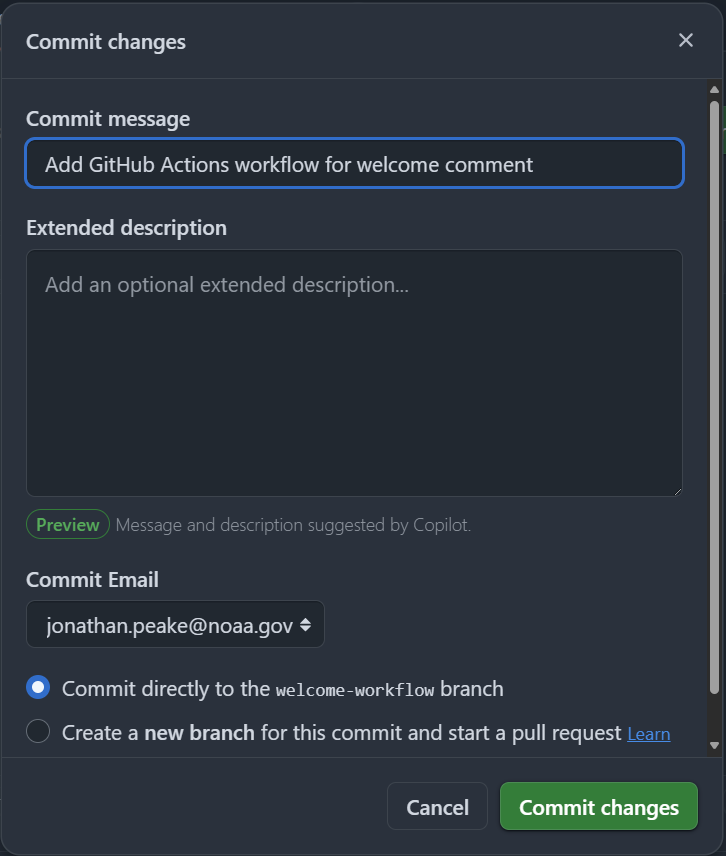
- Commit the changes directly to the
welcome-workflowbranch.
- Wait about 20 seconds for the tutorial to update, then refresh the instructions page.
Add a step to the workflow file
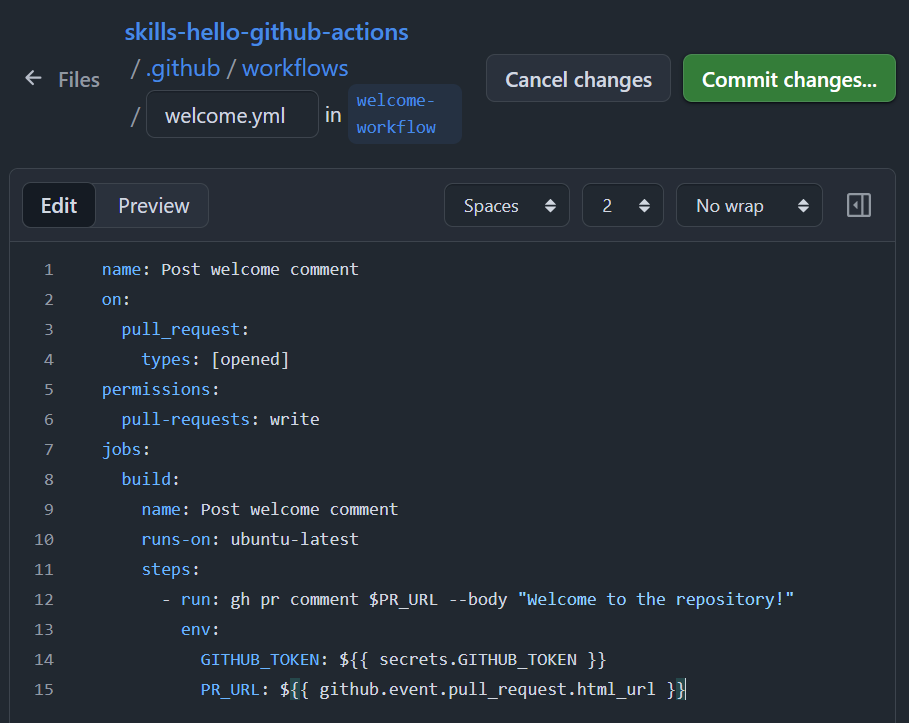
We added a job to our workflow file, but at this point the job doesn’t really do anything. Let’s change that by adding a step to our job. This step will use the GitHub Command Line Interface (gh) to add a comment to a pull request when it is first opened. The step also sets some important environment variables that are required for our job to run.
- In the same
welcome.ymlfile (your browser should still be on the file after you committed the last edit), click the Edit button again. Paste in the updated YAML code from the exercise instructions.
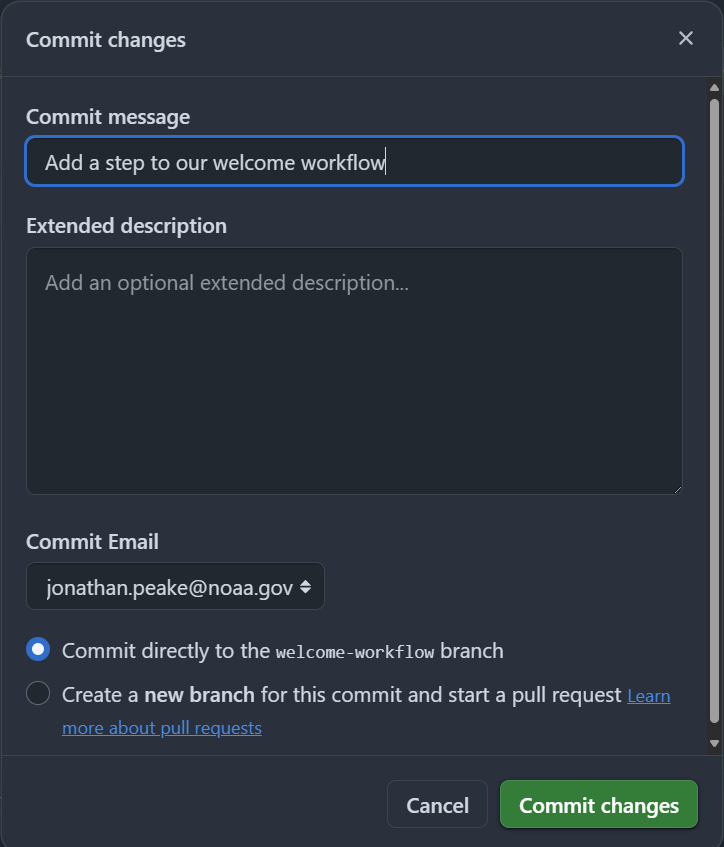
- Commit your changes directly to the
welcome-workflowbranch.
- Wait about 20 seconds for the tutorial to update, then refresh the instructions page.
Merge your workflow file
All of the changes that we’ve made have been on a separate branch so we avoid editing the main branch before the Action is ready for primetime. Let’s merge our changes from the welcome-workflow branch into the main branch.
- Navigate to the Pull requests tab, and click on the “Welcome workflow” pull request we created previously.
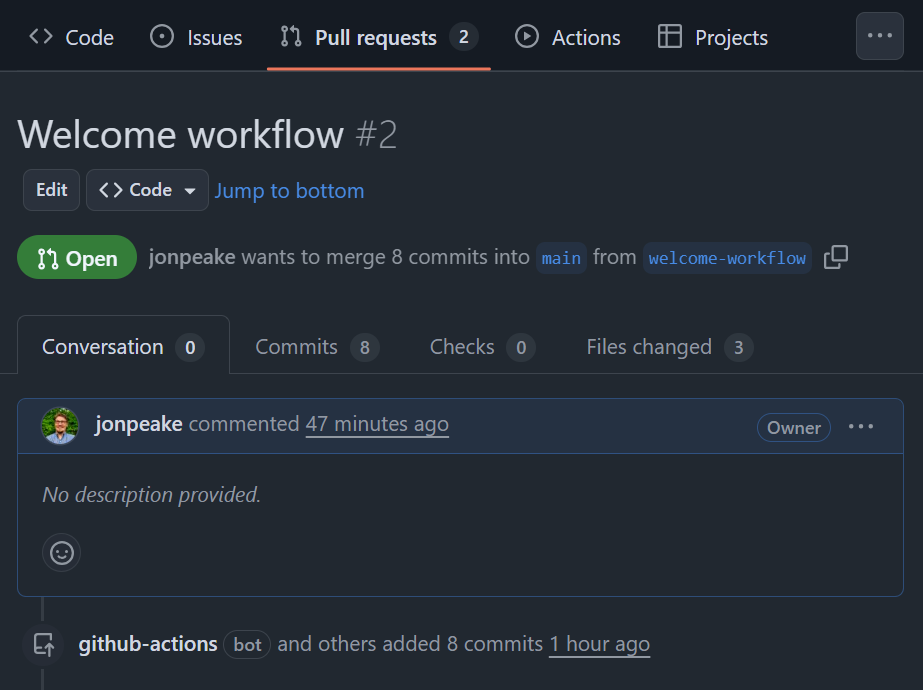
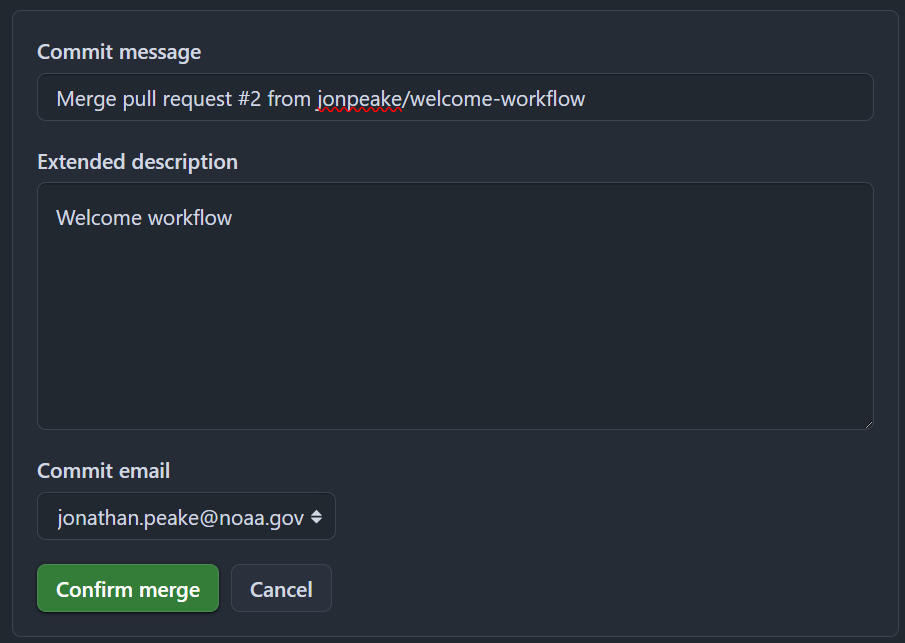
- Scroll to the bottom of the pull request (note the various commits that we have made and that the GitHub Skills actions have made) and click Merge pull request, then Confirm merge.
- Delete the
welcome-workflowbranch, wait about 20 seconds for the tutorial to update, then refresh the instructions page.
Trigger the workflow
Now that we’ve merged our workflow into our main branch, let’s test it out by opening a pull request.
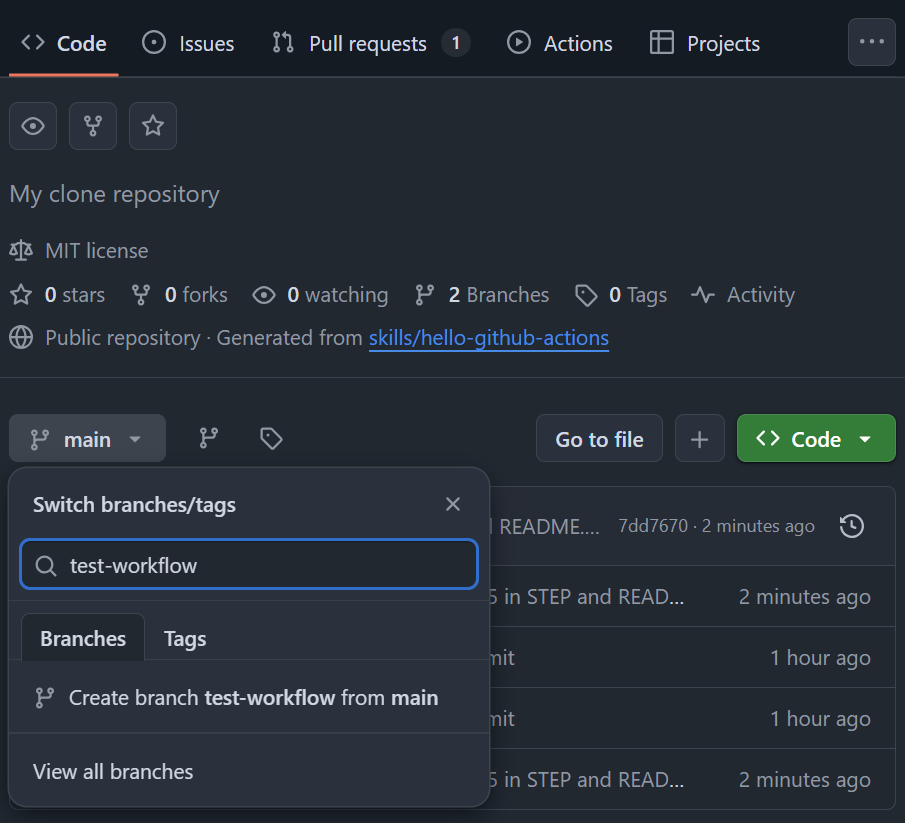
- Make a new branch named
test-workflowfrom the Code tab.
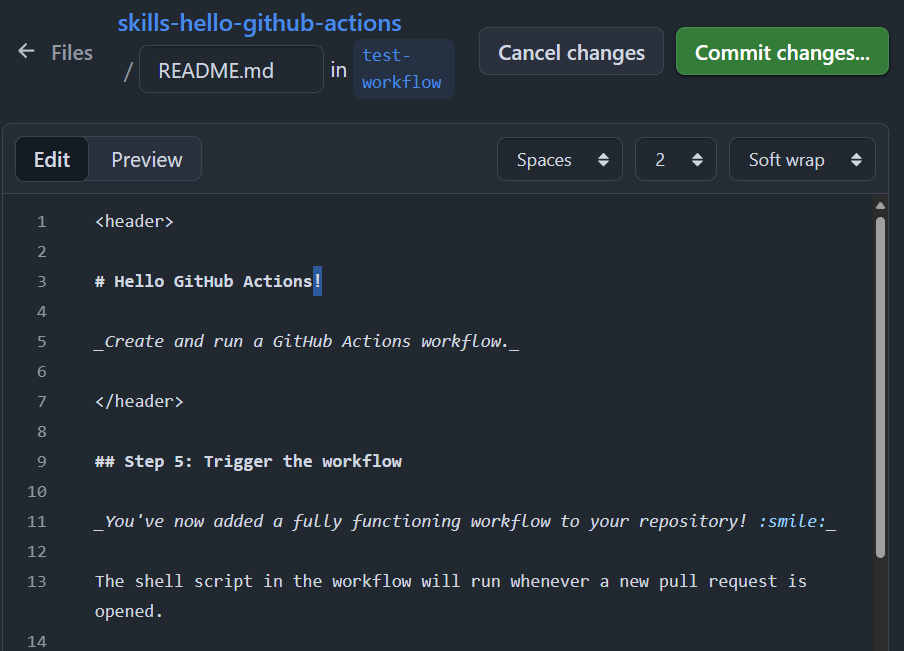
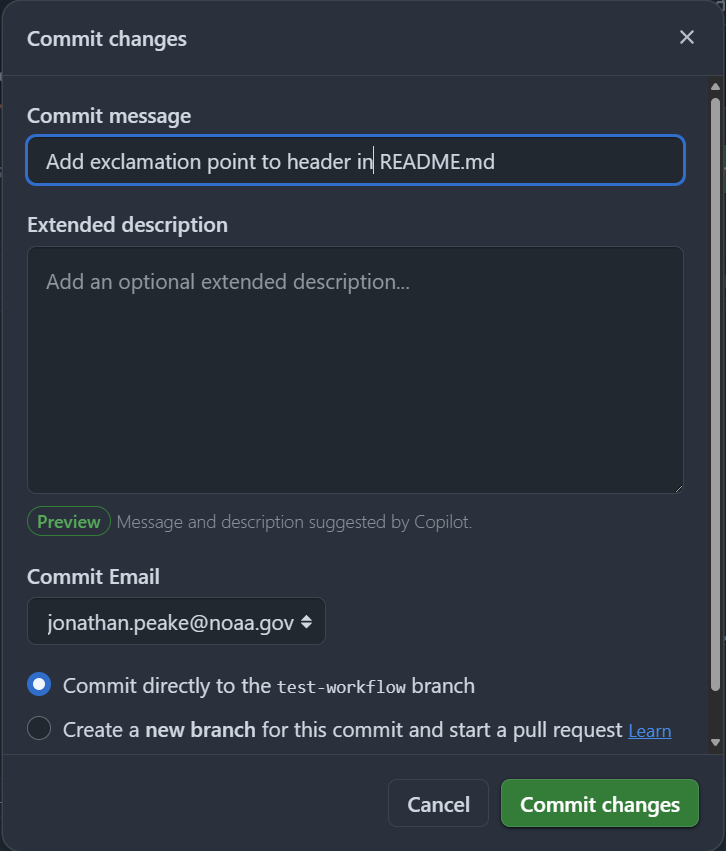
- Make a change to the README file by clicking the Edit file button on the README. It doesn’t matter what change you make. In this example, we added an exclamation point to the title header.
- Commit your changes directly to your new branch.
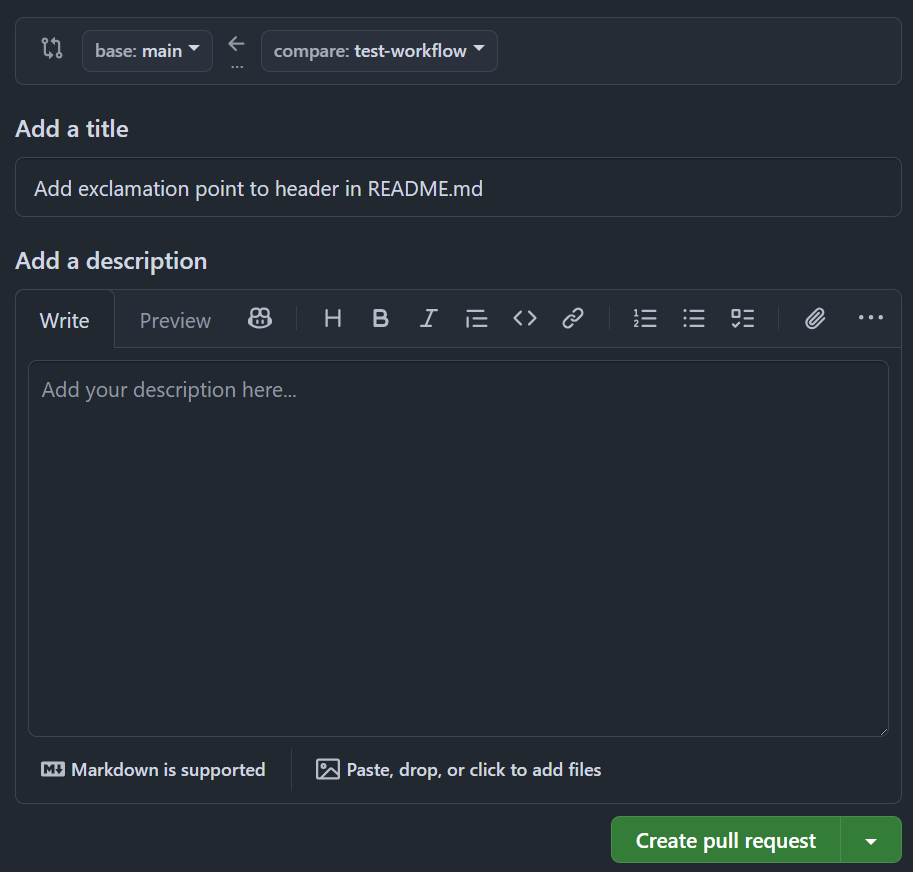
- In the Pull requests tab, create a pull request merging
test-workflowintomain.
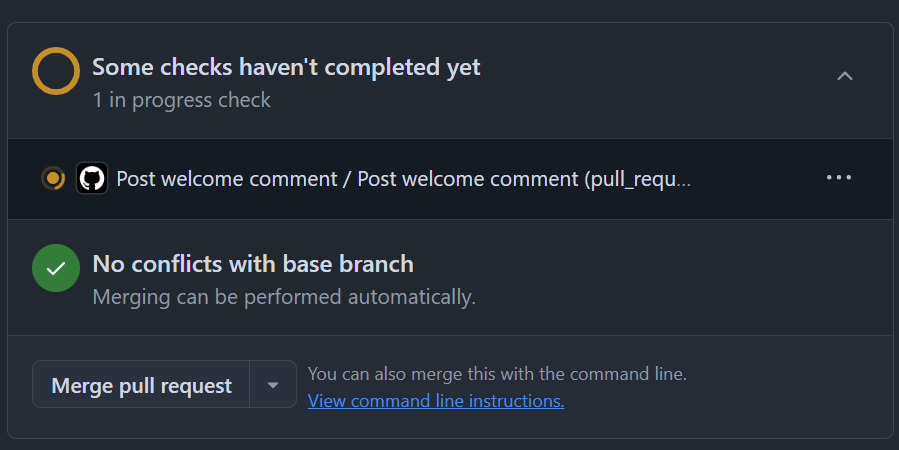
- Watch our Welcome Workflow running in the checks section of the pull request.
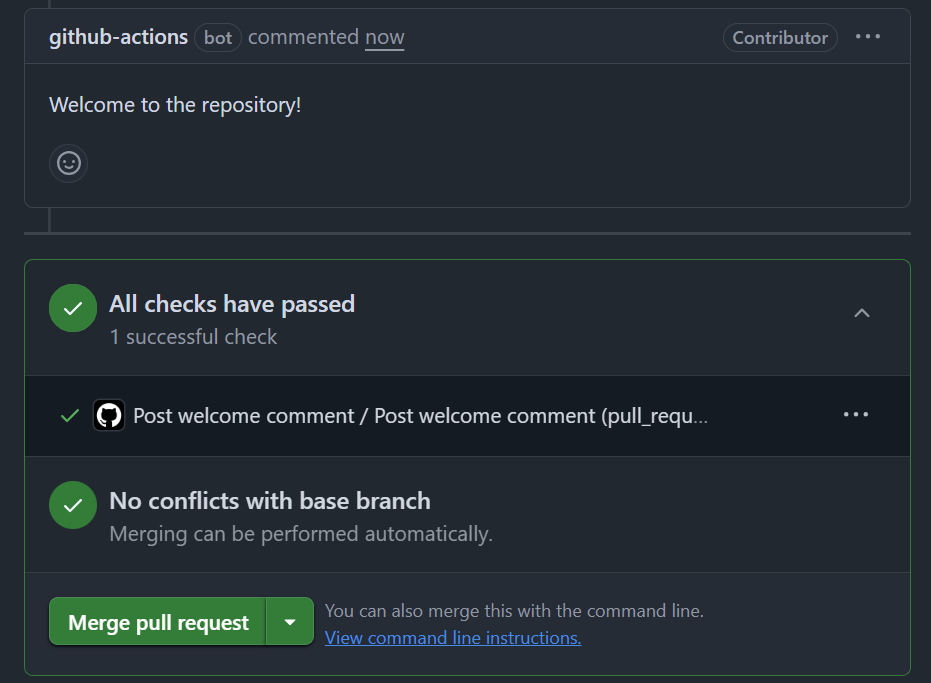
- Notice the comment that the workflow adds to the pull request.
- Wait about 20 seconds, then refresh the instructions page to finish the tutorial.