Set up JupyterHub Authentication
Setting up Authentication in various ways
Requirements
- Documentation: https://z2jh.jupyter.org
I assume you have https set-up and your JuptyerHub is installed with a config.yaml file. You will need to know your upgrade command when you make changes to the config.yaml file. For example, but yours will look different.
helm upgrade --cleanup-on-fail --install jhub1 jupyterhub/jupyterhub --namespace jhubk8 --create-namespace --version=3.3.4 --values config.yamlSee examples of full config.yaml files in the config directory in the nmfs-opensci/nmfs-jhub GitHub repo.
Set up GitHub authentication
I am going to show an example where I use a team on a GitHub organization to manage authentication. There are many other ways to manage users. See the JupyterHub documentation.
Create a new Oauth Application on GitHub
This is going to be associated with your (personal) GitHub account, but you can use a team on a GitHub org that you are owner of.
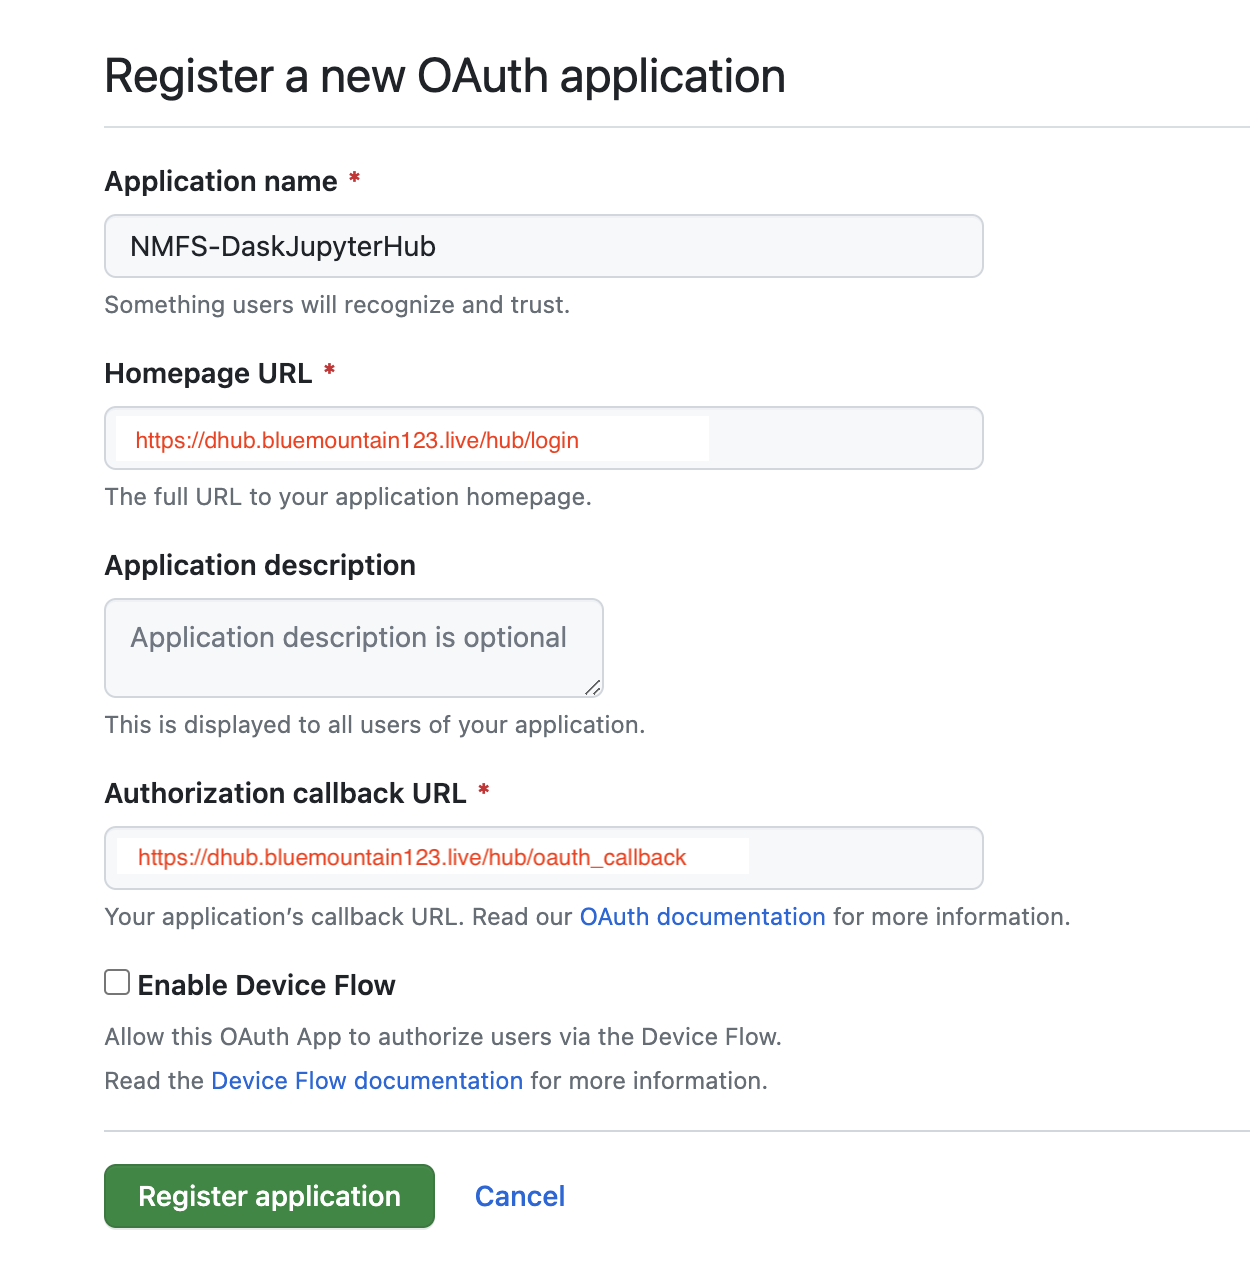
Log into GitHub and go to GitHub > Settings > Developer Settings > New Oauth Application
Look carefully at how I filled in the boxes.
Next you will see something like this
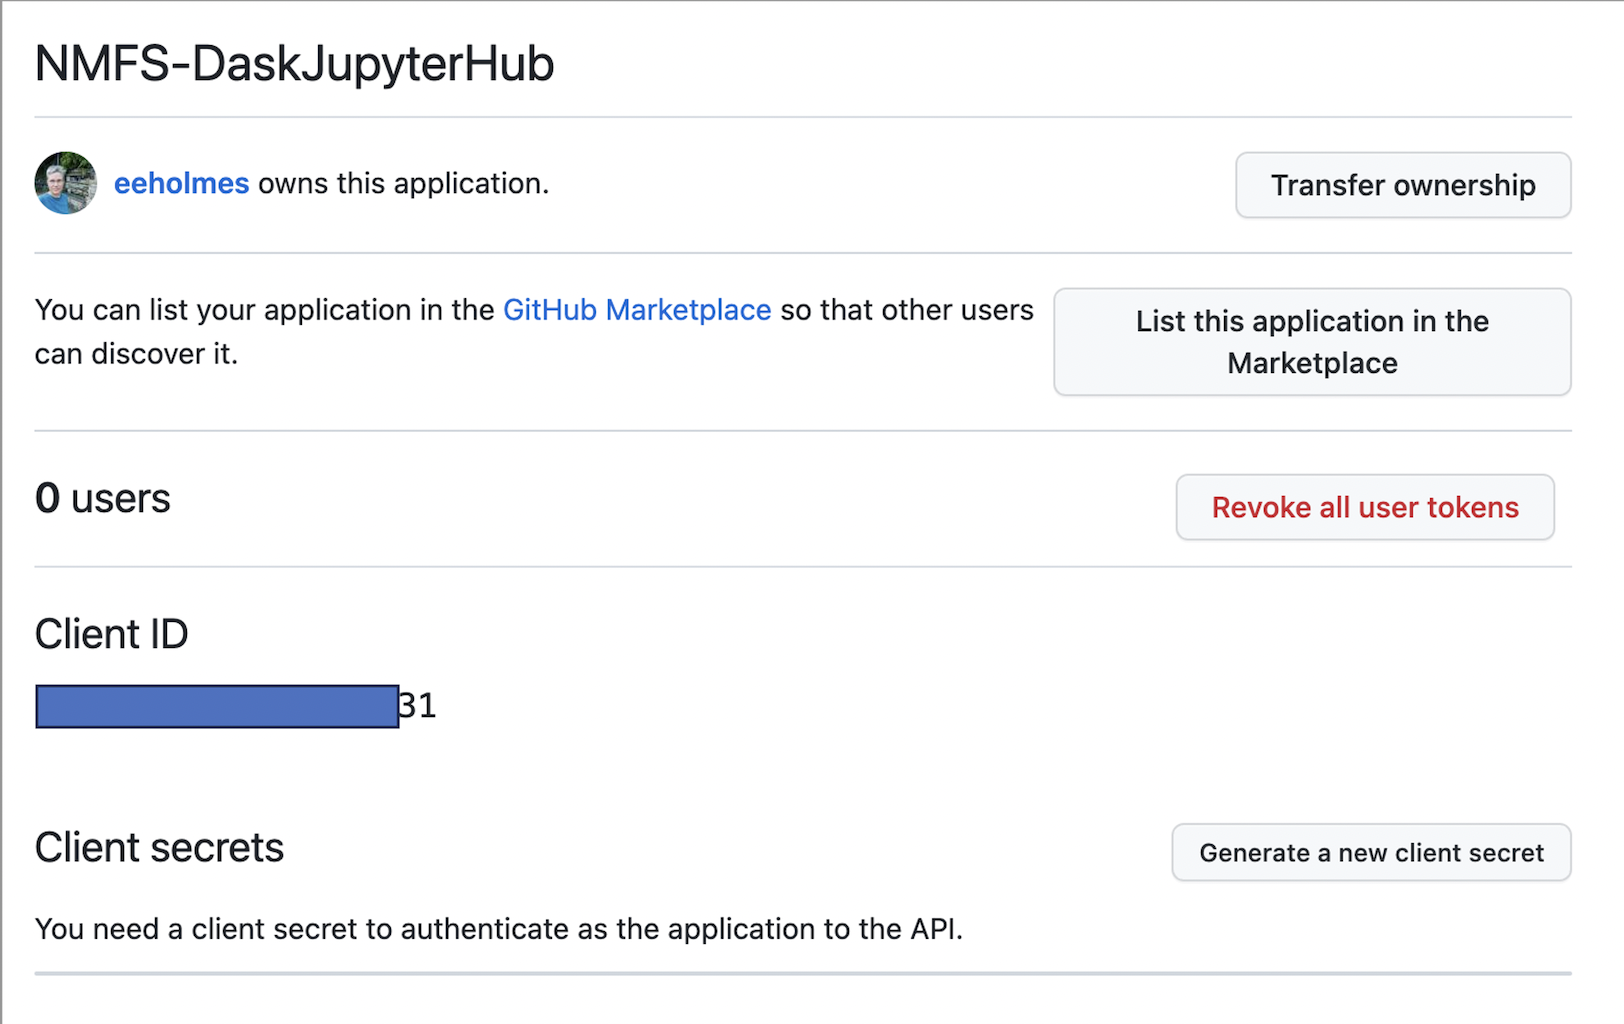
You need to copy the ID and then click the create secrets button and save the secret. Save those for later.
Create a team in your GitHub org
You will be added by default and add anyone else who needs access to the hub. Let’s say your org is MyOrg and the team is called DaskHub. So then the allowed organization is MyOrg:DaskHub. You can leave off :DaskHub if you want to allow all members of the organization to log in.
Edit the config.yaml file
nano config.yamlAdd the following to your config file (nano config.yaml). Replace the id, secret and url with your values. We need to set the KubeSpawner working directory because the Openscapes Docker image sets it to home/jovyan/.kernels–which is fine but annoying since .kernels is hidden and not $HOME.
Make sure you have “myteam” created as a team in your GitHub org (“myorg”) and that you have added yourself to that team.
hub:
  config:
    GitHubOAuthenticator:
      client_id: <replace by what is on GitHub>
      client_secret: <replace with secret on GitHub>
      oauth_callback_url: https://dhub.bluemountain123.live/hub/oauth_callback
      allowed_organizations:
        - myorg:myteam
      scope:
        - read:org
    Authenticator:
      admin_users:
        - yourGitHubusername
    JupyterHub:
      authenticator_class: github
    KubeSpawner:
      working_dir: /home/jovyan
Update the hub.
helm upgrade --cleanup-on-fail --install jhub1 jupyterhub/jupyterhub --namespace jhubk8 --create-namespace --version=3.3.4 --values config.yamlTest. Go to https:\\dhub.bluemountain123.live and it should ask you to login with GitHub. There will be some popups asking permission for the OAuth to have access to “myorg”. Make sure you grant access to “myorg”. Oh no, I forgot! You’ll probably have to go through the process of recreating an OAuth. I am not sure how to trigger it to ask to grant access again.
If you use daskhub helm chart
If you used the daskhub helm chart instead of the jupyterhub helm chart, then the config.yaml file has a jupyterhub: section:
jupyterhub:
  hub:
    config:
      GitHubOAuthenticator:
        client_id: xxxxxxx
        client_secret: xxxxxxx
        oauth_callback_url: https://dhub.opensci.live/hub/oauth_callback
        allowed_organizations:
          - myorg:myteam
        scope:
          - read:org
      Authenticator:
        admin_users:
          - eeholmes
      JupyterHub:
        authenticator_class: github
      KubeSpawner:
        working_dir: /home/jovyan